

Congratulations! SecureIT is installed and is working full-time to keep your computer safe from virus and malware threats. Now lets get started with SecureIT Desktop!
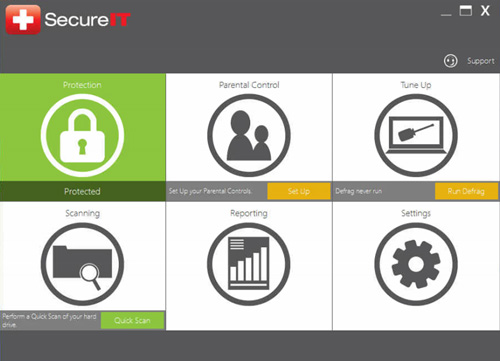
You’ll see SecureIT’s main menu after installation. From here you can set up your general settings, scan your computer, and see a report of recent scan events.
The first thing you’ll want to do is run a quick scan to ensure your computer is free of infections followed by updating your settings to your preference. We’ll walk through how simple it is to do these things below.
DOWNLOADING INITIAL DEFINITIONS
Upon installing SecureIT, you will need to download the virus, anti-phishing and parental controls definitions. These will download automatically once you have finished your installation.
RUNNING A SCAN
SecureIT automatically keeps you safe with its Real-Time protection. However, you can also manually scan your computer for malware using our powerful scanning tools.
First, navigate to the Scanning page by clicking the Scanning panel on the main menu. Once on the Scanning Page, you will see three different types of scans as well as a Schedule link on the left-hand side.
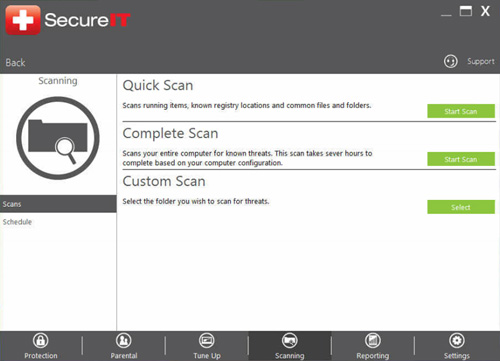
To run the desired scan, simply click ‘Start Scan’ to the right of each scan.
You can also choose to schedule a time for SecureIT to scan your computer by utilizing the Schedule scan feature. To enable this, click Schedule on the left-hand side, then once you are on the Schedule Scan page, enable the scan using the switch on the upper right, select the desired drive to scan, pick the frequency of the scan and the desired start time from the drop-down menu.
CHANGING SETTINGS
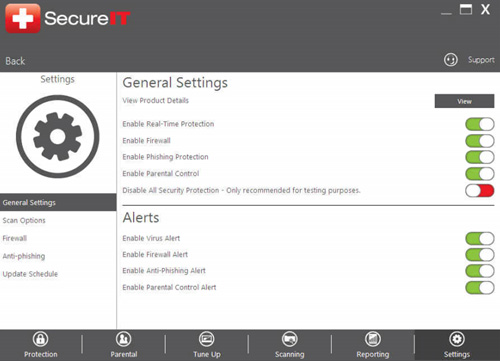
The Settings within SecureIT allow you to enable or disable the various components of SecureIT.
GENERAL SETTINGS
Here you can enable/disable Real Time Scanning, Firewall, Anti-Phishing and Parental Controls. You can also enable/disable the various alerts within SecureIT.
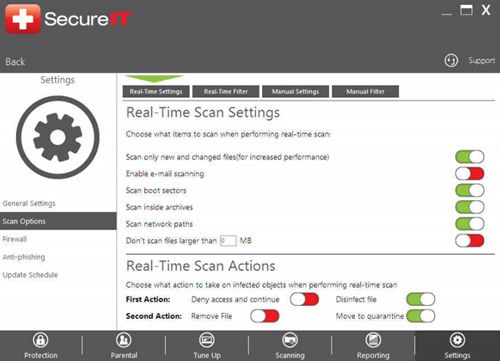
SCAN OPTIONS
Here you can select the various options available to you for Real-Time Scanning and Manual Scanning.
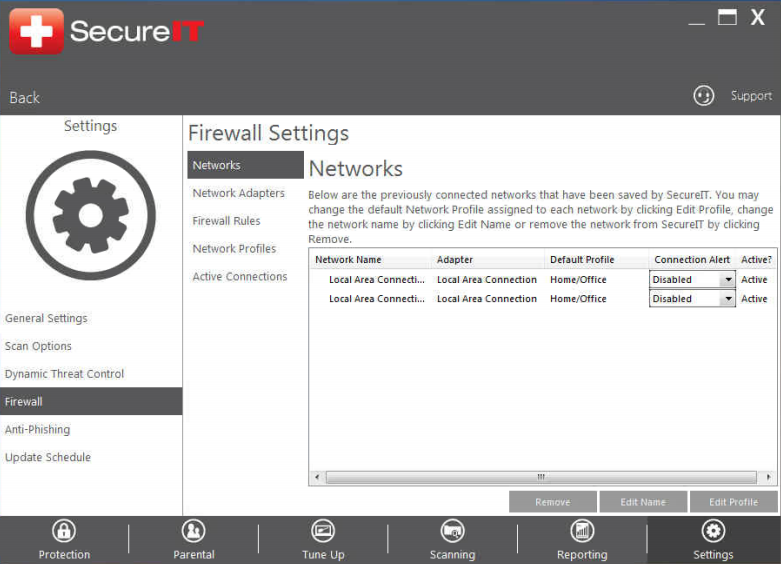
FIREWALL
Here you can customize SecureIT’s Firewall, you can choose to block all traffic, change network adapter zones and even create custom firewall rules.
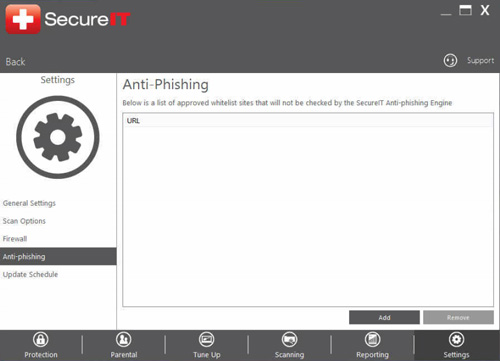
ANTI-PHISHING
Here you can add sites that have been erroneously flagged as phishing sites to a whitelist so they will not be flagged as malicious by SecureIT.
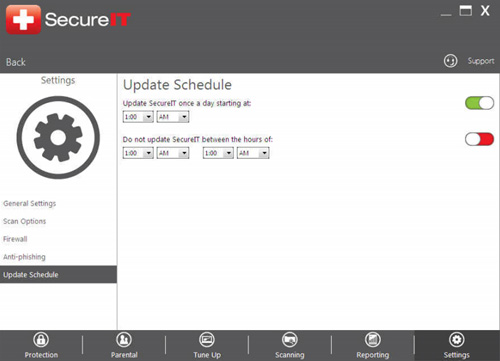
UPDATE SCHEDULE
Here you can set when SecureIT checks for updates. By default, SecureIT checks for updates every 10 minutes.
CONFIGURING PARENTAL CONTROLS
If you have SecureIT Plus, then you have access to our robust Parental Controls. To set them up, click on Set Up under Parental Controls on the main menu.
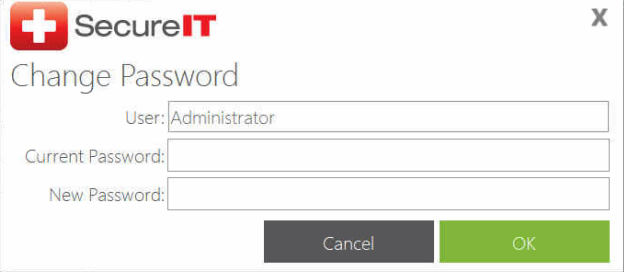
Once you have gotten to the Parental Controls screen, you will need to setup the Administrator account. To do this, click Change Password; then under New Password, enter your desired password.
Once you have setup the Administrator account, you can begin creating additional users. To add a new user, click ‘Add User’. The ‘Add User’ pop-up will appear; there you will enter in the new user’s name and password.
After the User has been created, you can click on Settings to change the filter categories, enable application blocks, set time controls and manually block certain sites. You can create multiple users and set them each up with their own specific settings. Each child user simply has to login under their profile within SecureIT and all parental controls settings will be applied to that user.
Easy, right? SecureIT can do a lot more. Visit our How To Guides to learn about all the features available with SecureIT, including how to use your MyPortal account.
And as always, all SecurityCoverage apps are supported by our US-based product support team, so if you ever have any questions don’t hesitate to ask.