The FileHopper Desktop Client can be downloaded here: http://products.securitycoverage.com/download/filehopper.
Once the FileHopper Desktop Client is downloaded to your computer, click on the FileHopper.exe file to begin installing the client.
Note: It is recommended that you close all other open applications before installing FileHopper Desktop Client.
To begin the installation, follow the easy steps in the setup wizard. On the Online Registration Screen, enter the e-mail address and password you used when you registered FileHopper on your mobile device.
The amount of time it takes to sync files between your devices depends on how many files you are syncing, the size of the files, and the strength of you Wi-Fi connection.
If you find that your devices are not syncing after quite some time:
- Check to see if your computers are connected to the Internet.
- Verify that all of the devices have been installed with the same FileHopper account.
- If you continue to experience syncing issues, you can contact our support technicians at 877-373-3320.
SecurityCoverage offers full, product support for all your mobile and desktop needs. Call one of our knowledgeable technicians, chat in, or use our online resources such as FAQs and the User’s Guide.
You can upload or add files to your FileHopper through both the mobile application and the desktop companion.
To upload photos from your mobile application:
- Navigate to “Backup or Uploads” from the FileHopper Main Menu.
- Select “Upload Photos” to add any photos from the photo gallery of your device.
- Choose the photos you would like to upload and press the “Upload” button.
To upload or add files from your desktop companion, drag and drop any photos or files into your FileHopper folder on your desktop and watch as they seamlessly upload and sync to your mobile device(s).
It’s that easy!
To sync your mobile to your desktop, you can install the free desktop companion with the same e-mail/password and your accounts will be synced.
Your data is secured using proven, government-standard 128-bit SSL encryption. This is the same level of protection used by banks and financial institutions around the world.
When you mark a file as a Favorite in FileHopper, the file is added to your Favorites for easy access and viewing, like a bookmark. Pick your favorite or most used photos and files and add them to the Favorites tab. All favorites are available for offline viewing.
Uninstalling on iOS is very easy. Simply press and hold the FileHopper icon on the main display screen of the Apple Mobile Device. You will see the icon wiggle and an X will appear in the corner. Press the X, and the app will be uninstalled.
Yes! If backups have been performed from multiple devices under the same FileHopper account, you can select which device backup to restore to the current device.
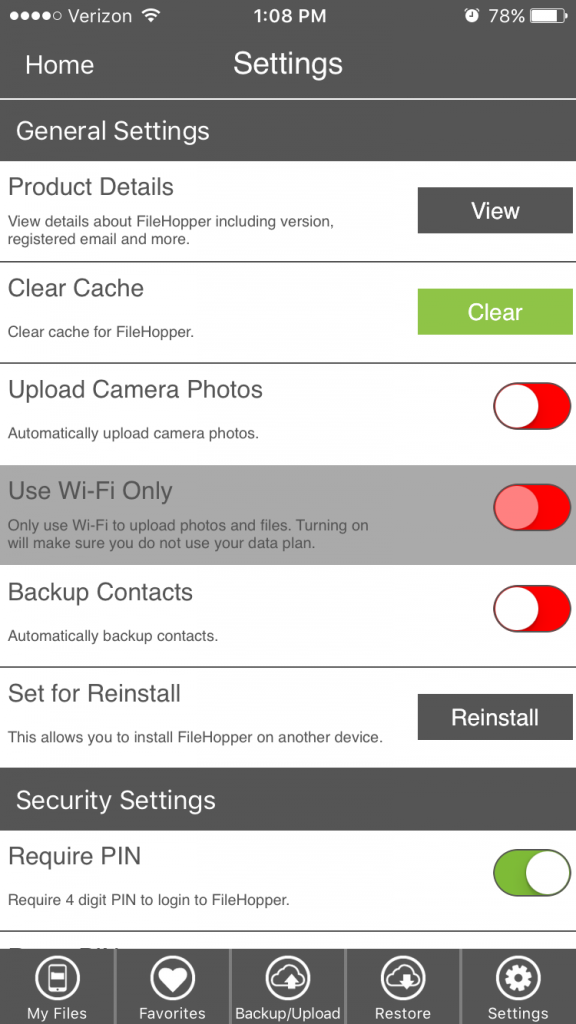
When you install FileHopper, you have the option to Upload Photos automatically. If you enable this option, every time you take a photo with your mobile device, it will be automatically uploaded and synced with your other devices. If you enable Upload Photos, you will have the option to enable or disable Wi-Fi only. If you enable Wi-Fi only, photos will only be auto uploaded if you have a Wi-Fi connection. If you disable Wi-Fi only, photos will be auto uploaded if you have a connection using Wi-Fi or your data plan (data plan usage rates may apply). You can also enable/disable these options after installing FileHopper by navigating to Settings.
To transfer your premium installation to a newer device, you must first remove the existing installation from your old device by navigating to Settings –> General Settings –> Set for Reinstall.

Once this has been been completed, you may then install FileHopper iOS on your new device using your same account credentials. Your premium installation should be active as soon as you’ve completed the registration wizard.
Unfortunately, you may run into this type of issue due to an Apple limitation that handcuffs our functionality.
Once FileHopper becomes a background process, it has a small window of time to complete its upload before the Apple device will suspend or kill the process. If your selected data set does not complete before FileHopper becomes a background process, you may experience this type of issue.
We suggest one of two things to remedy this situation:
1. We recommend keeping the FileHopper application open and active until your upload is complete.
2. You can also choose to upload in smaller data sets, which would allow FileHopper to finish the upload before it to becomes a background process.
If Apple ever makes changes and removes this limitation, we will act quickly to resolve and allow you to finish uploads even if FileHopper becomes a background process.


