

You’ve installed FileHopper Plus. Now lets get started with FileHopper Desktop!
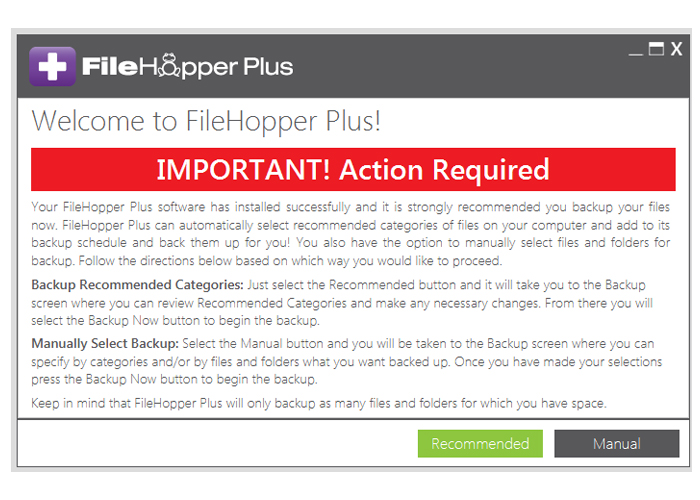
You’ll see an “Action Required” immediately following installation. Here you will decide how to set up your first backup. You can either select our recommended backup or select your own categories/files/folders for backup.
BACKUP
If you selected Recommended, you will see this message:

This allows you to “set it and forget it”.
If you selected Manual, you will see this screen:
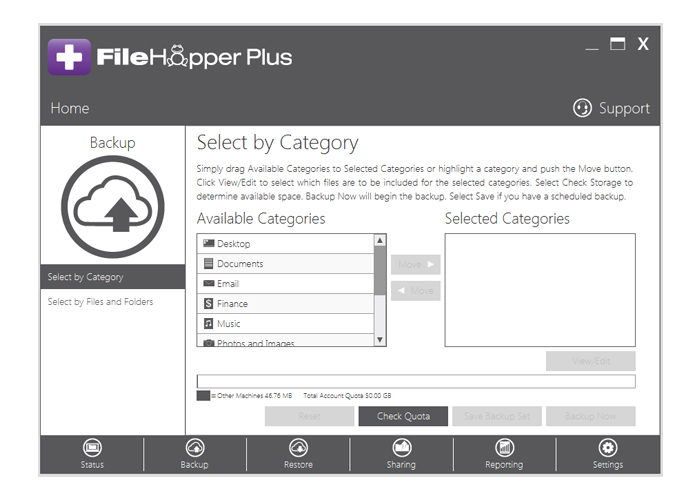
Select Categories, Files, and/or Folders you would like to backup.
Select Backup Now to start the backup.
OR
Select Save to let it backup on a regular schedule.
SHARE
Easily share your file and folders between your desktop and mobile devices.

Look for the FileHopper Folder located on your desktop.
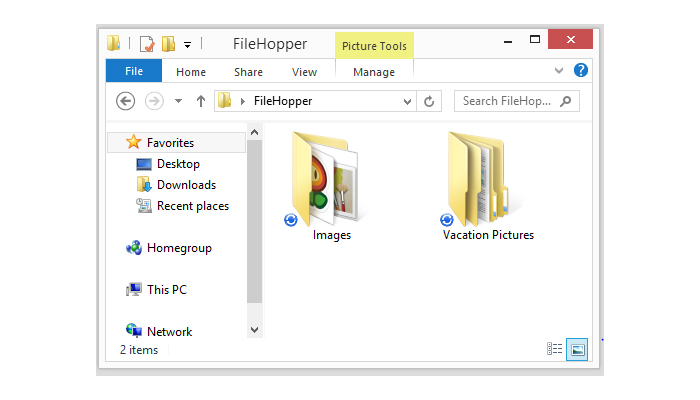
Simply drag and drop your folders and files into the FileHopper Folder.
If you have FileHopper on your mobile device you will see the files and folders you shared from that device here.
A syncing symbol appears on all files and folders.
A green checkmark appears when syncing is complete.
Easy, right? FileHopper can do a lot more. Visit our How To Guides to learn about all the features available with FileHopper including auto-backups, uploading files, marking files as Favorites, automatically uploading the photos on your device, sharing them with friends and family, and synchronizing them to your Mac or Windows PC.
And as always, all SecurityCoverage apps are supported by US-based techs, so if you ever have any questions don’t hesitate to ask.