

You’ve installed FileHopper Android. Now lets get started with FileHopper Android!
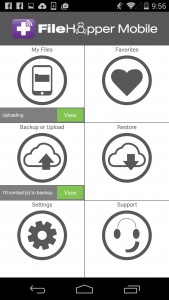
You’ll see the FileHopper Main Menu after installation. From here you can navigate to My Files, Favorites, Backup/Upload, Restore, Settings, and Support. You can also see the status of your uploads and backups.
The first thing you will want to do with FileHopper is to Backup Contacts/Call History/Text messages and Upload Files/Photos.
The quickest way to get going with FileHopper is to upload a photo and view it. Of course, you’ll need to have a photo on your device to follow along. If you don’t, snap a picture and we’ll show you how to upload and save it.
UPLOAD A PHOTO

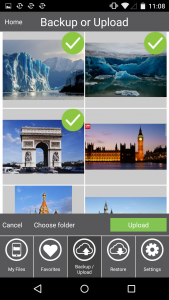
Press Backup or Upload from the main menu.
Press Upload Photos at the top of the screen.
Press Photos. A green check mark will appear to show which photos have been selected.
Press Upload.
VIEW IT
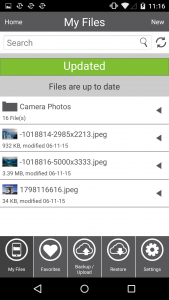
Press My Files from the main menu. Your uploaded photos will appear here.
BACKUP
Backing up Contacts, Call History, and Text Messages is very simple, and can be a life saver if your device ever gets lost or destroyed.
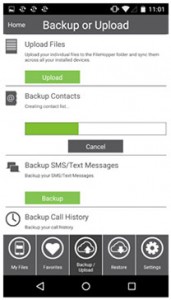
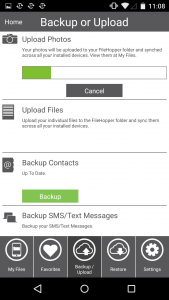
Press Backup or Upload from the main menu.
Press Backup under Contacts, SMS/Text Messages, or Call History. A progress bar will appear during the backup. You will see “Up To Date” when the category that you selected has finished backing up.
Easy, right? FileHopper can do a lot more. Visit our How To Guides to learn about all the features available with FileHopper including auto-backups, uploading files, marking files as Favorites, automatically uploading the photos on your device, sharing them with friends and family, and synchronizing them to your Mac or Windows PC.
And as always, all SecurityCoverage apps are supported by US-based techs, so if you ever have any questions don’t hesitate to ask.