Operating Systems:
Android 4.4 and above
Resource Requirements
10MB Free Storage Space
64MB Available RAM
WIFI or 3G Internet connection
After downloading and installing FileHopper from the Google PlayStore, the following screen will be displayed:
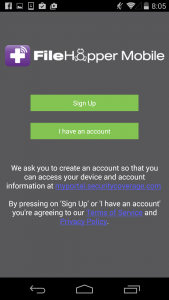
Press “I have an account” and the following screen will be displayed:
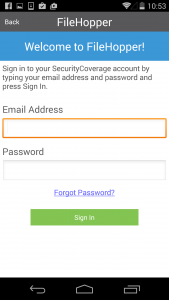
Enter the email address and password that you used to register this or other SecurityCoverage products, and then select “Sign In”.
If you cannot remember the password that you originally registered with, you can select the “Forgot Password?” link. An email will be sent to the email address that you registered with. The email will contain instructions and a link to change your password.
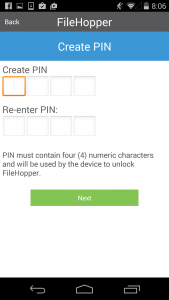
You will need to create a PIN, then reenter the PIN for verification, then press “Next”. The following screen will be displayed:
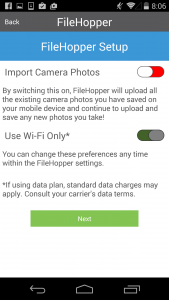
On this screen, you can select to enable the automatic upload of camera photos. If you enable camera photos, the “Use Wi-Fi Only” option becomes functional. If you leave the “Use Wi-Fi Only” default as enabled, the photos will upload only when you are connected to Wi-Fi, thus saving usage of your data plan. If you disable “Use Wi-Fi Only”, camera photos will upload regardless if you are connected via internet or your data plan. Select “Next” to continue.
If you have installed FileHopper on another device (either Android or iOS), and have performed a backup on that device, the following screen with appear:
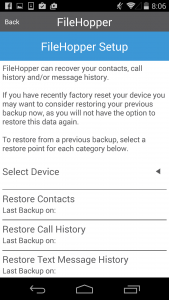
This screen also appears if you are reinstalling FileHopper on the same device. This allows you to restore backups of Contacts, Call History, and/or Text Messages to this device. If you do not wish to restore, simply press “Next”. To restore, first select the Device that you are restoring from by pressing on the arrow adjacent to “Select Device”. Select the device that you want to restore, then select the restore category (Contacts, Call History, or Text Message History). You will receive a message when the restore is complete. Press the “Next” button to continue. The following screen will be displayed:
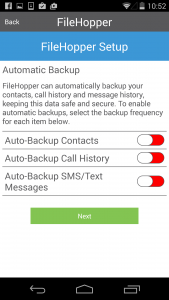
Here you will be able to set automatic backups. If you do not wish to set up backups at this time, simply press “Next” to continue. You may set up backups later in Settings within the app. Enable each category that you would like to backup, then select if you would like the backup to occur on a Daily or Weekly basis. Press “Next” to continue. The following screen will appear:
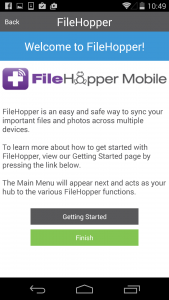
Press “Getting Started” to access the Getting Started Guide online. This will open an internet browser on your device to the guide.
Press “Finish” to complete the installation and registration process and begin using your FileHopper app.
After downloading and installing FileHopper from the Google PlayStore the following screen will be displayed:
Press “Sign Up”. The following screen will be displayed:
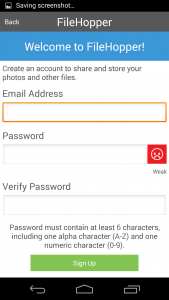
Enter a valid email address and a password. Then you will need to verify the password. Press “Sign Up” to continue, the following screen will be displayed:
You will need to create a PIN, reenter the PIN for verification, then press “Next”. The following screen will be displayed:
Press “Getting Started” to access the Getting Started guide online. This will open up a browser window on your device to this guide.
Press “Finish” to complete the install and registration of FileHopper Android and begin using the app.
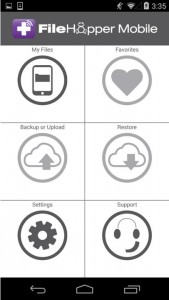
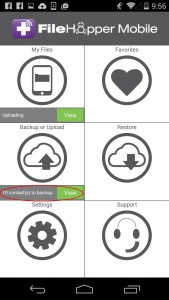
The FileHopper Main Menu allows you to quickly access all of your FileHopper options.
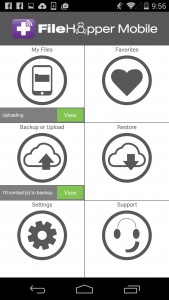
My Files: Press this to access FileHopper Sharing, which displays all of your synced files and folders.
Favorites: Press this to view all files you have marked as a Favorite.
Backup or Upload: Press this to upload photos and other files from your device and/or Backup Contacts, Call History, and Text Messages.
Restore: Press this to restore Contacts, Call History, and Text Messages.
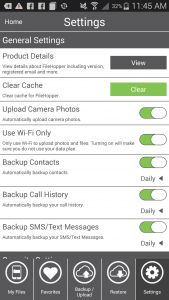
Settings: Press this to change your FileHopper preferences and view FileHopper app information.
Support: Press this to view the online support resources available for FileHopper.
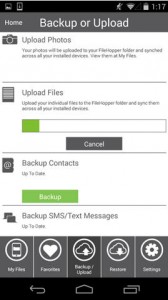
To manually select and upload files and photos from your device to your FileHopper, navigate to the Backup or Upload tab.

When you press the “Upload Files” button, your device’s folder/file structure will be displayed. Navigate to and press on each file that you wish to upload. A green check mark will appear as they are selected.
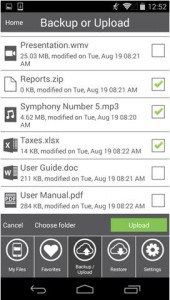
If you press Upload now, your selected files will be uploaded to the root of My Files (they will not appear in a folder). You can also choose which folder in your FileHopper you would like the files added to by pressing “Choose folder”.
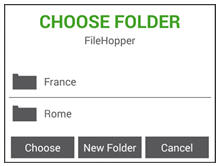
Select a folder by pressing on that folder and pressing Choose.
To create a new folder, press New Folder and enter a name for your folder.
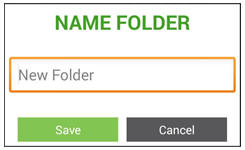
Press Save. After selecting or creating a new folder, the folder/file structure will appear again. Press Upload to begin uploading your selected files. You will be returned to the following screen, and you will see the upload progress bar:
You will receive a message when the upload is complete. You will be able to find your files in My Files in the location you selected.
Remove any of your files or folders from your device at any time.
To delete a file or folder:
1. Press the small menu icon to the right of the file or folder you wish to delete.
2. Press Delete. You will be asked to confirm this action.
3. Press “No” to return to FileHopper. Press “Yes” to permanently remove this file from your FileHopper.
4. If you choose “Yes” to delete, the file or folder will then be removed from My Files on all other mobile devices and/or the FileHopper Folder on desktops that are installed and syncing with your FileHopper account.
We offer 5GB, 50GB, and 250GB storage options. To upgrade to one of these storage sizes, contact your service provider. If you do not have a service provider and you have purchased FileHopper directly from SecurityCoverage, contact customer support at 1-877-373-3320.
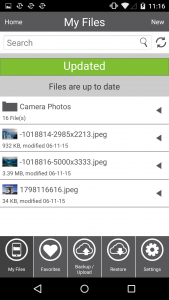
You can search for Files and Folders that have been uploaded to FileHopper by simply navigating to My Files and entering the file/folder name in the search field.
The search results will begin to appear as you type in the name.

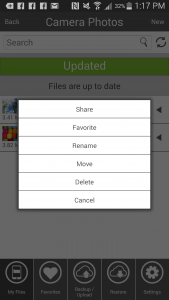
You can perform any of the normal file functions on these files: Share, Favorite, Delete or Rename.
To see all the files in your FileHopper again, press the “X” in the search field to clear the search. This will return you to your normal FileHopper view, with all of your files and folders.
This same search functionality is available also in the Favorites tab.
Upgrading your FileHopper from Free to Premium is easy!
Simply press on any of the grayed out options on the Main Menu:
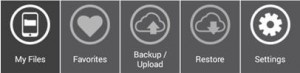
or on the Menu Bar:
or in Settings:
Or you can select Add Storage in Settings:
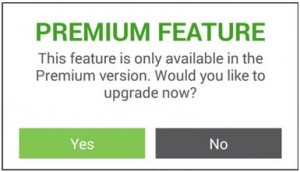
The following message will appear after selecting any of those options:
Press Yes to continue to upgrade. From here the In-app Purchase dialog box will appear from the Google Play Store. Follow the prompts from the Google Play Store. Once the In-App purchase is complete, your screen will refresh and all premium options will unlock.
You can share any file you’ve saved in FileHopper through all your available methods (i.e., text message, e-mail, Facebook, Twitter, Flickr).
To share a file:
1. Press the small menu icon to the right of the file you wish to share and then press Share.
2. You will then be prompted to choose how you wish to share the file. These choices will vary depending on your device and the applications you have installed.
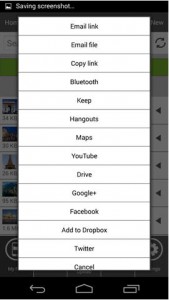
3. Select the method in which you wish to share and follow the prompts from that application. Your file will be shared to that application.
From the FileHopper Main Menu, click Backup or Upload. Once you are in the Backup or Upload tab, simply select Backup Contacts, SMS/Text Messages, or Call History. You will see a progress bar as it backs up. When the backup is complete, you will see the status change to “Up To Date.”
To manually select and upload files and photos from your device to your FileHopper, navigate to the Backup or Upload tab.
When you press the “Upload Photos” button, it will automatically display thumbnails of all the photos that are in your gallery. Press on each photo you would like to upload; a green check mark will appear as they are selected.
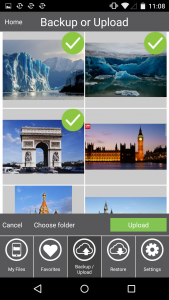
If you press Upload now, your selected photos will be uploaded to the root of My Files (they will not appear in a folder). You can also choose which folder in your FileHopper you would like the photos added to by pressing “Choose folder”.
Select a folder by pressing on that folder and pressing Choose.
To create a new folder, press New Folder and enter a name for your folder.
Press Save. After selecting or creating a new folder, the Gallery will appear again. Press Upload to begin uploading your selected photos. You will be returned to the following screen, and you will see the upload progress bar:
You will receive a message when the upload is complete. You will be able to find your photos in My Files in the location you selected.
You can restore during the install process or from the Restore Tab within the app.
Restore During Install/Reinstall
If you have backed up contacts with your FileHopper account on the same mobile device or another mobile device, you will see the following screen when installing on a new device or reinstalling on your existing device.
To restore, simply click on the drop-down arrow adjacent from Select Device. Select which device you would like to restore from. Next, press the data type you would like to restore, Contacts, Call History, or Text Message History. You will be returned to the same screen so that you may restore all 3 options. When you are finished restoring, press Next to continue with the install process.
Restore from within the App
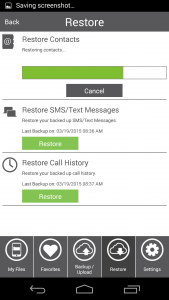
To restore Contacts, Call History, and/or Text Message History after install, navigate to the Restore Tab.
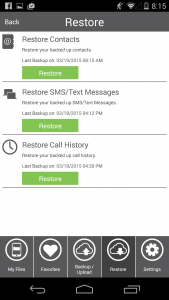
Press Restore under the data type in which you would like to restore. If you have FileHopper installed on more than one mobile device, you will be prompted to choose which device you would like to restore. You will see a progress bar during the restore. When complete, you will see a Success message with the number of Contacts, Call History, or Text Message that have been restored.

Choose the files that you want to access quickly or frequently and mark them as a favorite.
To mark a file as a favorite:
1. Press the small menu icon to the right of the file you wish to make a favorite.
2. Press Favorite.
3. The file will then appear in the Favorites tab of the application.
Marking a file as a favorite means a full copy is downloaded to your mobile device and can be accessed anytime, even if your device is not connected to the Internet.
When you mark a file as a favorite, it will be downloaded to your phone and stored locally so you can access that file anytime you need to, with or without an Internet connection.
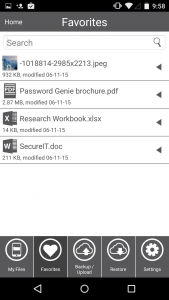
These files are displayed in the “Favorites” tab, which makes them easily accessible without having to search through all of your other files.
With files you have marked as favorites, you can:
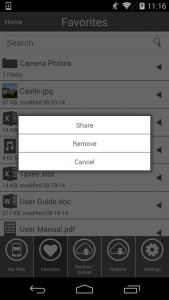
Share: When pressed, this will open the share options you have available on your device.
Remove: The file will be removed from your Favorites, but will still remain in your FileHopper.
Rename your files and folders to the name of your choosing at any time.
To rename a file or folder:
1. Press the small menu icon to the right of the file/folder you wish to rename.
2. Press Rename.
3. Enter a new name for the file/folder. Press Rename.
The new name will also sync to all other devices installed with your FileHopper account.
You can create a new text file to be uploaded and synced to all of your devices installed with your FileHopper account. To do so, navigate to My Files and press “New” in the upper right-hand corner of the screen.
1. Give your new text document a name.

2. Enter your contents into the text document.
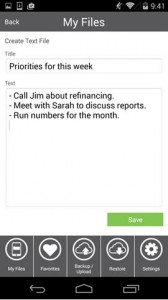
3. Press Save.
If you do not wish to save, simply press the Back button in the upper left-hand corner. A message will appear asking if you wish to save, select No.
Once you save your text document, it will appear in your FileHopper list and will sync across all of your devices.
Every time you make a change to a contact, add a new contact, or delete a contact from your device, the Main Menu of your FileHopper app will display the number of contacts needing to backup.
Press View to enter the Backup or Upload tab where you can manually backup your contacts.
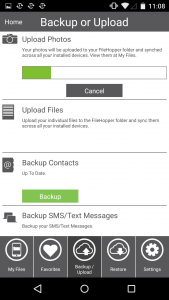
On the Backup or Uploads tab you will see the following:
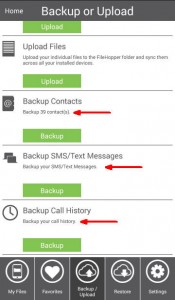
If there are contacts to backup, you will see “Backup X number of contacts”.
If there are text messages to backup, you will see “Backup your SMS/Text Messages”.
If there is call history to backup, you will see “Backup your call history”.
Press Backup to manually backup any of these options.
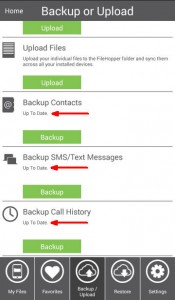
Once the backup is complete you will see “Up To Date” under the back up category.
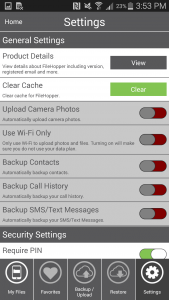
You can set Automatic Backups for your Contacts, Call History, and Text Messages during install or in the Settings Tab after install.
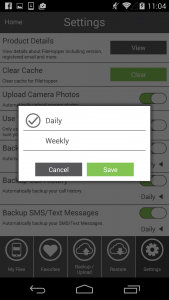
To set automatic backups during install, simply enable the following options. You will then be prompted to select either daily or weekly backups. The first backup will occur immediately after installation is complete.
To set automatic backups at any time after installing, navigate to the Settings tab within the app.
Simply enable the desired options. You will be prompted to select either daily or weekly backups.
The first automatic backup will occur immediately after enabling the option.