Syncing to a desktop account is simple. Once you’ve decided to use Password Genie desktop all you have to do is enter the same email address and password that you used to register your existing Password Genie account. Password Genie will recognize your email and password and sync your accounts together!
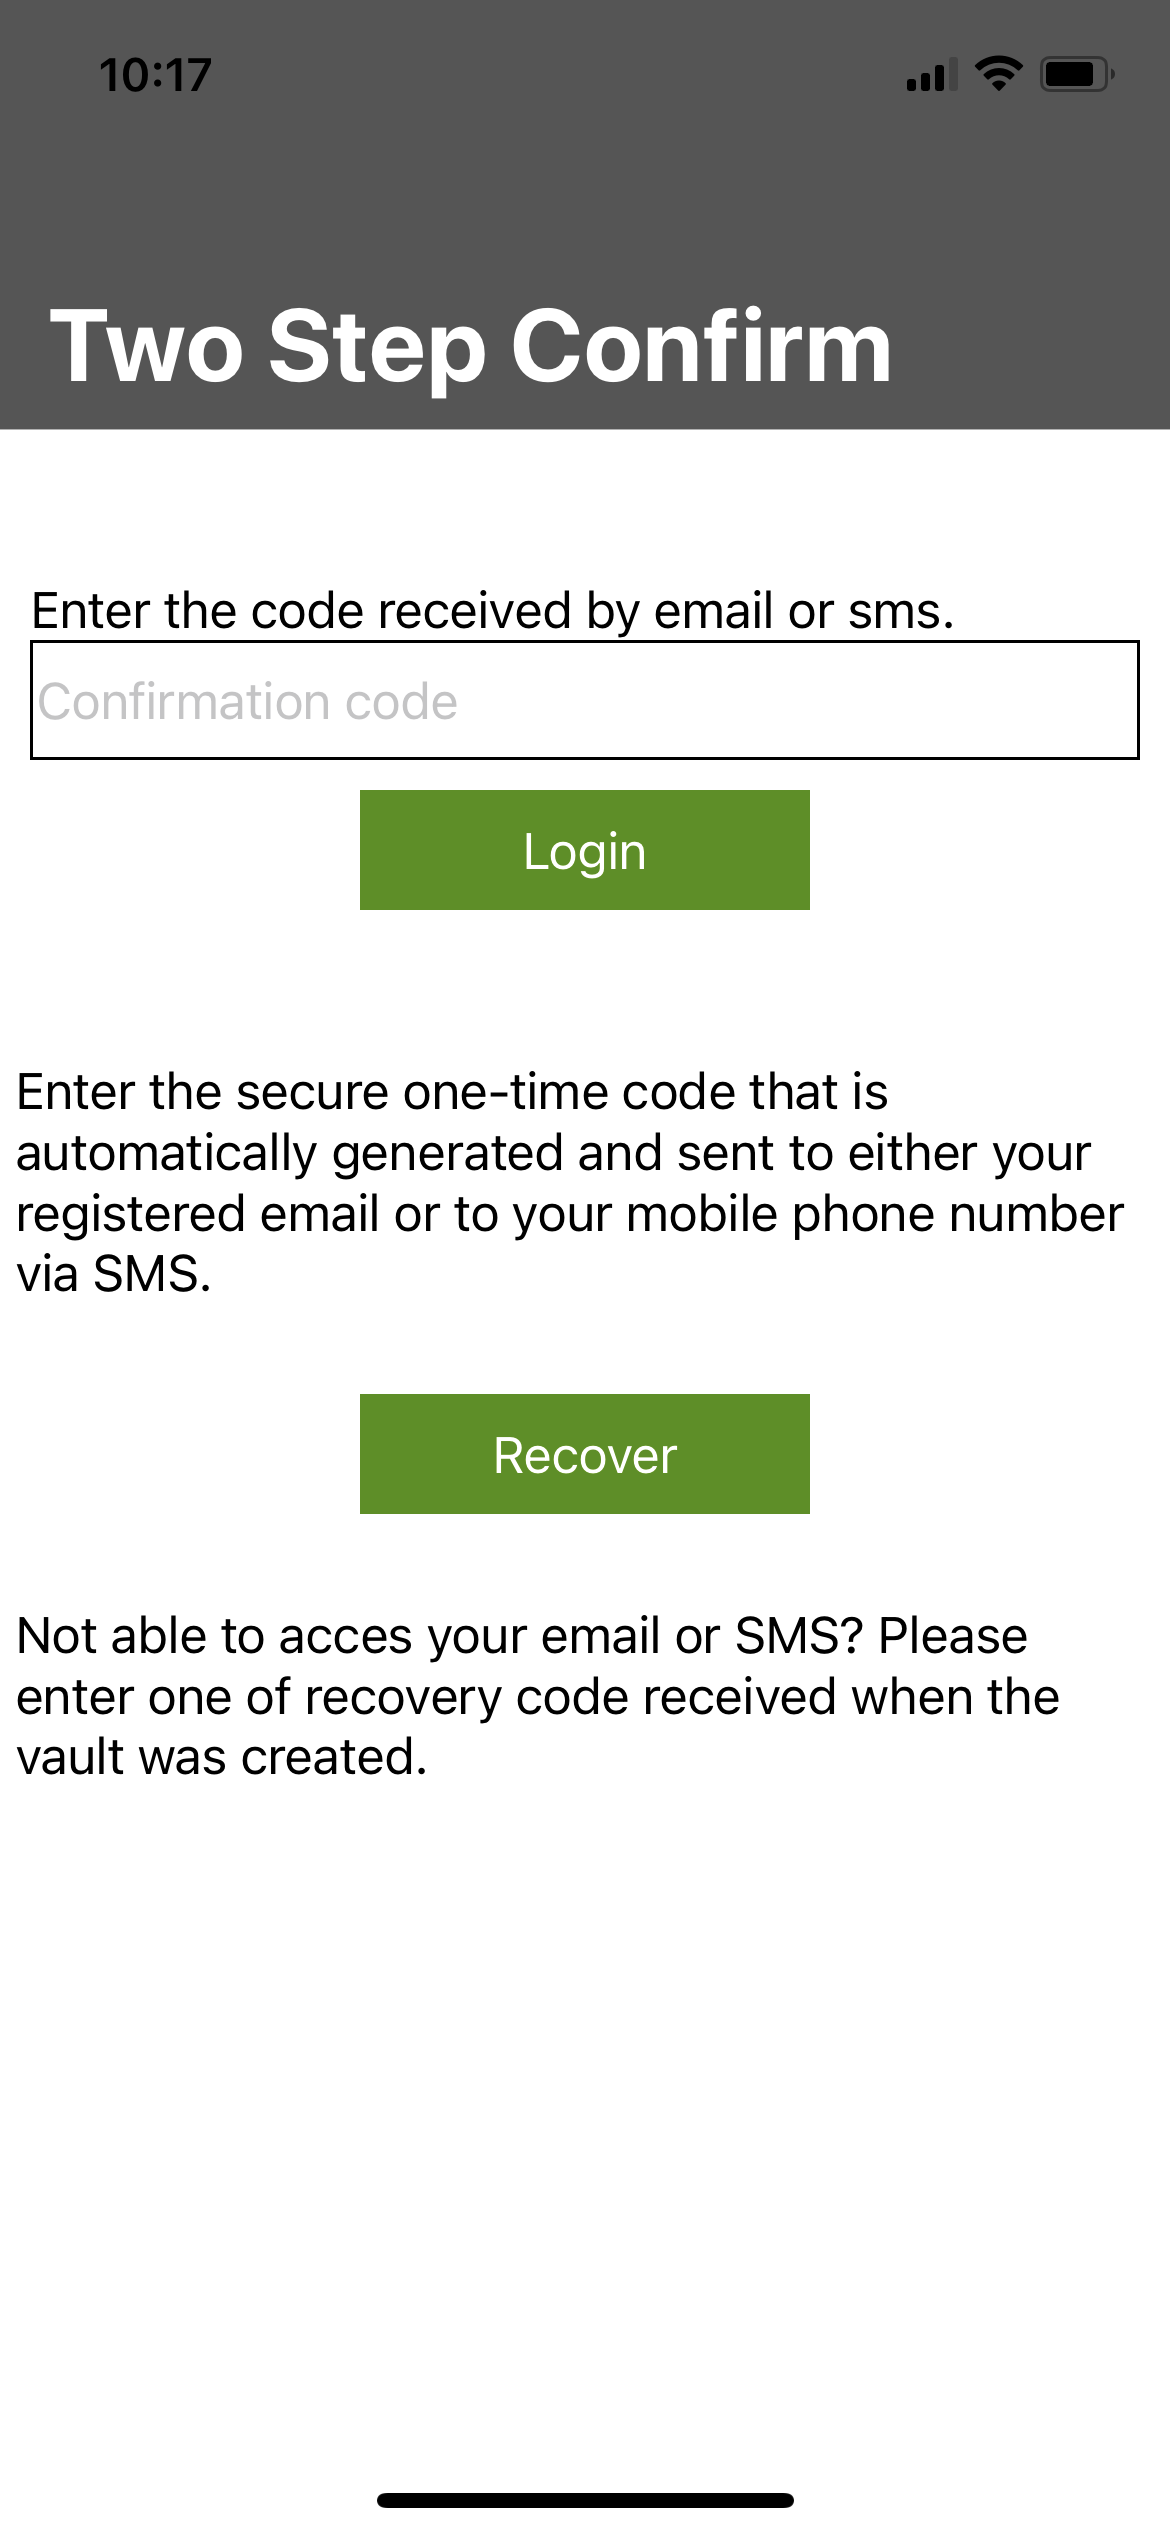
Once two-step verification is enabled, Password Genie requires you to enter the master account e-mail, as well as your master password. Once this information has been verified as correct, we will send your PIN code to that email, which will then need to be entered before you can access your saved information.
Please be aware that a working internet connection is required for Password Genie to send you your UNLOCK code.
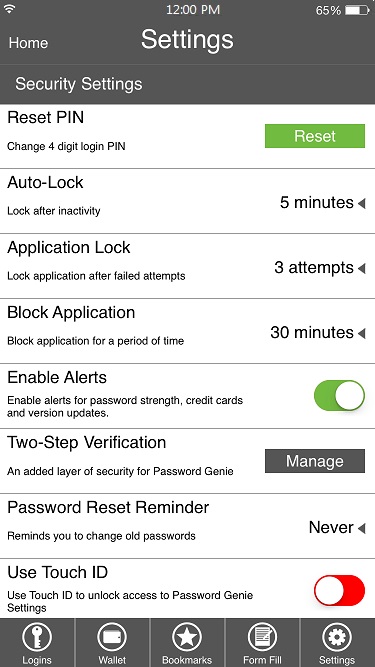
Password Genie lets you manage your two-step verification settings through the console. These settings can be found at Settings–>Security–> Manage Two-Step Verification.
To access a saved login from your list in Password Genie Android, locate the login you would like to go to in your Password Genie entry list.
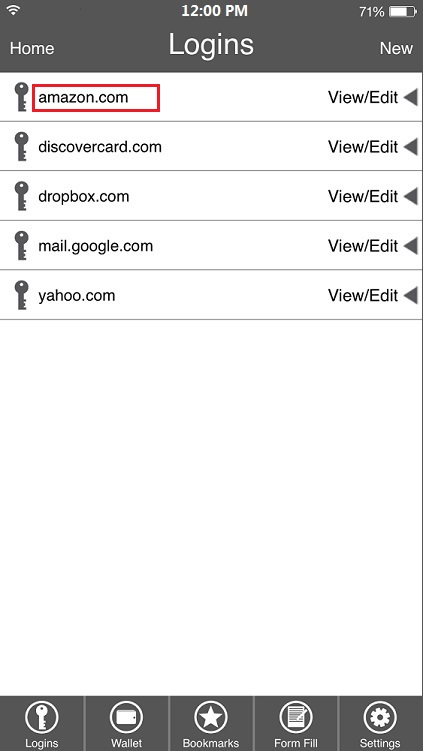
Press the link of the desired URL. This will then launch the internal browser and auto fill your login credentials. Press the “Sign In” or “Log In” button for the site. No copying or pasting to your device’s clipboard required!
Important – Password Genie utilizes a built-in browser for auto-fill. Due to Android browser limitations, Password Genie will only work with this built-in browser at this time.
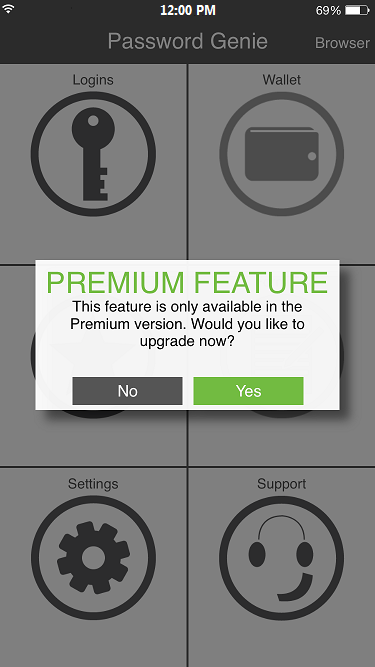
Upgrading your Password Genie from the Free to Premium version is easy!
When you’re on the Free version of Password Genie you can press any of the grayed out options of the application and complete an in-app purchase through the Apple App Store.
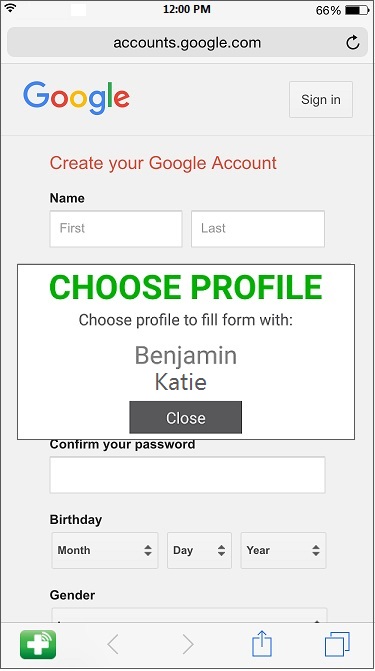
Due to technical limitations of the default iOS browser, the form-fill function will not operate in that browser. You must launch the Password Genie browser from within the Password Genie app. Press the Browser button on the Main Menu to launch the browser.
While using the Password Genie browser, when a page containing a form is detected, it will automatically fill in all fields based on what was set up in your profile. If you’ve created multiple profiles, Password Genie will ask you to choose which profile to use.
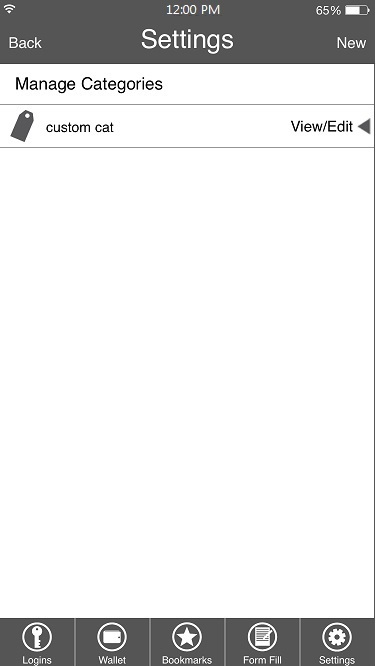
To edit the fields in your custom category, go to the Settings section of your Password Genie for mobile, scroll down and choose “Manage Categories.”
Once you select the “Custom Category” section, you will be taken to a list of all the custom categories you have created. Select the View/Edit for the category you would like to edit.
Once you have the category you’d like to edit open, you will be able to immediately start editing your fields.
Tip – To delete a field, press the “X” button.To add a field, press the “Add Field” button.
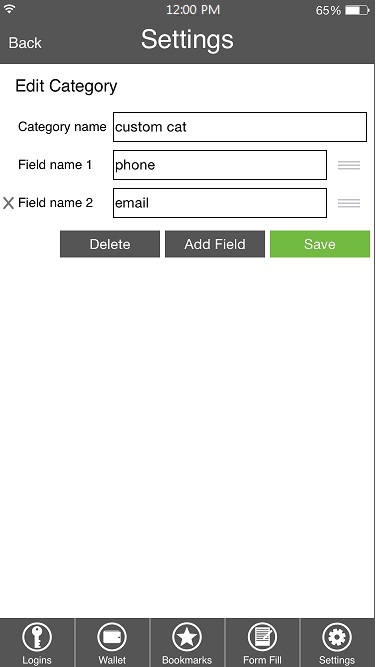
Once you have finished editing your fields, press the “Save” button save your changes.
A customized category can be created from your list of main groups, or from the Custom Category section within the Settings tab.
To add a customized category to your list of saved information in Password Genie for mobile, navigate to the main Menu of the application and press the “Wallet” tab. Choose “New” at the top and select “New Category”. You will be taken to a form where you can create your Custom Category by filling out the following information:
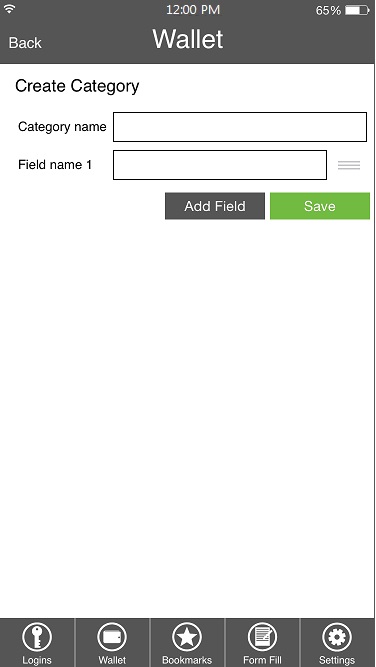
Category Name: Name the type of category you’d like to save.
Field Name 1: Name of the first field for the category.
Add Field: Create additional fields within your custom category.
Note: There is no limit to the number of fields you can add to your custom category.
Cancel: Cancels the custom category creation.
Save: Saves your custom category.
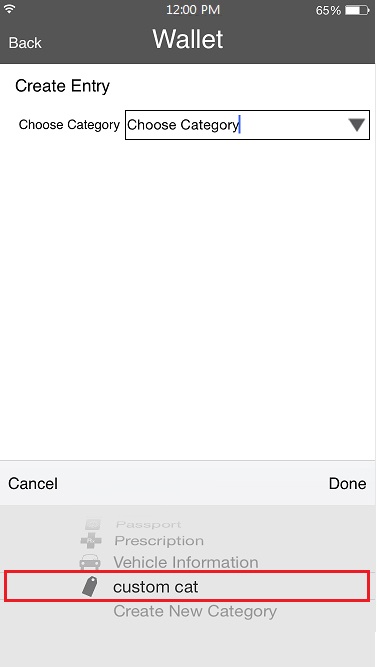
To create an entry for your new category, simply go back to your “Wallet” section of the Password Genie mobile choose New Entry and select the newly created “Custom Category” from the list.
Editing an Entry
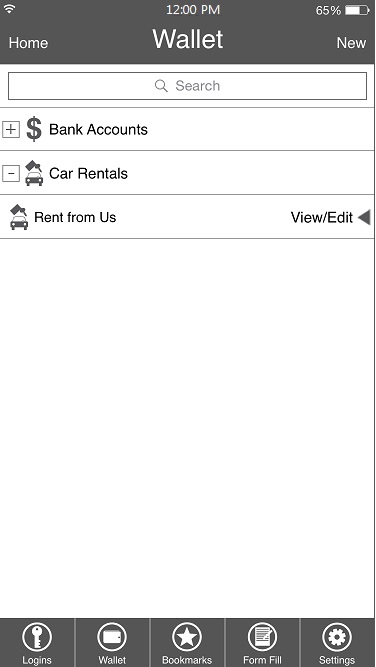
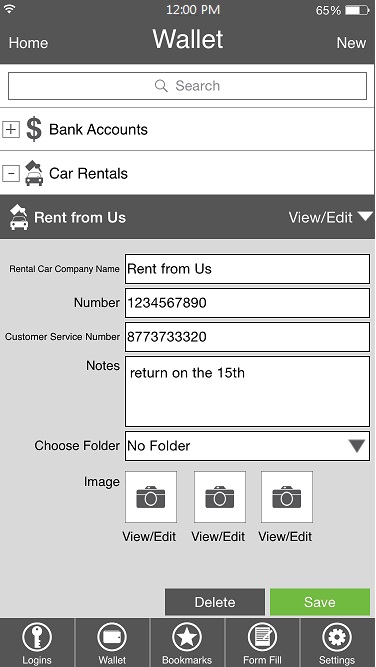
To edit the fields in any category in your Password Genie for mobile, go to the Main Menu, choose the section of which your Entry is saved (Logins, Wallet or Bookmarks) choose the View/Edit button next to the entry you’d like to edit.
Once pressed you can edit any field from the drop down, press “Save” to save any changes.
Deleting an Entry
To edit the fields in any category in your Password Genie for mobile, go to the Main Menu, choose the section of which your Entry is saved (Logins, Wallet or Bookmarks) choose the View/Edit button next to the entry you’d like to edit and choose Delete.
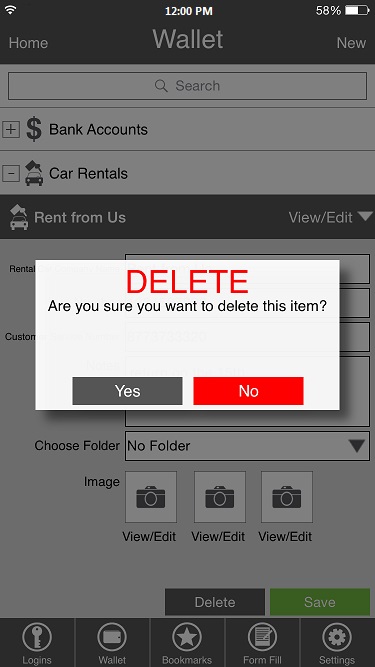
Press the “Delete” button and confirm your delete. Your entry will be permanently deleted from your list.
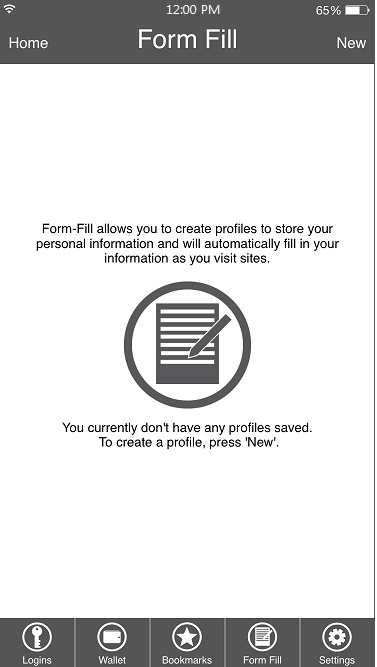
To set up a form-fill profile, press the Form-Fill icon from the Main Menu.
Then, press the “New” button at the top of the screen. You’ll be asked to provide a name and description for the new profile. These are required fields; all other fields beyond this point are optional.
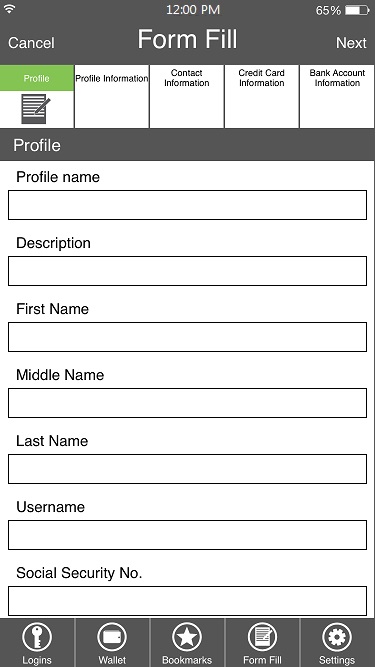
When ready, press Next to proceed to the profile information screen.
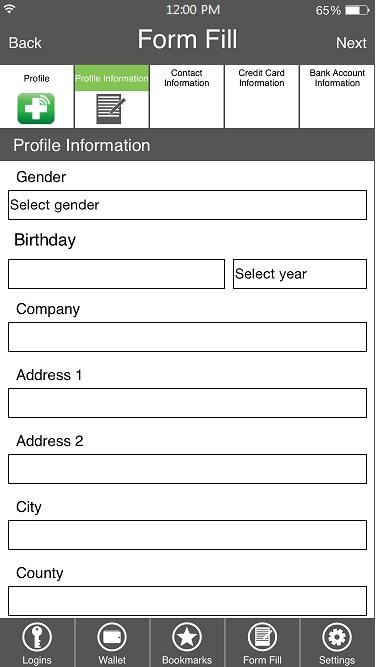
Here you can enter your name, address, etc the standard fields used by most online forms. Once you’ve entered the desired information, press Next to proceed to the next screen, contact information.
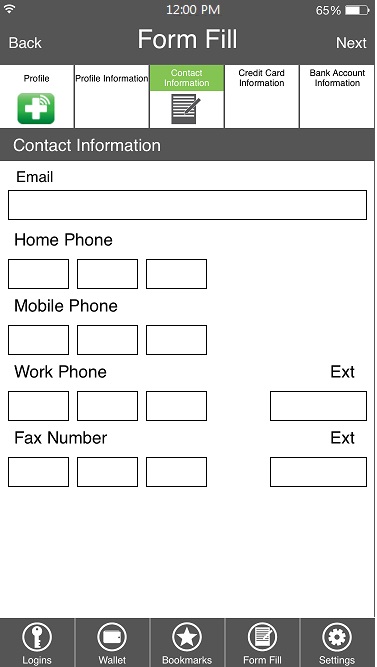
Here you can enter your email address and various phone numbers if desired. When ready, press Next to continue to the next screen, credit card information.
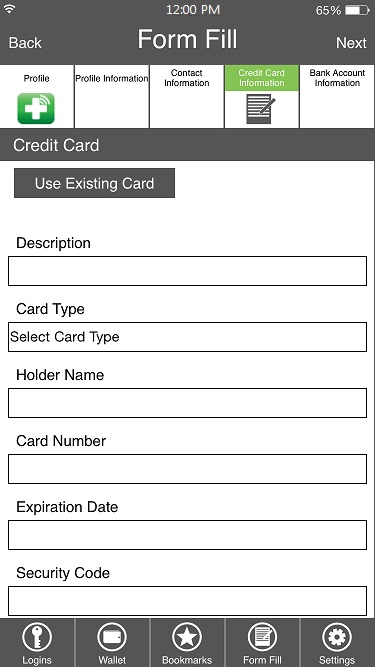
Here you can enter your credit card information; useful when you’d like to auto-fill online shopping sites. If you have a credit card entry already saved within Password Genie, you can import it directly into this form:
Once completed, press Next once more to proceed to the final screen, bank account information.
Here you may enter your bank account details; handy when auto-filling your monthly bill payments. If you have a bank account entry already saved within Password Genie, you can import it directly into this form:

When you’re finished, press the Save button. That’s all! You’ve successfully created a form-fill profile. Again, keep in mind that you do not have to fill out all fields and all screens; you can save and exit the profile creation process at any time (and you can always come back and edit a profile later).
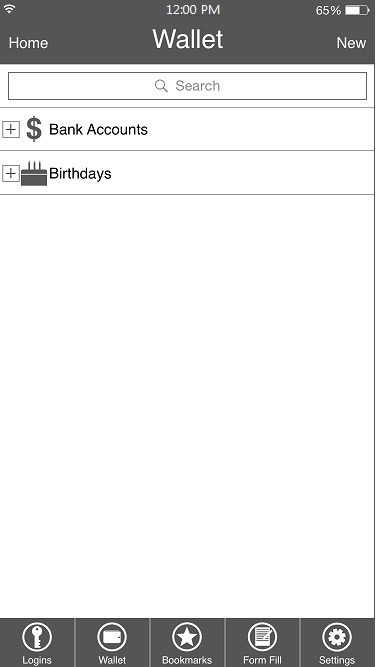
To set up a birthday reminder, press the ‘Wallet’ icon from the Main Menu, then choose New -> Wallet Entry and select Birthday from the list of categories. You’ll then be able to create a new birthday entry.
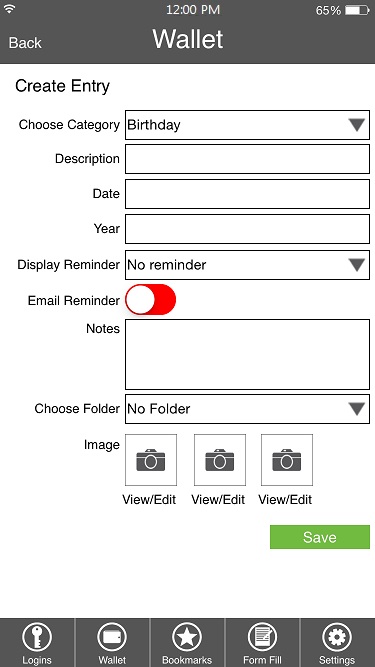
Simply enter a name and use the spinning calendar to select the date of the birthday. The ‘Age’ field will automatically calculate the person’s current age as you select the date. Make sure the ‘Display Reminder’ checkbox is checked, and then select at which time you’d like the reminder to appear (up to five days prior to the birthdate set). You can also enable the ‘Email Reminder’ option, and you’ll receive an email on the specified day.
Finally, you may add any notes you like. These will be sent in the email reminder as well; you may find it helpful to type in some gift ideas here! Once you’re done, press Save. Don’t worry about messing up; you can always come back and edit this entry later.
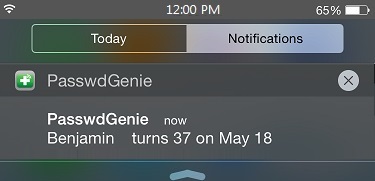
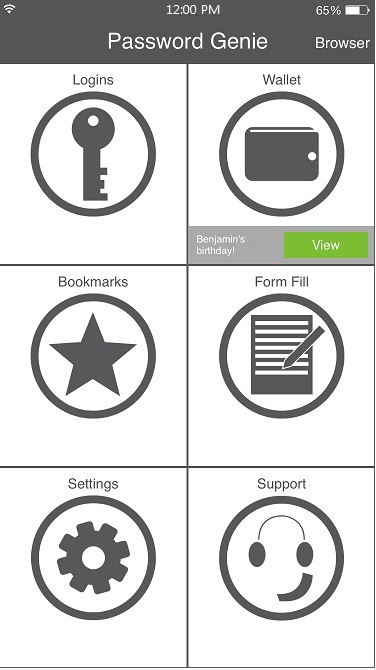
When the date of the reminder comes around, you’ll receive a notification from Password Genie on your phone or tablet with the details of any birthday reminders for that day.
Keyword searching through your Password Genie application is easy. At the top of your menu bar you have a search box that you can press at any time. Pressing the search button will bring up a search box at the top of your application.
Enter the keyword you’d like to search and press the search icon to the right of the search bar. Your results will be displayed below.
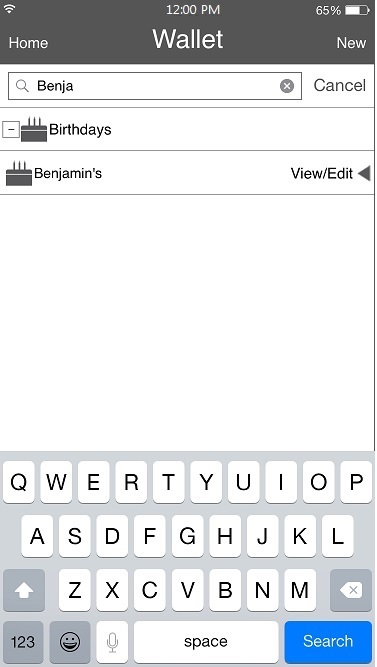
Important – Keyword searches will pull words from your descriptions, notes and folders.
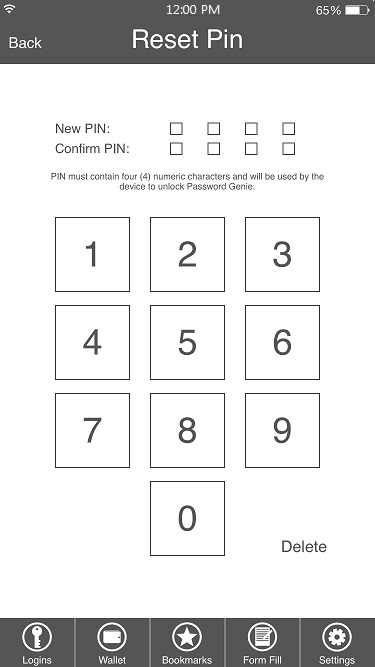
To reset your passcode, navigate to the Settings section of Password Genie and choose the “Reset Passcode” option:
From this window you are able to reset your passcode for the Password Genie application.
Open the Password Genie app, login to one of your Vaults, and press Vaults, then Add in the upper right corner. This will open the ‘Vault Creation Wizard’. Here you will need to follow the on-screen directions in completing the Vault creation process. Read each screen carefully, and ensure you remember any passwords you set as you will be unable to recover them at a later time.
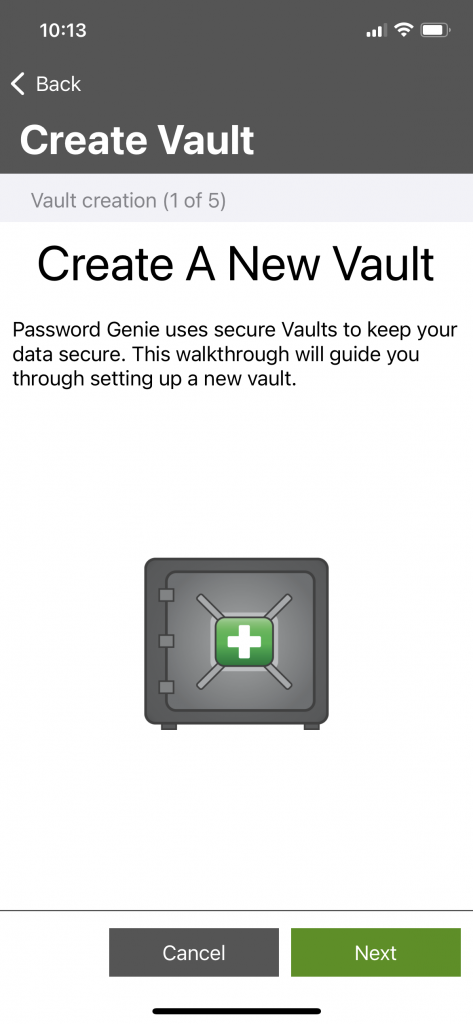
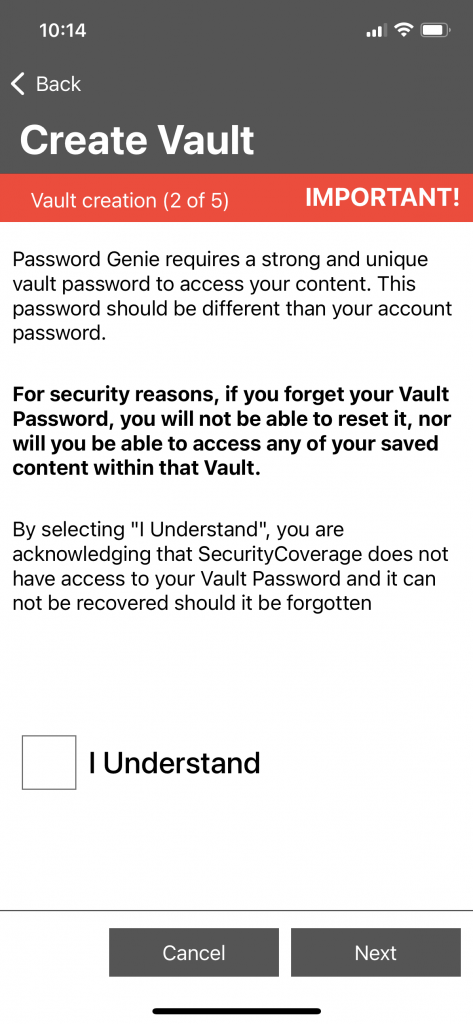
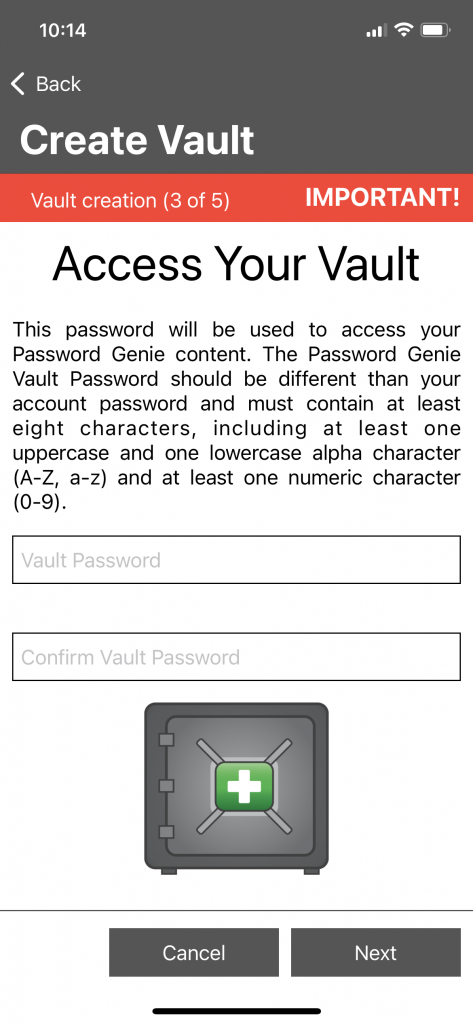
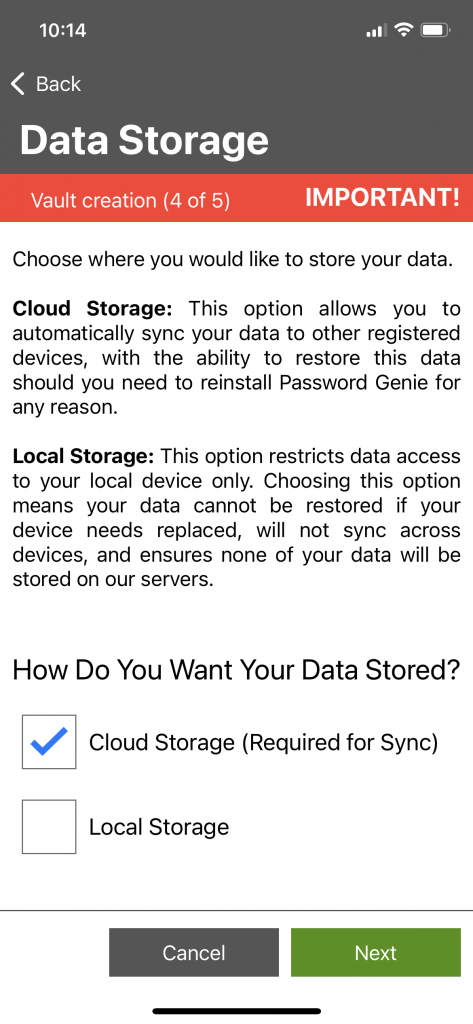
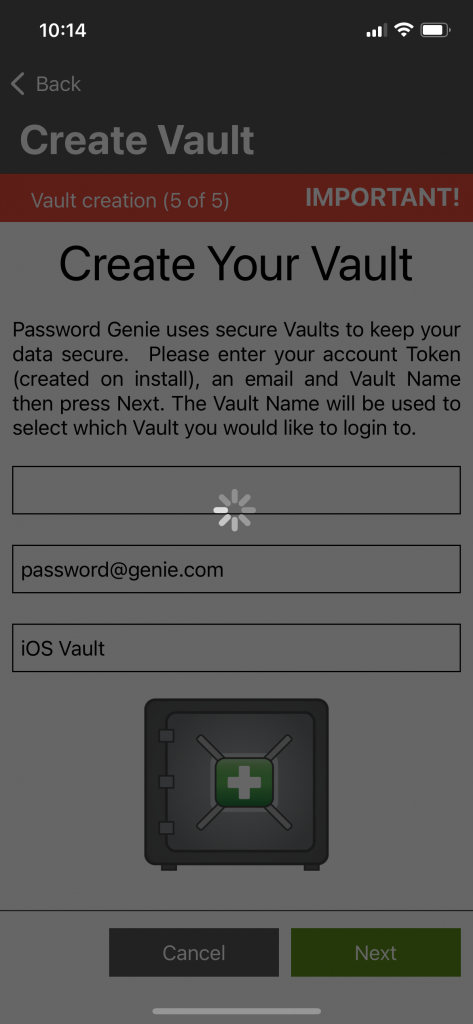
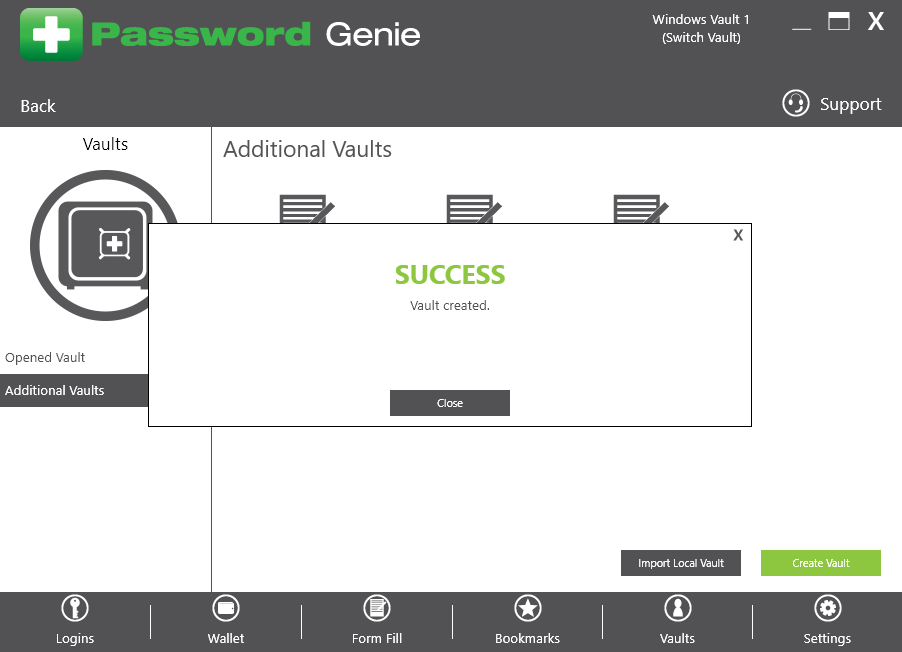
Once you have pressed Create, you will receive a confirmation that your Vault is created and you will now be able to login and begin using it!
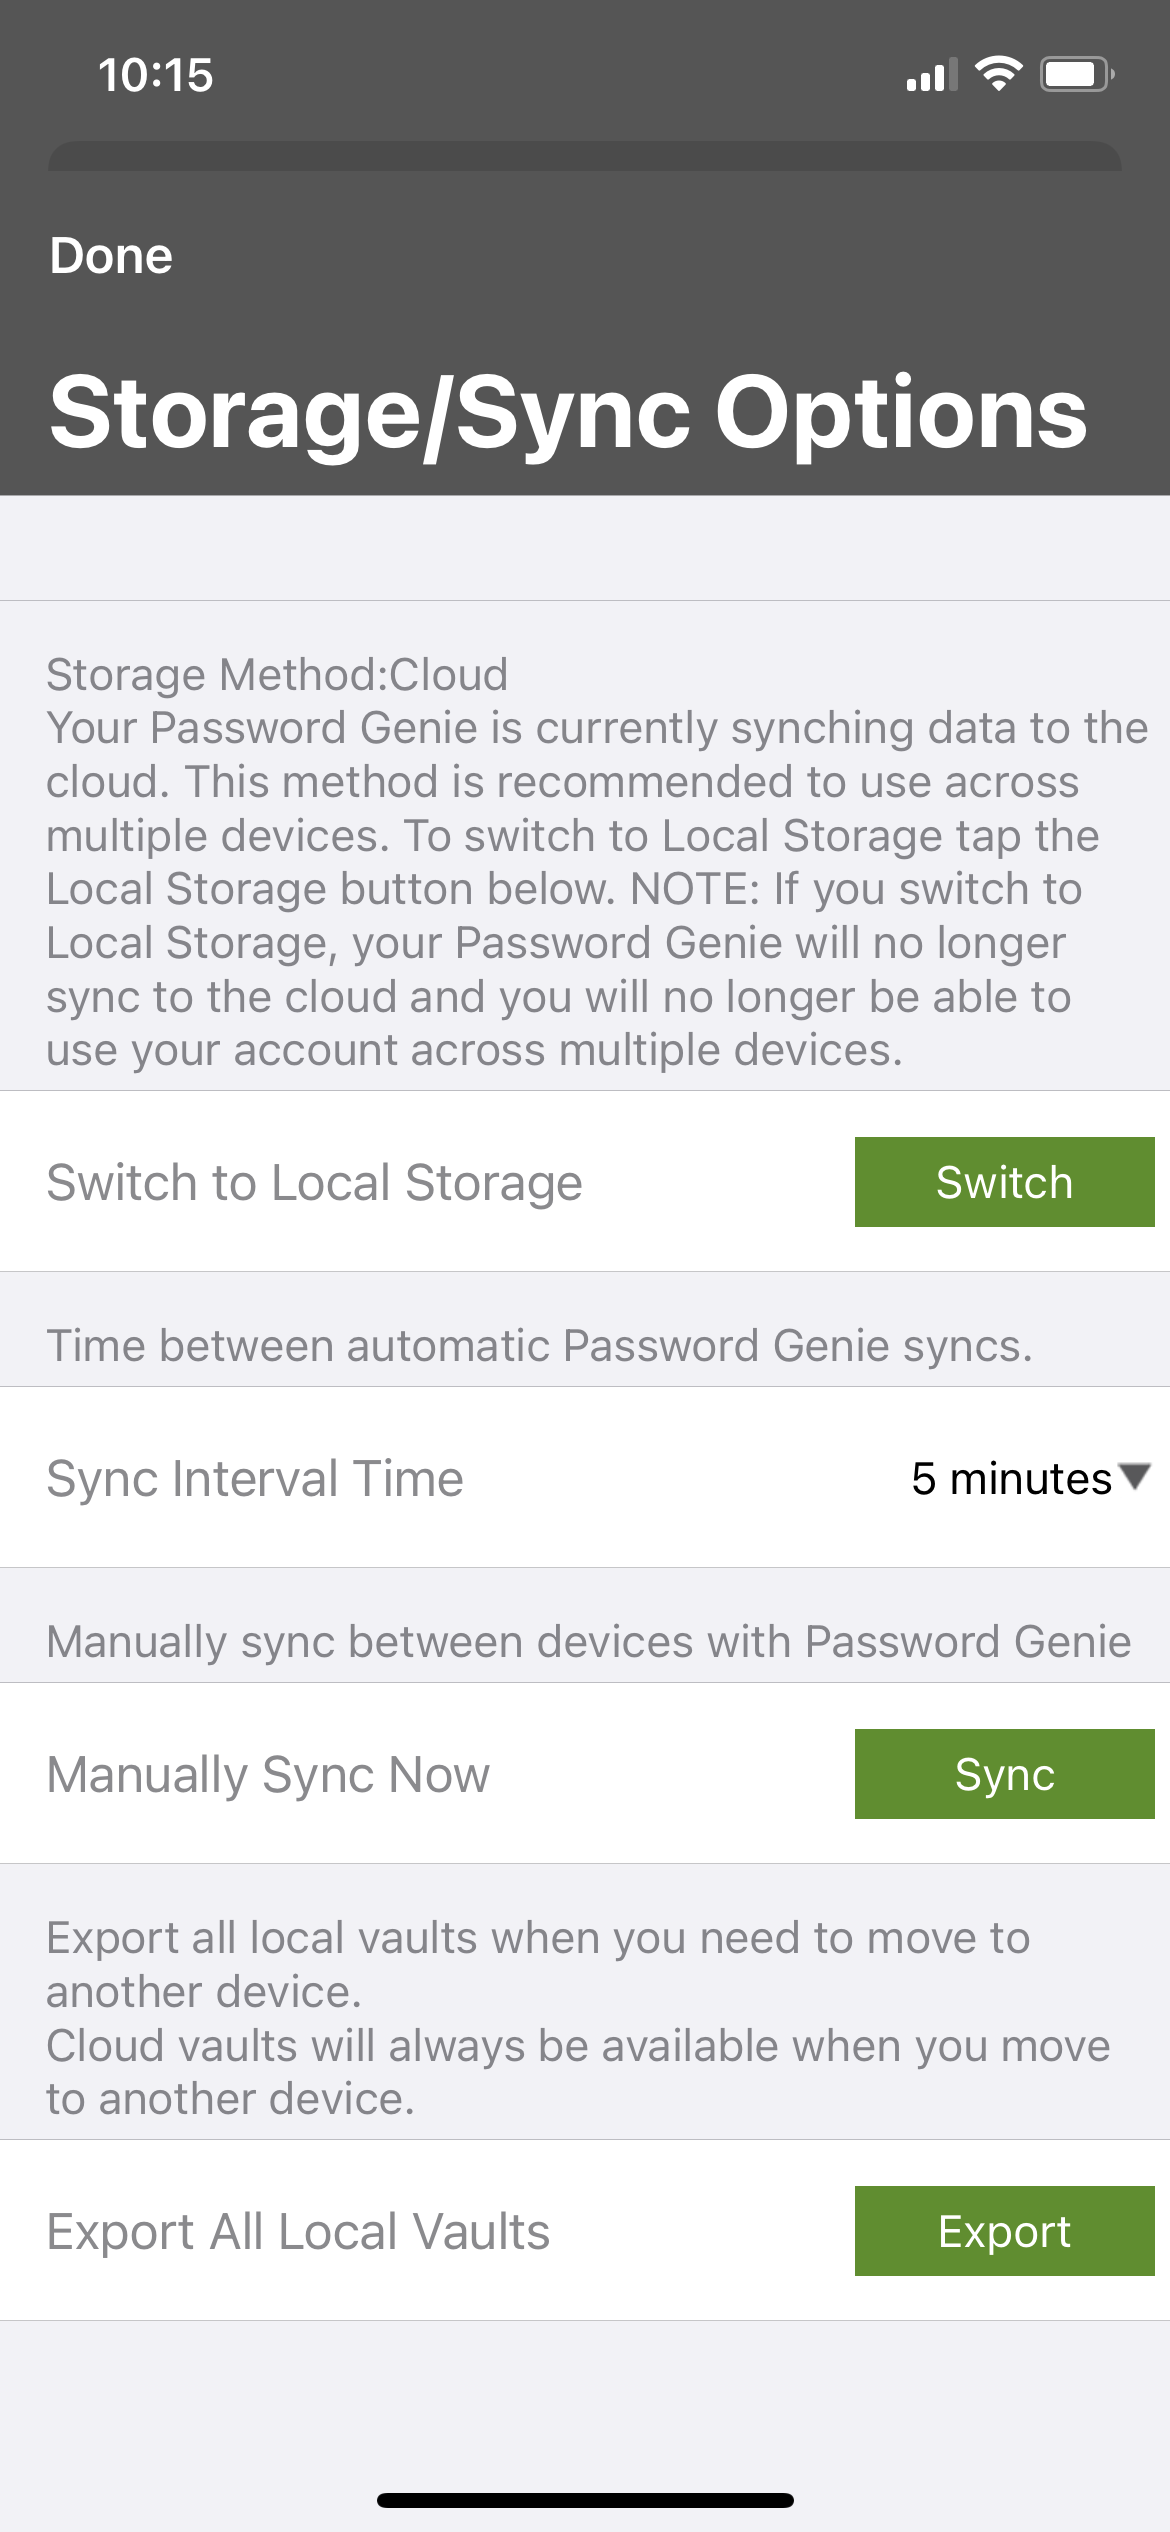
A Local Storage Password Genie Vault can being exported at any time in the Settings. Open the Password Genie App and press Settings then Storage/Sync Options then Export All Local Vaults.
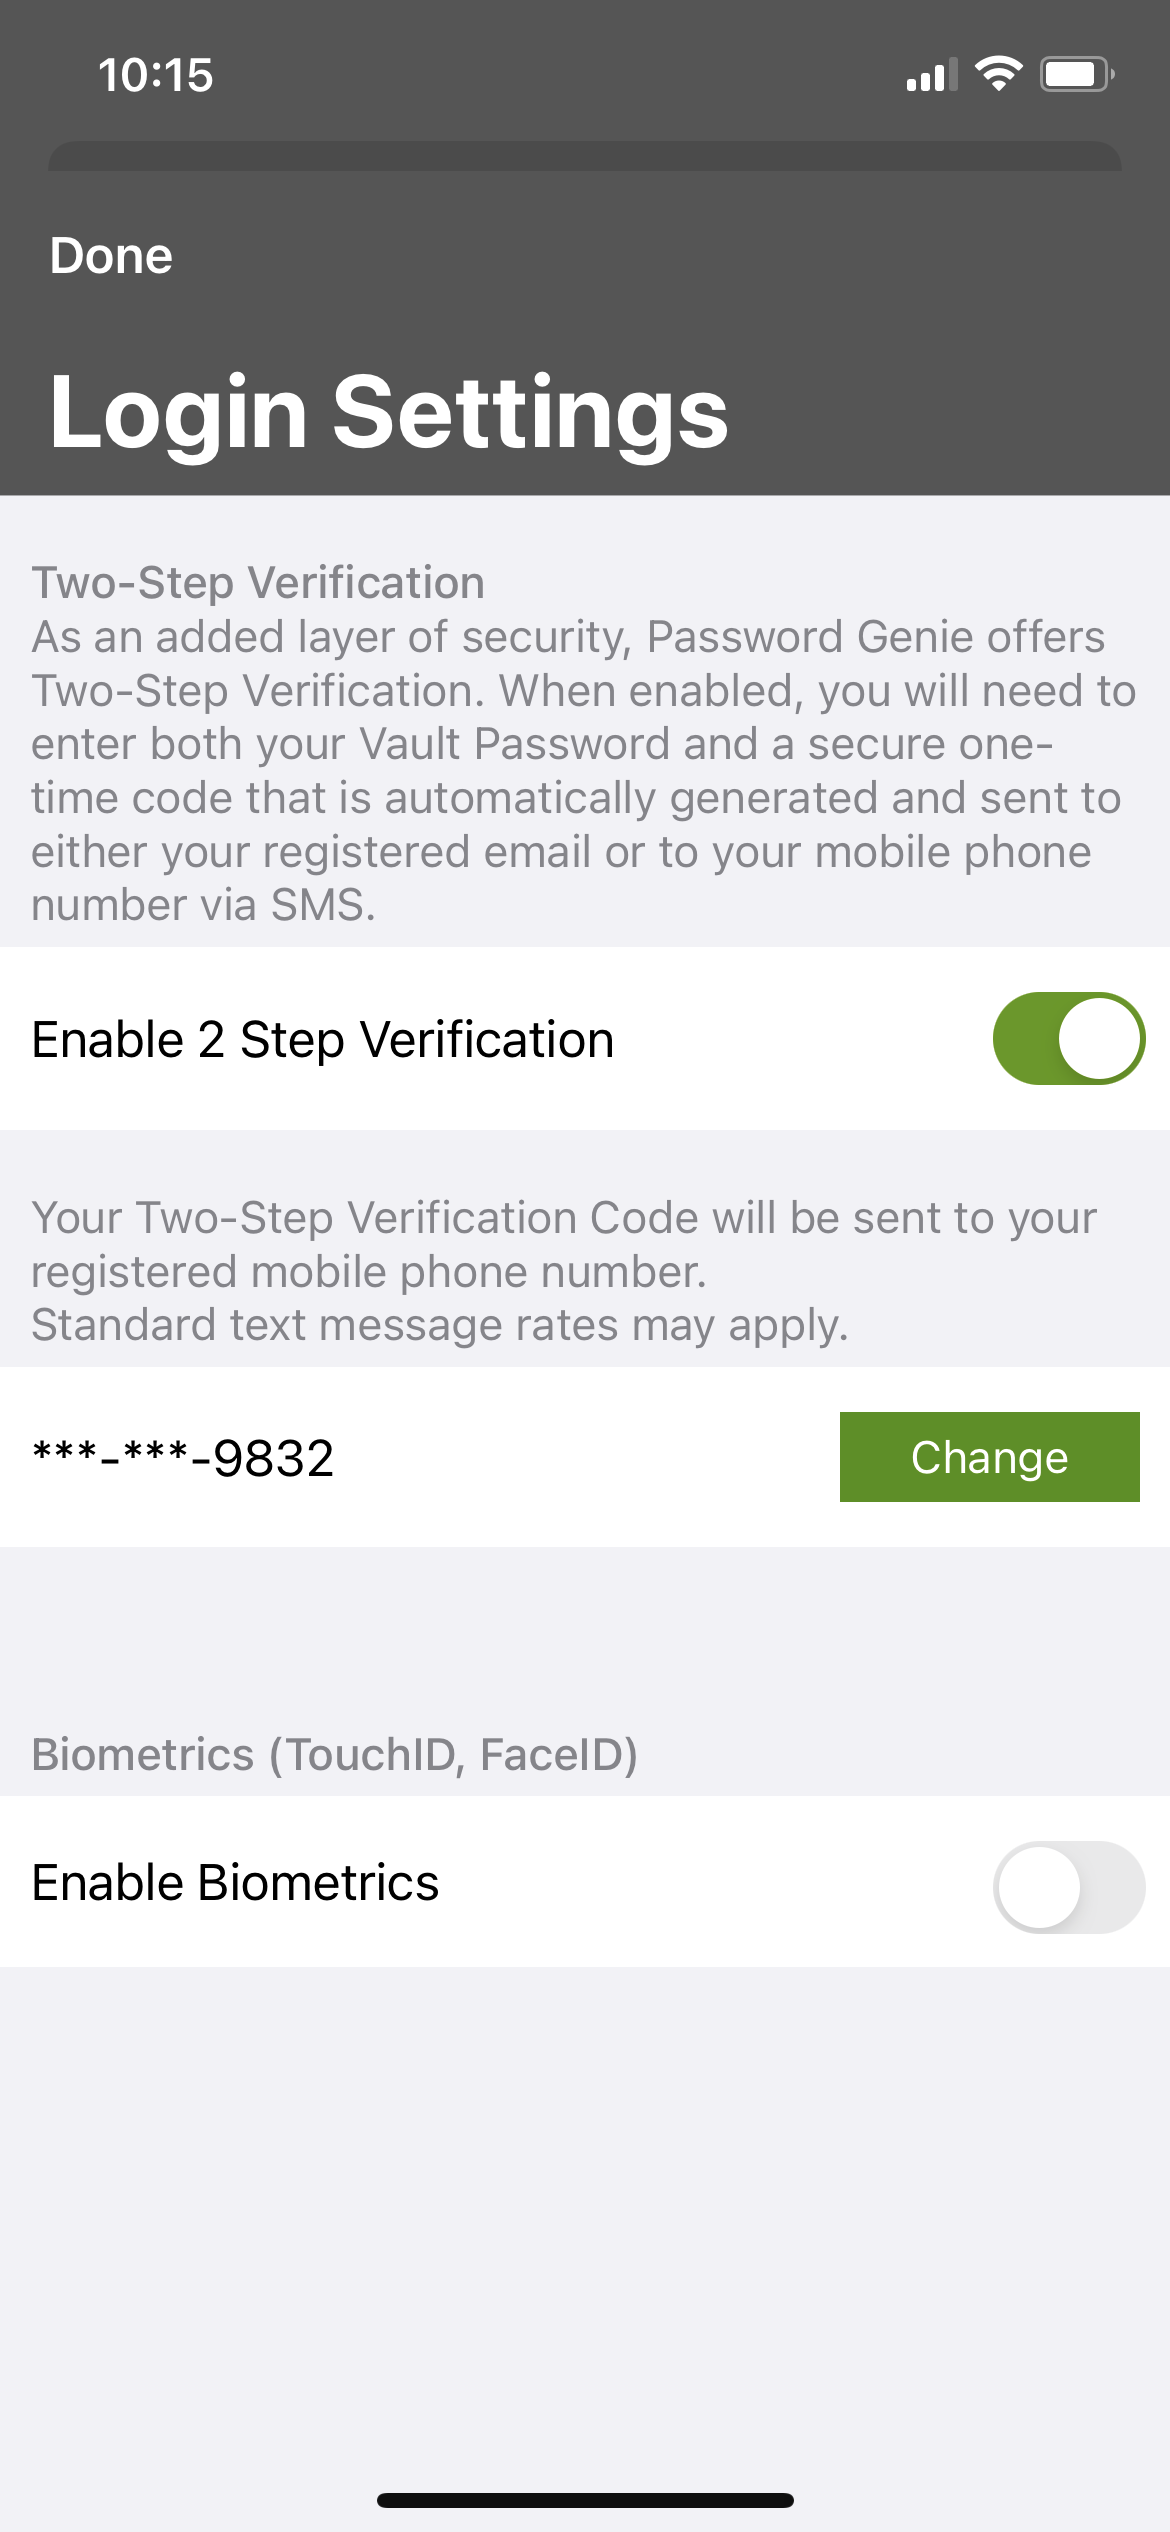
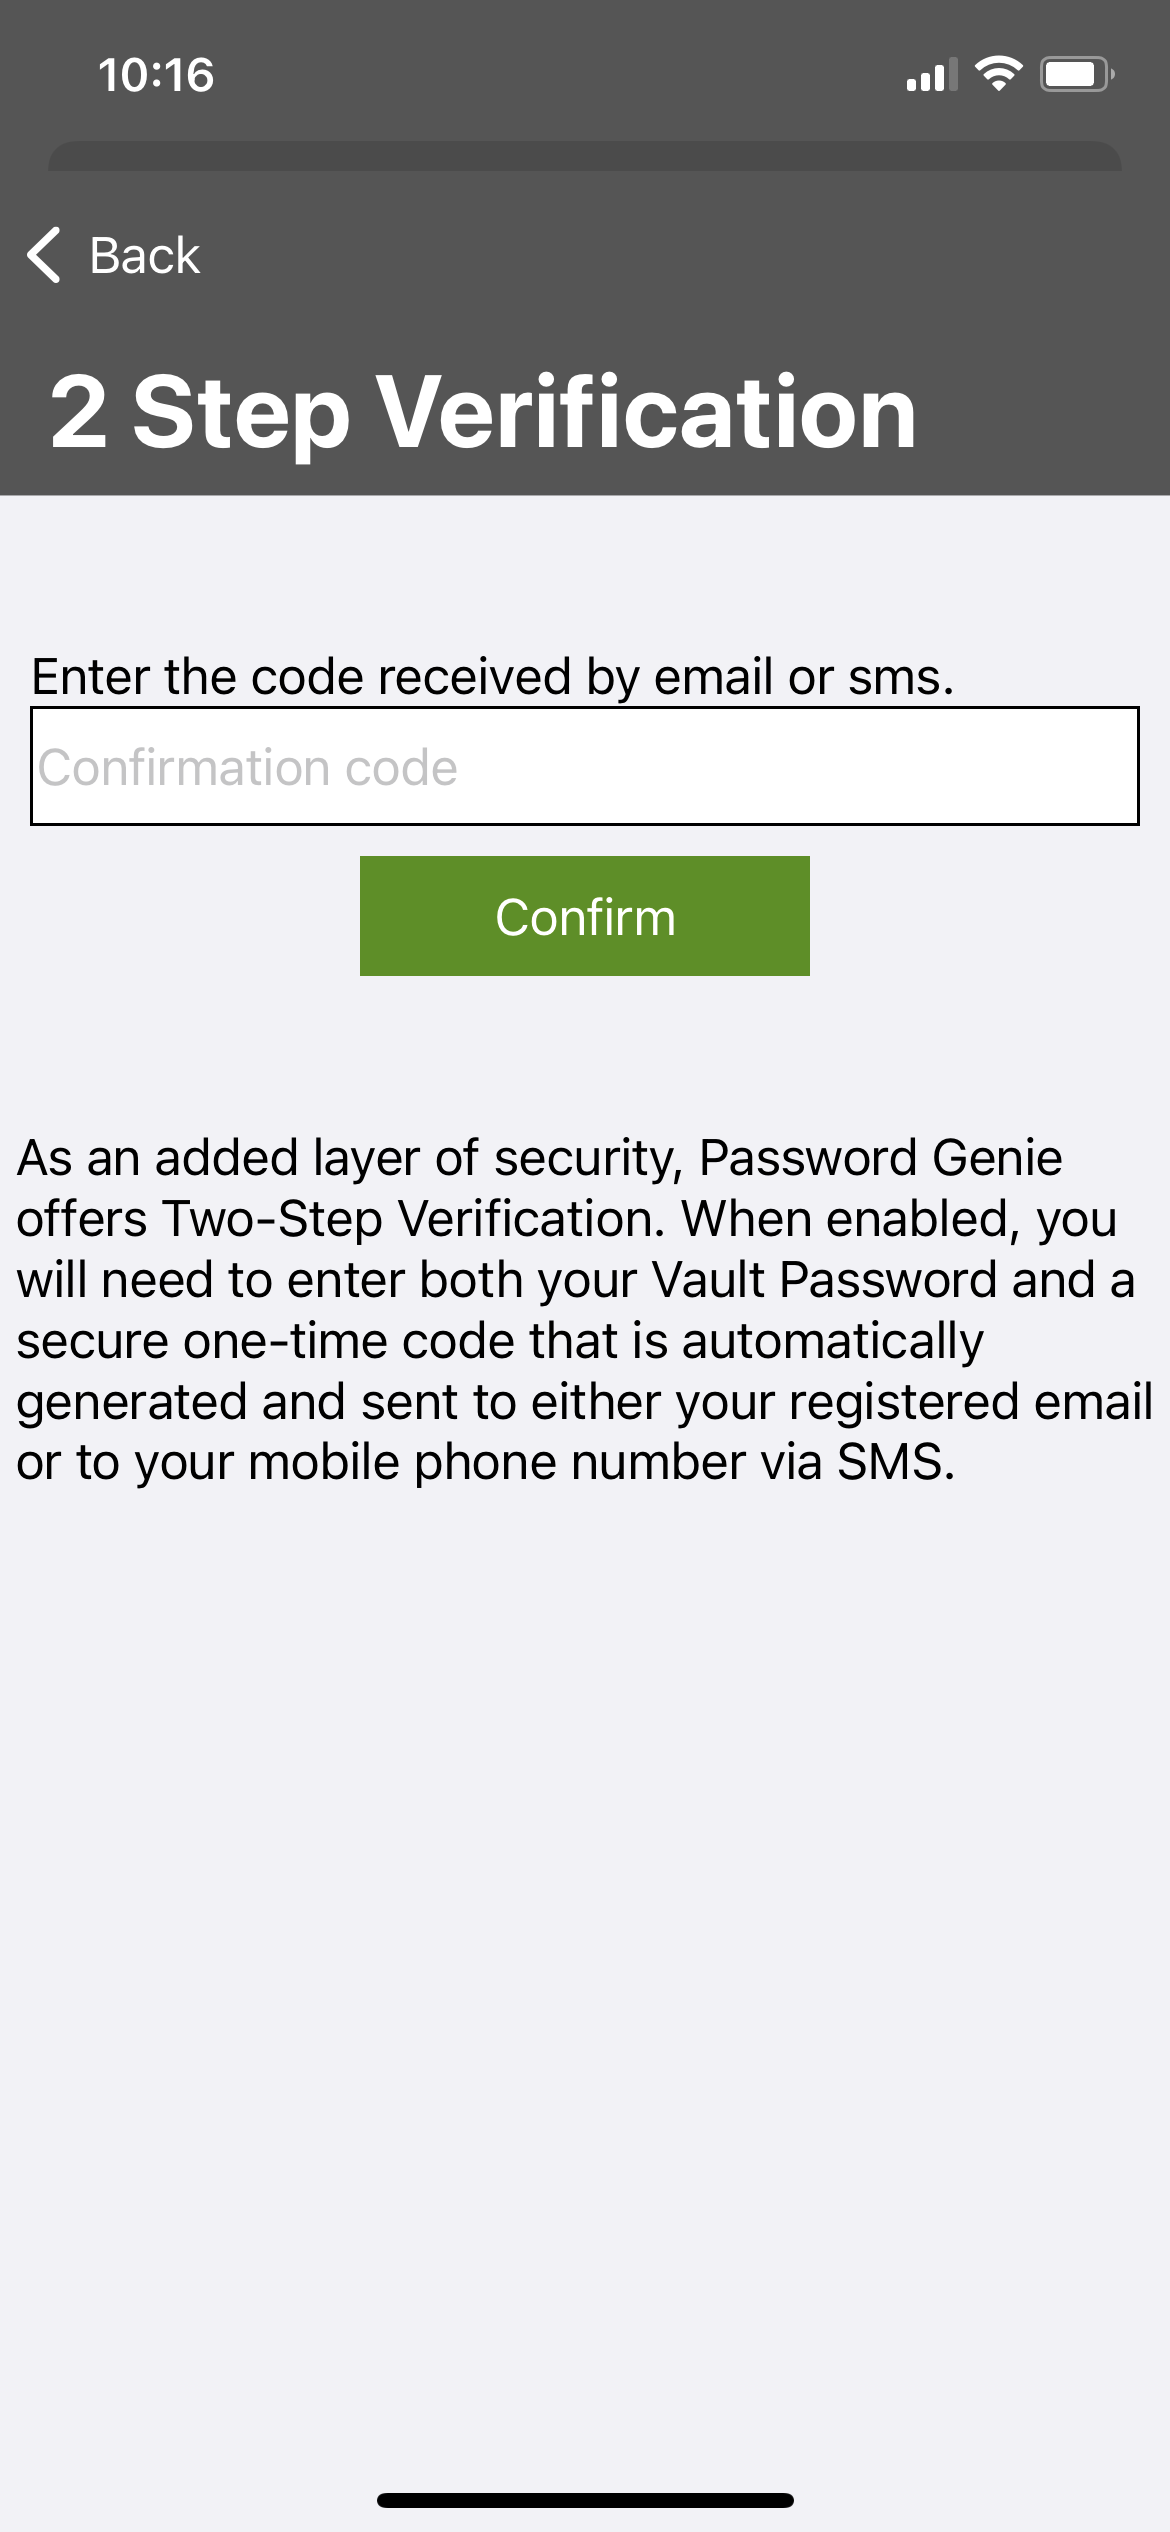
Open the Password Genie App and login to the Vault that you wish to enable 2FA on. Press on Settings then Login Settings.
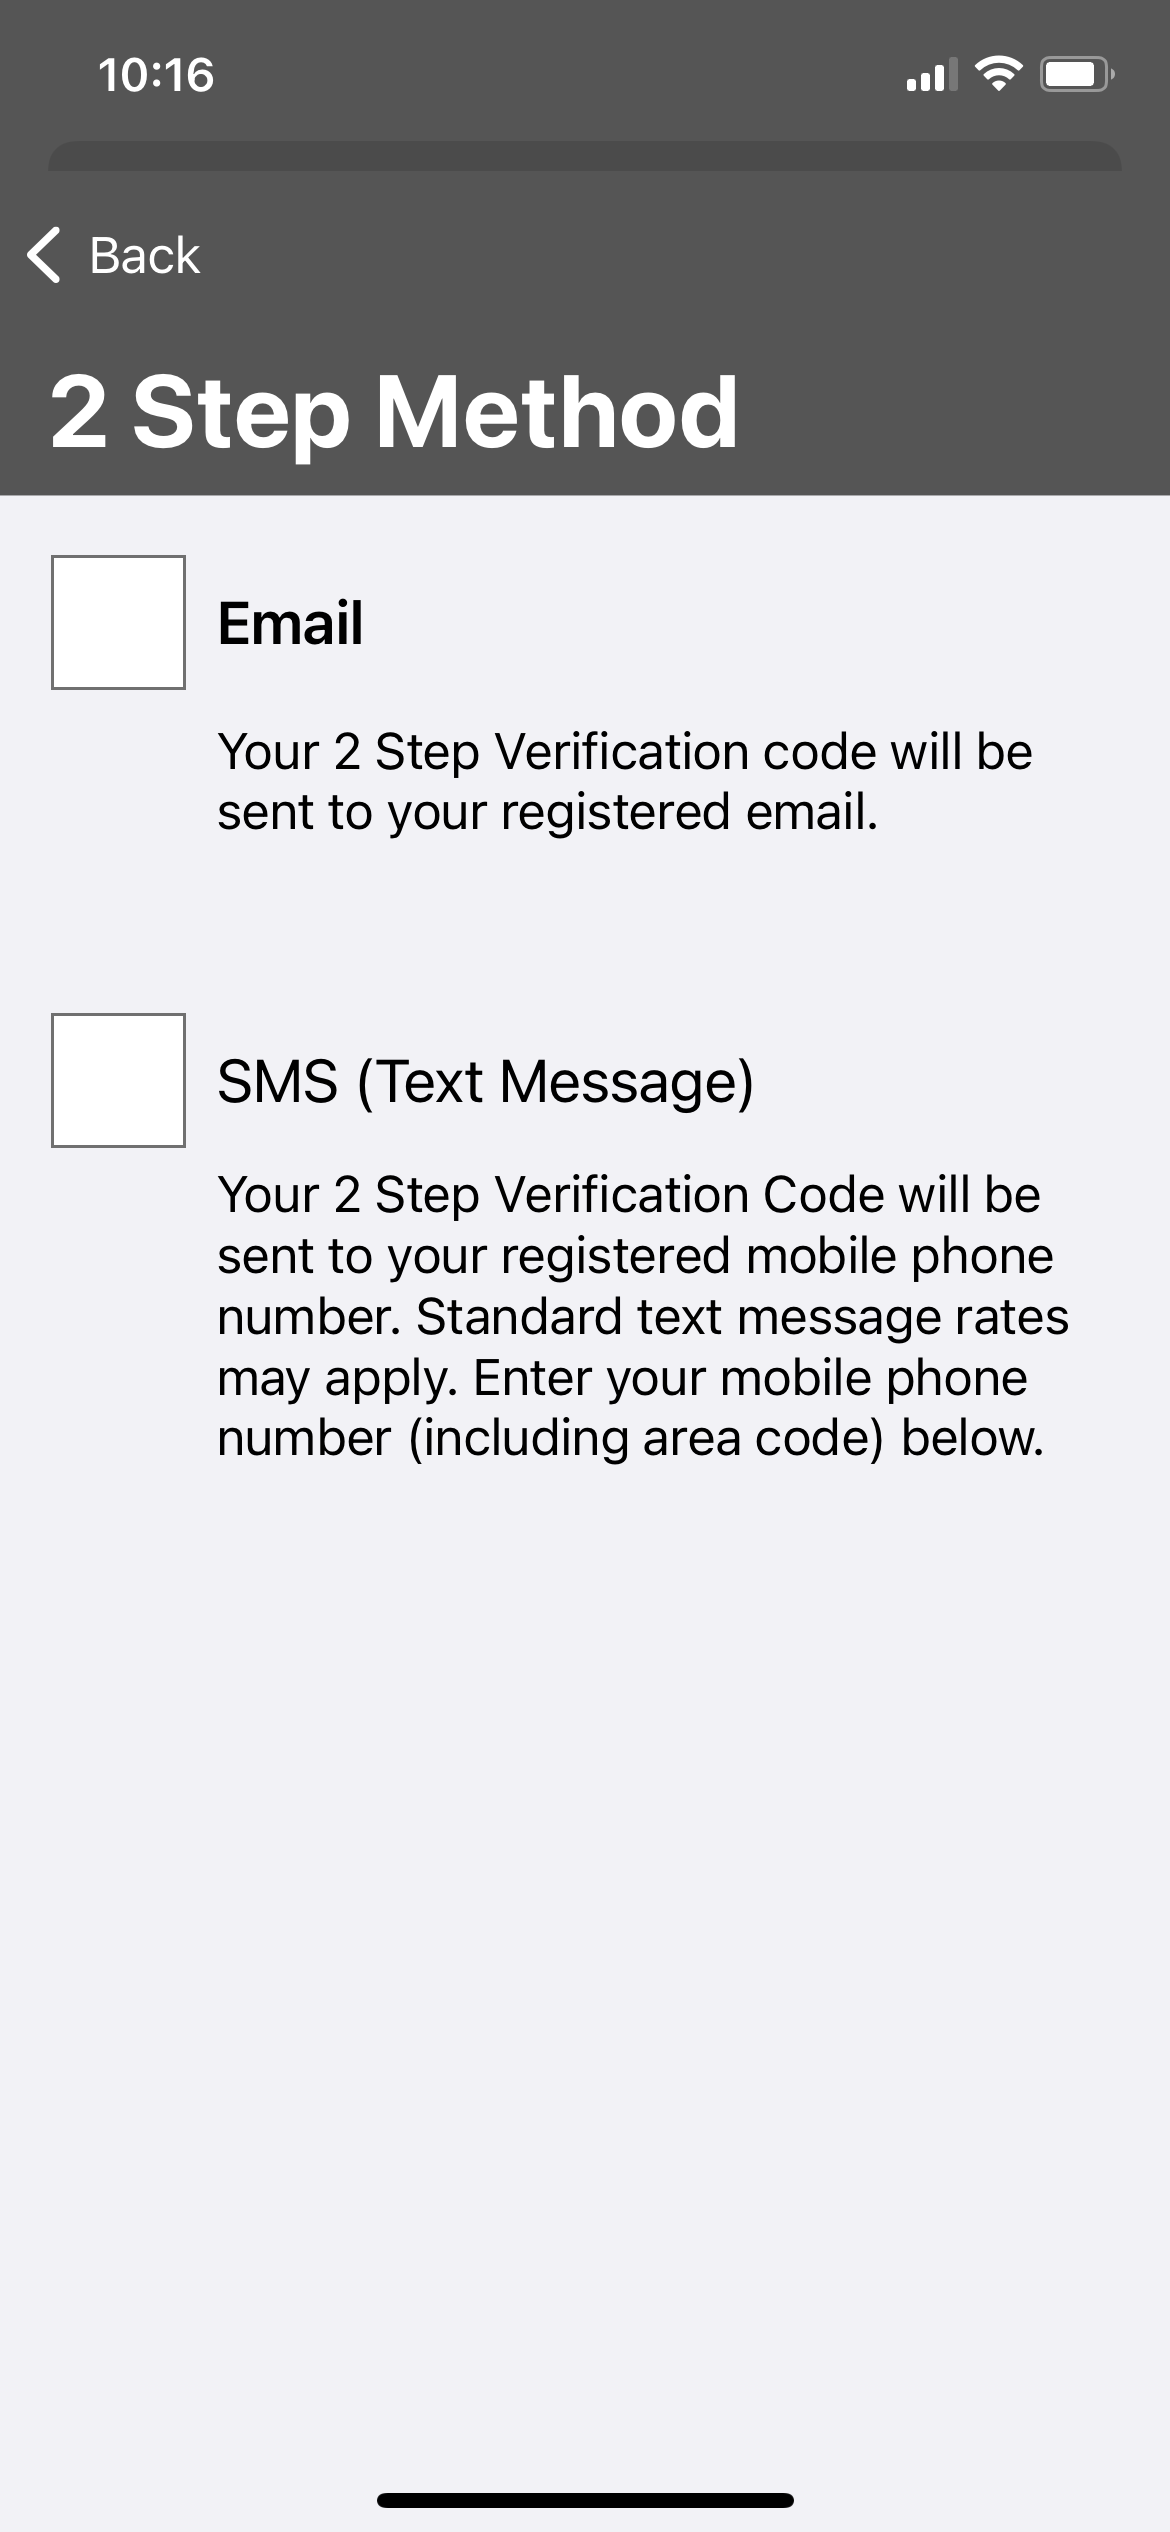
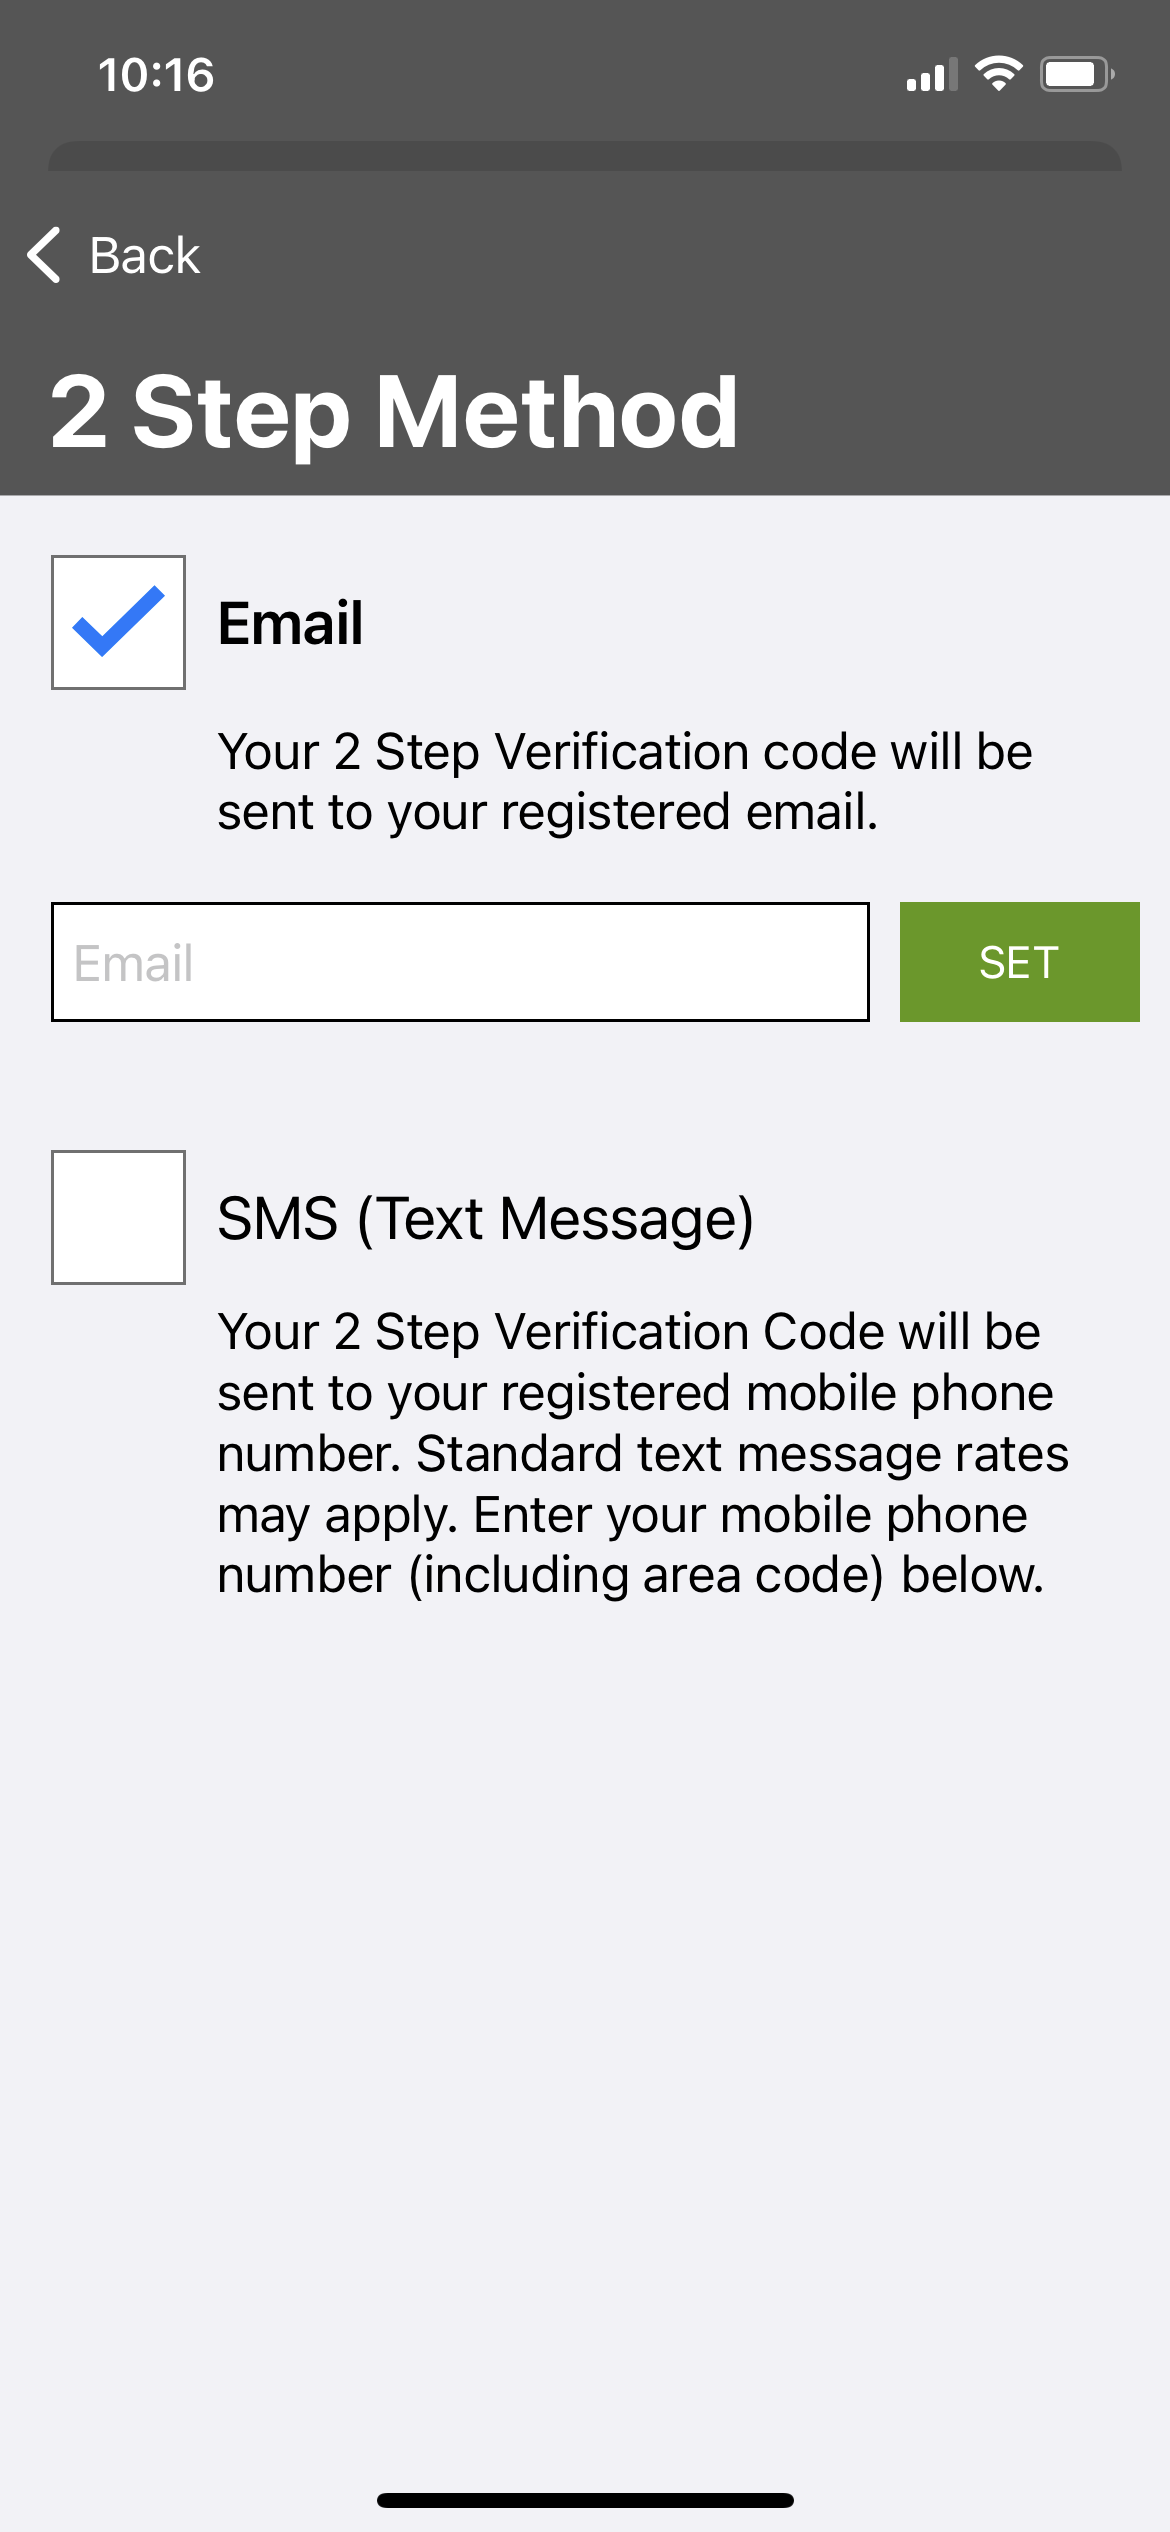
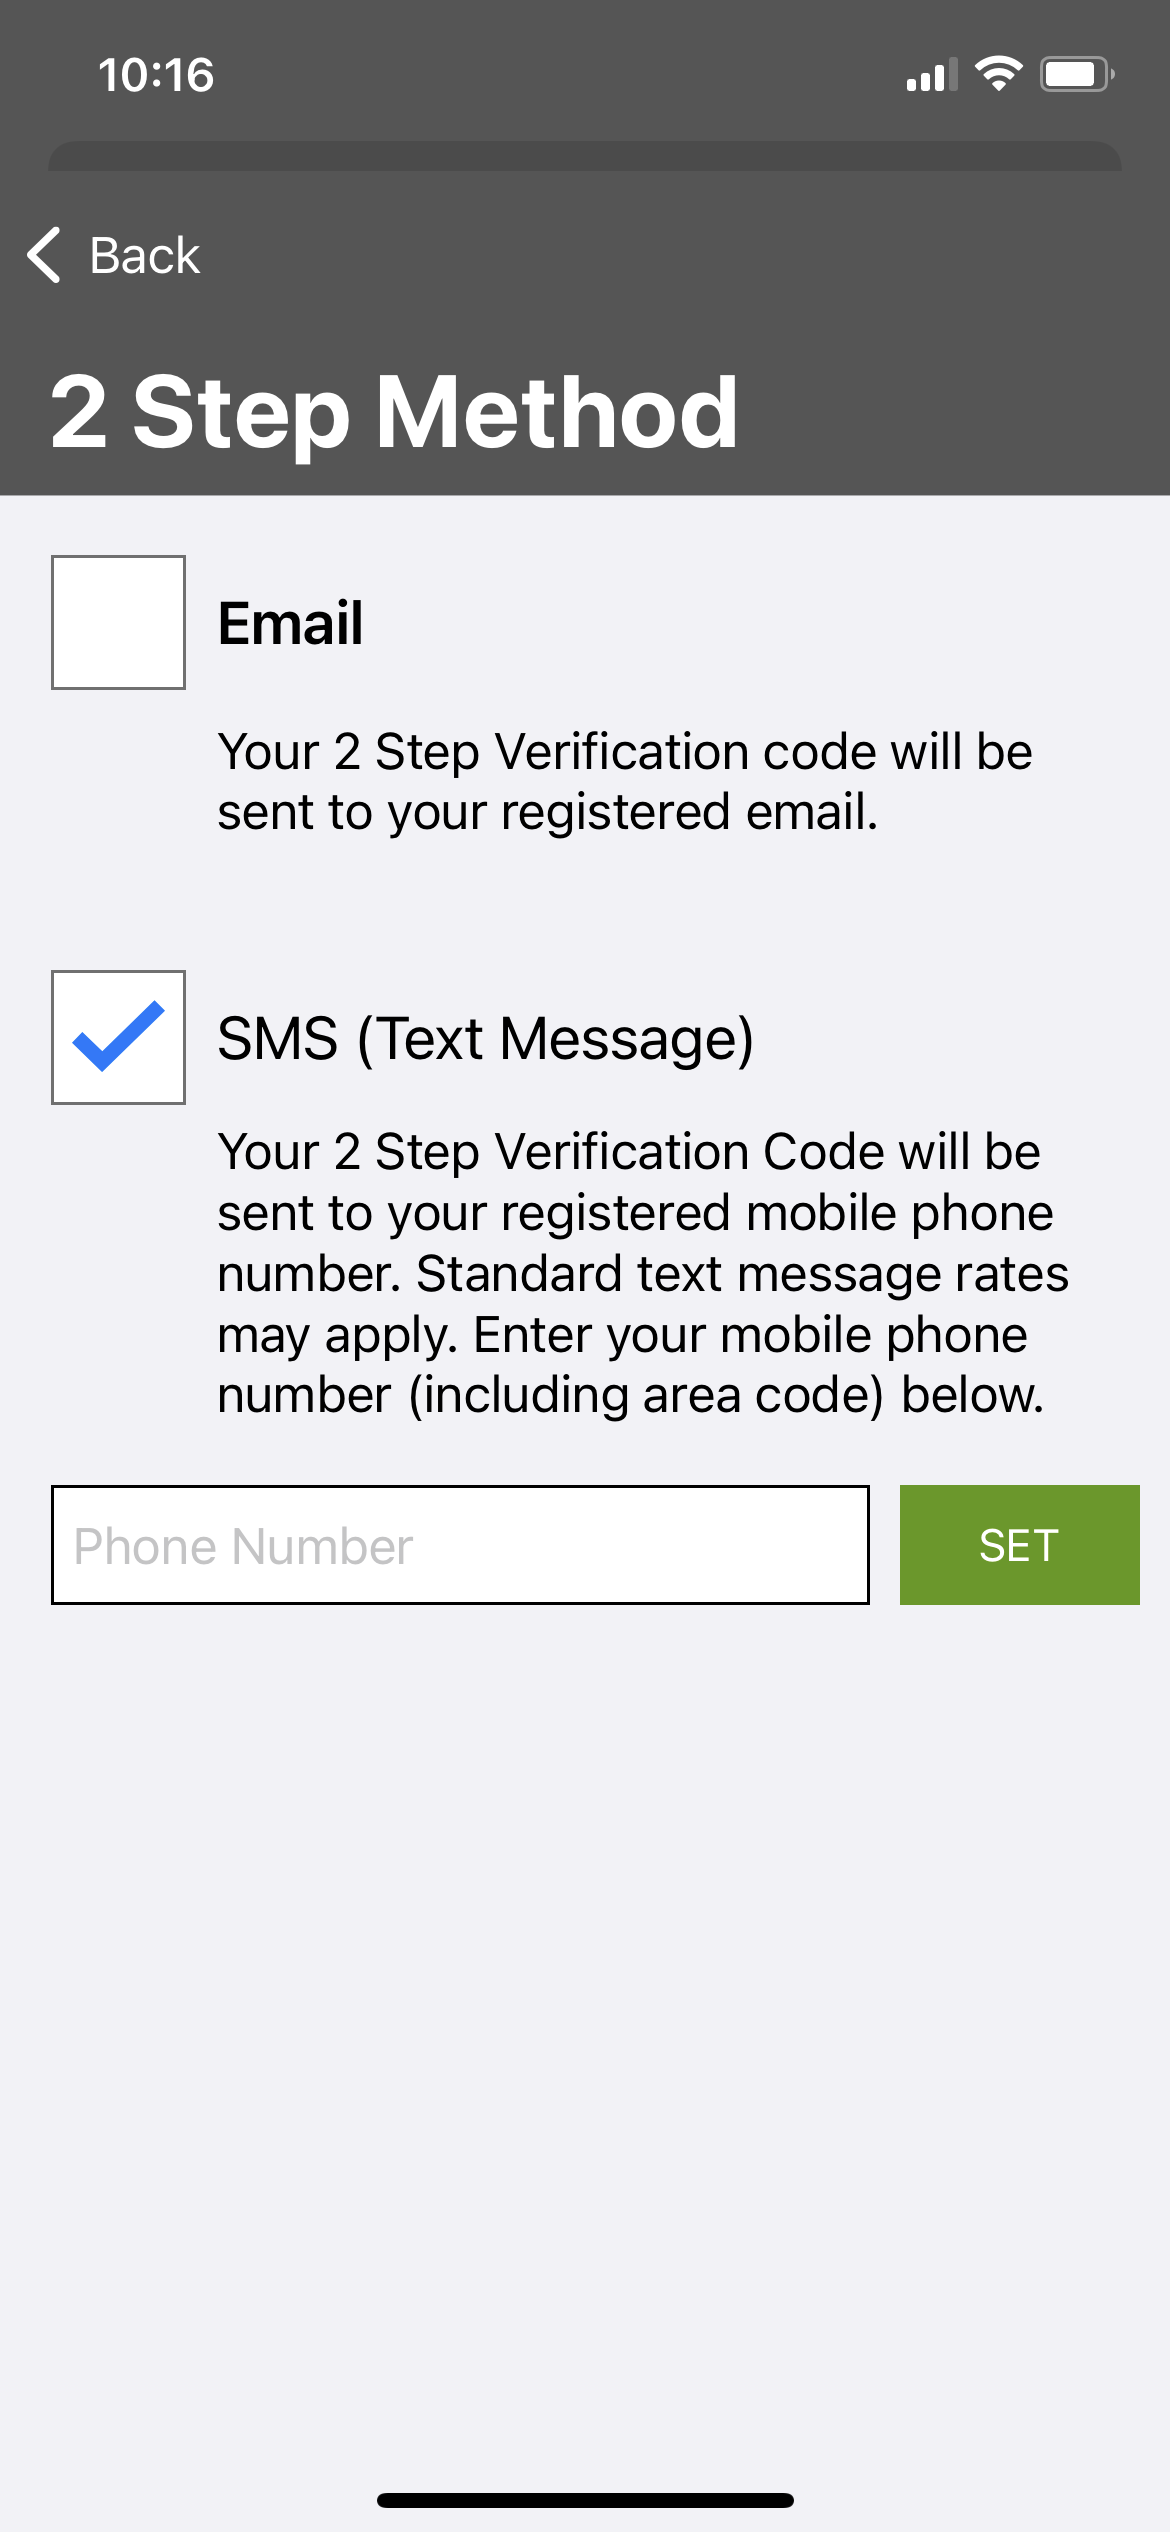
Under Two Factor Authentication, Press the toggle next to ‘Enable 2 Step Authentication to turn it on then choose either email of SMS by filling out the desired secondary authentication location then press Save.
Once the information is saved, you will receive a confirmation message at the specified address or phone number along with recovery code that can be used to disable 2FA if you ever lose access to the email or phone number.
Two Factor is now enabled and a verification code will be sent to the preferred lo email or phone whenever a login is performed on this Vault.
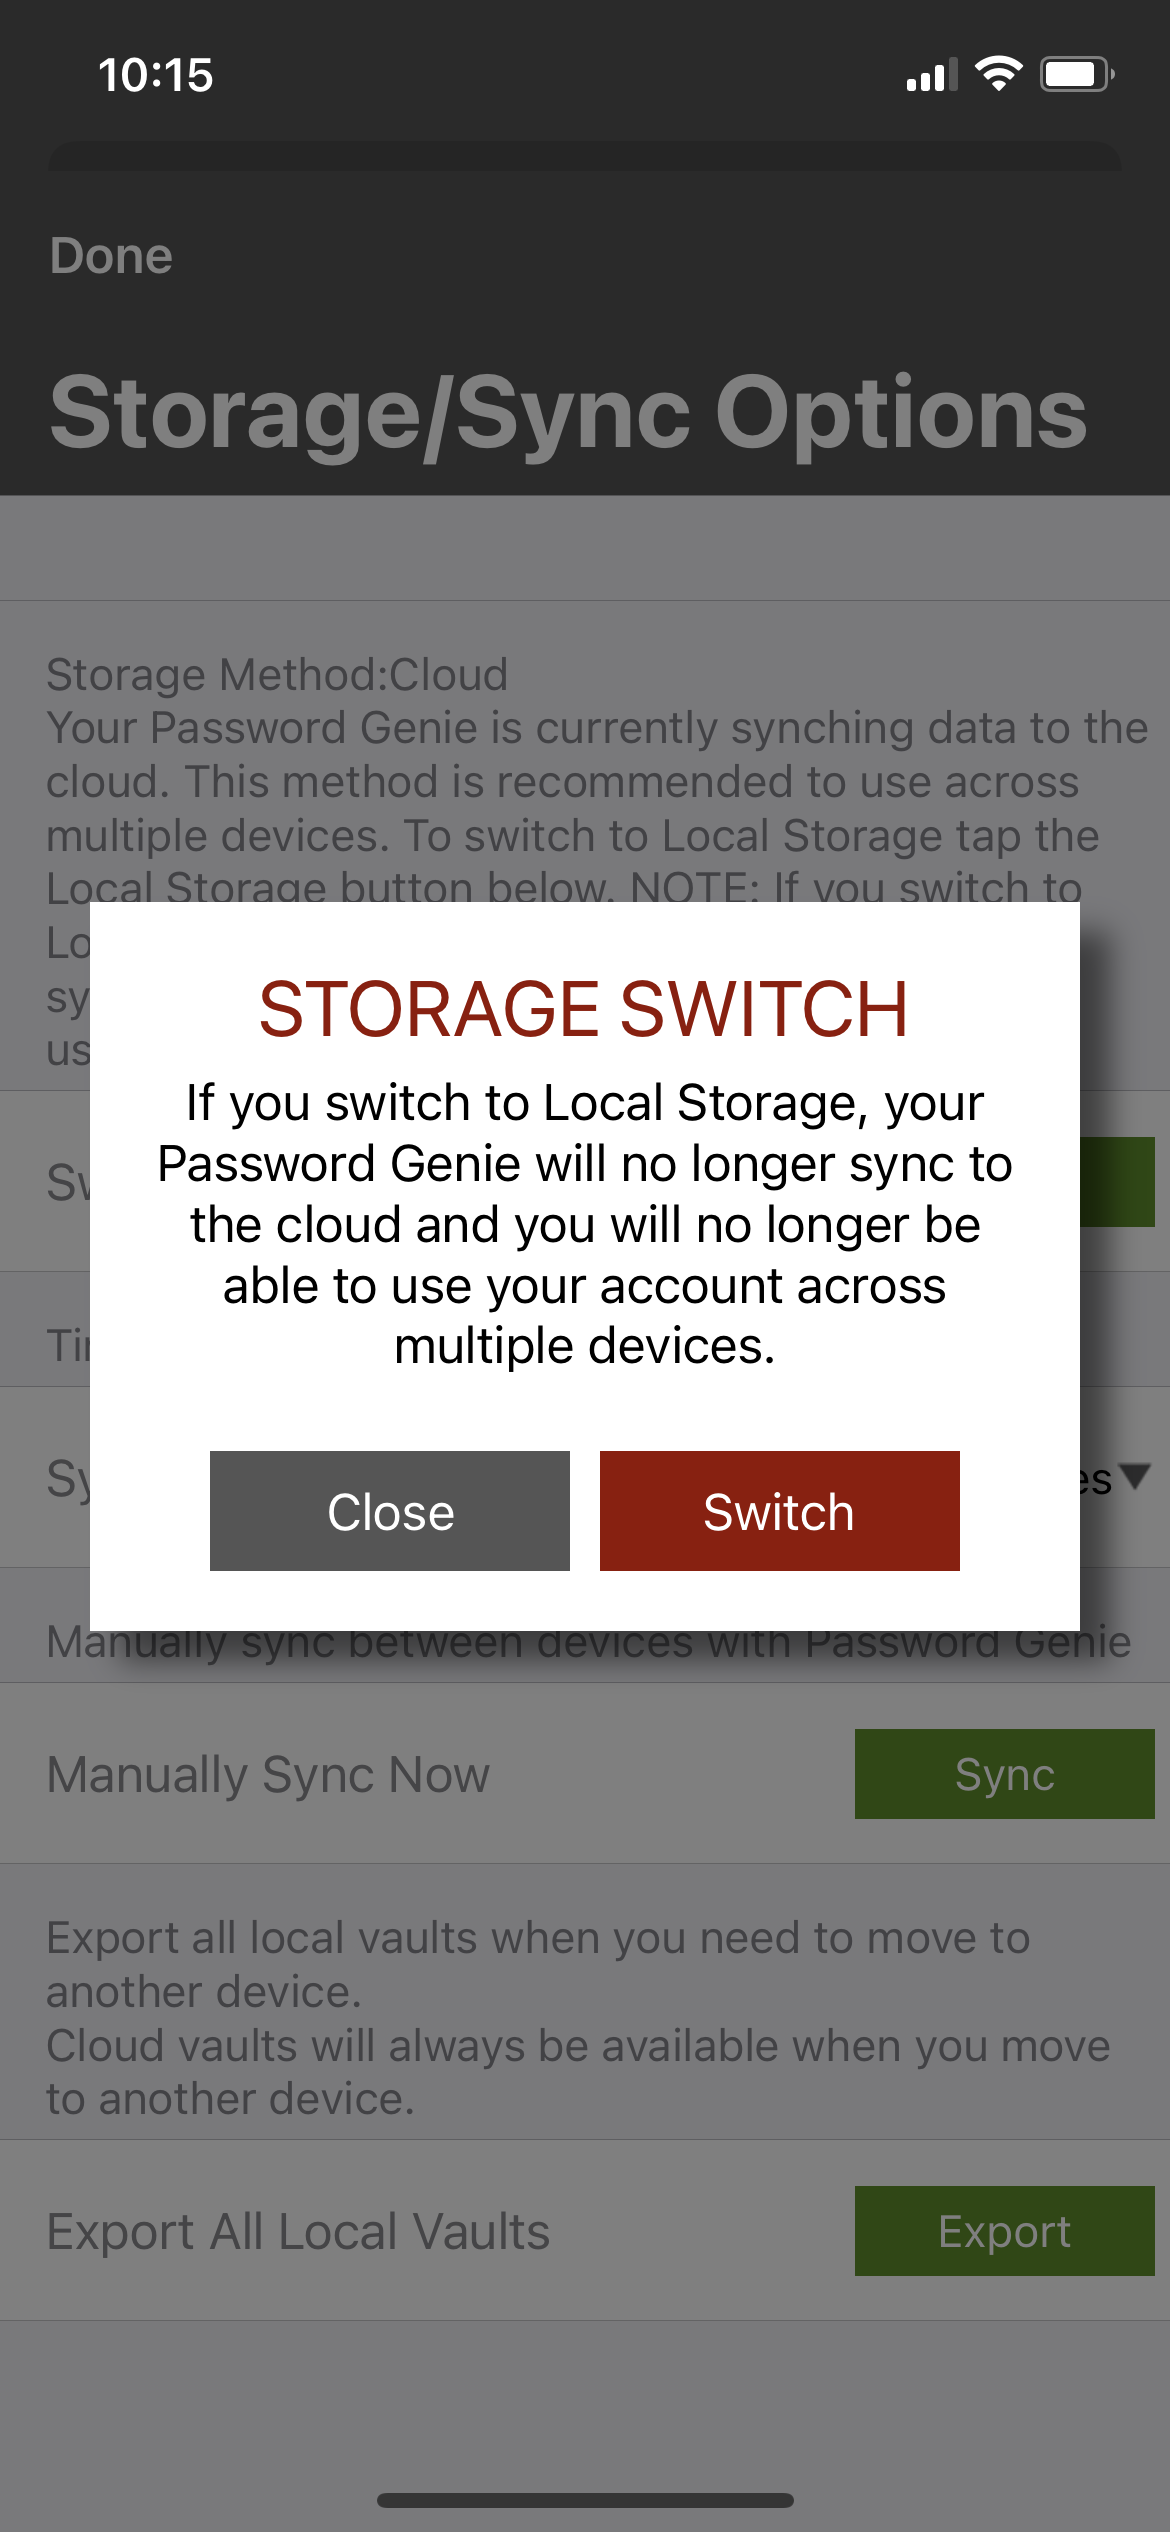
Login to the Vault that you wish to change the storage type and open the Password Genie app. Press on Settings, and then press Storage/Sync Options, then either ‘Switch to Local Storage’ or ‘Switch to Cloud Storage’ based on the type of Vault you are currently logged into. Once you press the ‘Switch Type’ button you will be given a confirmation message and then will then be logged out of your vault and when you log back in the storage type switch will be finalized.
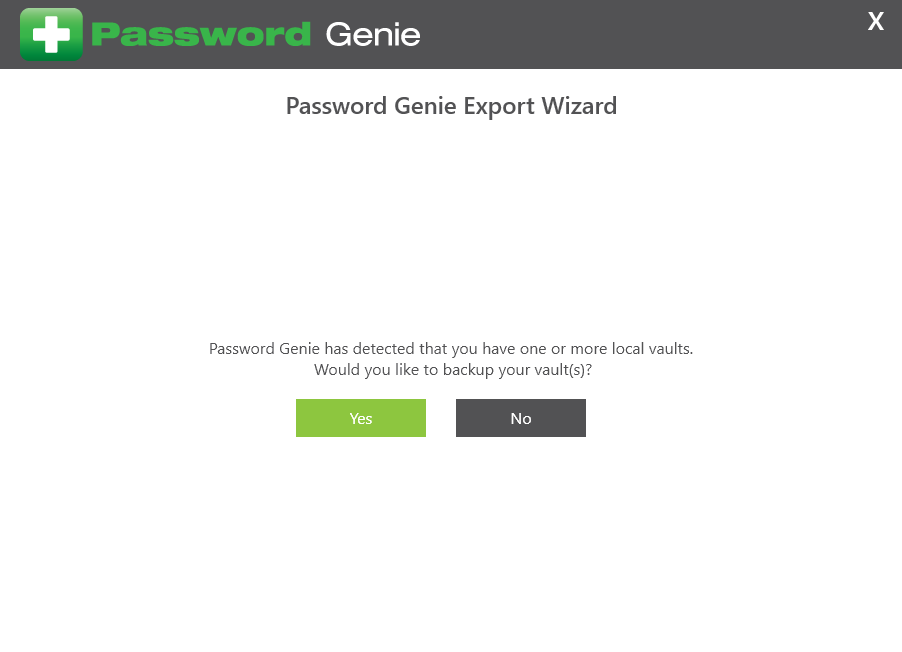
A Local Storage Password Genie Vault can be exported when you uninstall Password Genie. When the uninstall is initiated Password Genie will scan the existing Vaults to determine if any Vaults are stored locally. If they are, Password Genie will offer you the chance to export them if you plan on reinstalling Password Genie in the future.
Step 1. Uninstall Password Genie
Step 2. Click Yes when Password Genie asks if you would like to backup local vaults.
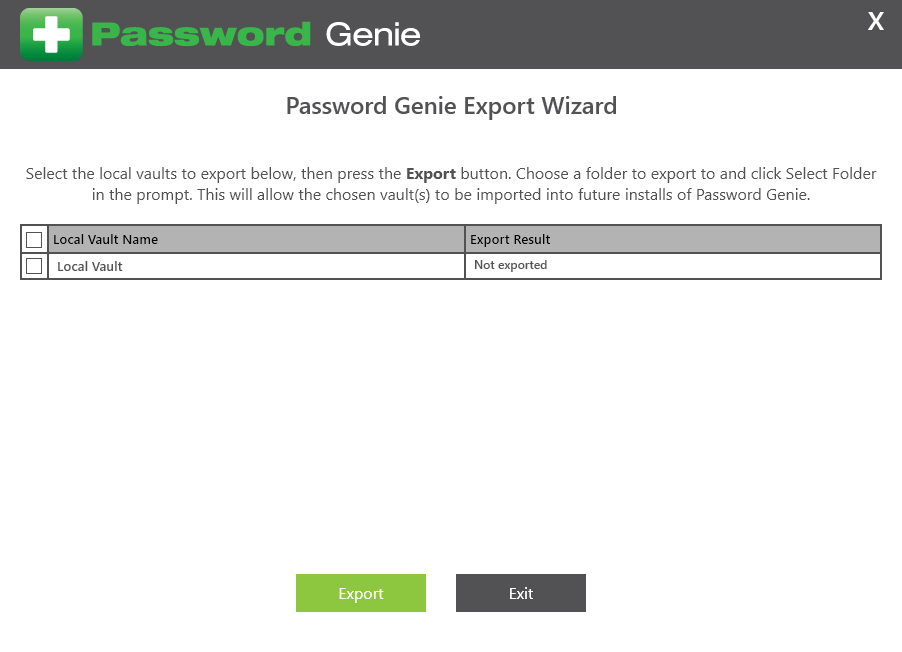
Step 3. Select the Local Vaults that you wish to export., then click Export.
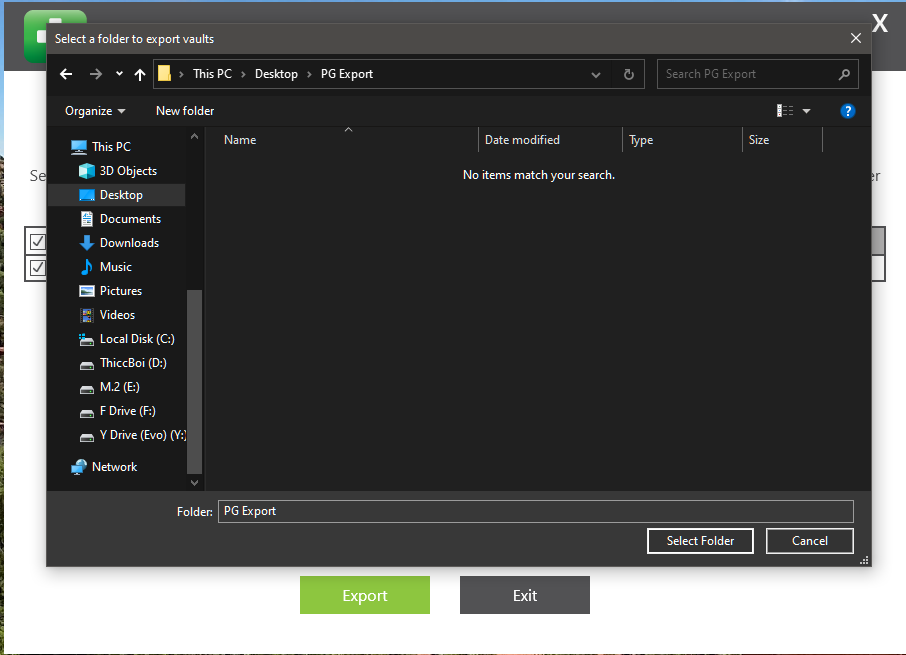
Step 4. Choose the location on your computer where you wish to export the Vaults to.
Step 5. When the ‘Export Result’ field changes to ‘Exported.’ It means that the Vaults have successfully been backed up and you can click Exit.
Step 6. The uninstallation will continue.

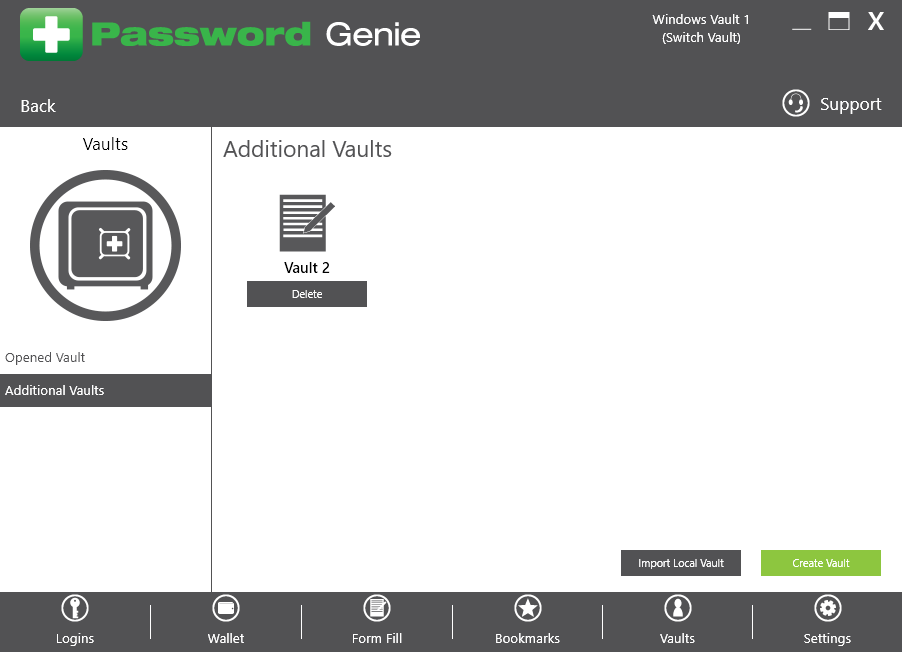
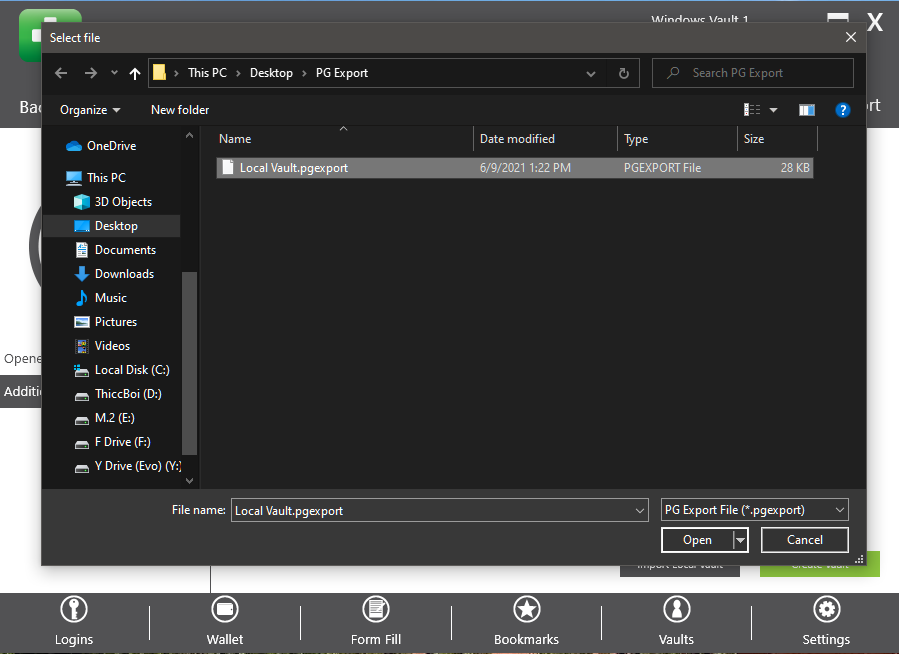
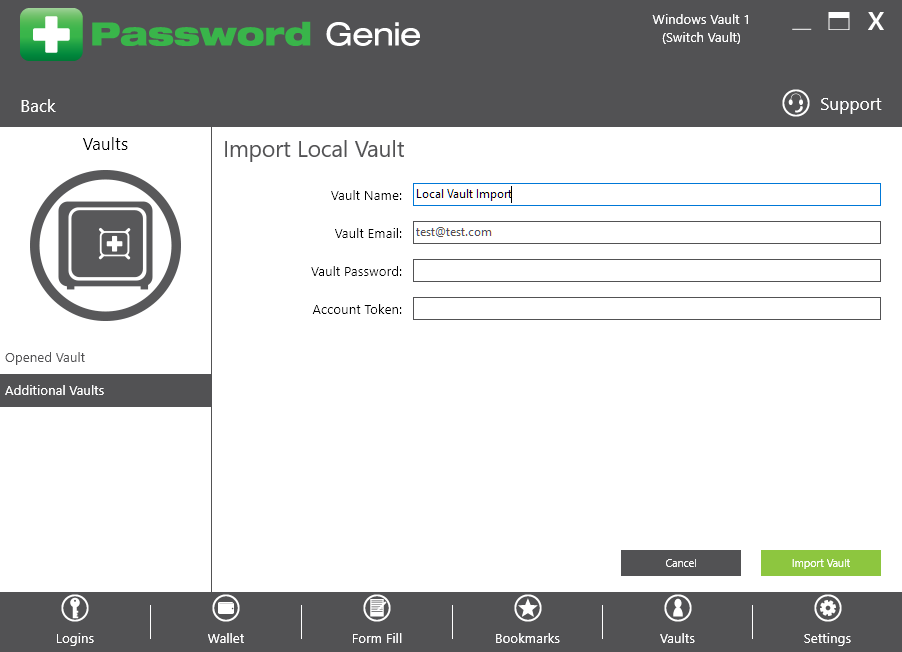
Open the Password Genie Console and Click Vaults, then ‘Import Local Vault’. Navigate to where you saved your previously exported Local Vault and select it.
The Vault Name and email will be pre-filled, and you will need to enter the correct Vault Password and Account Token. Once this has been filled out, click Import Vault.
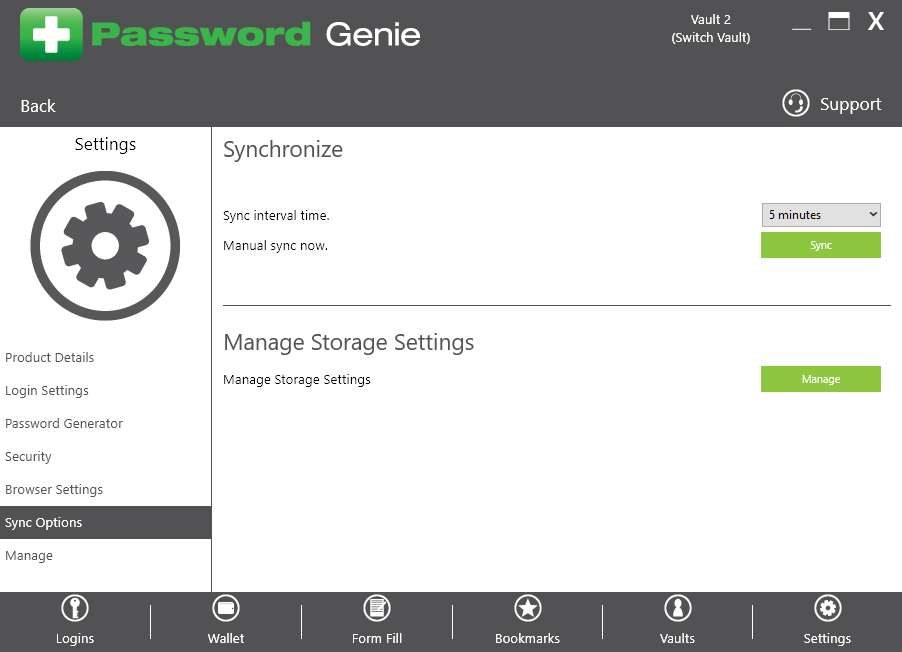
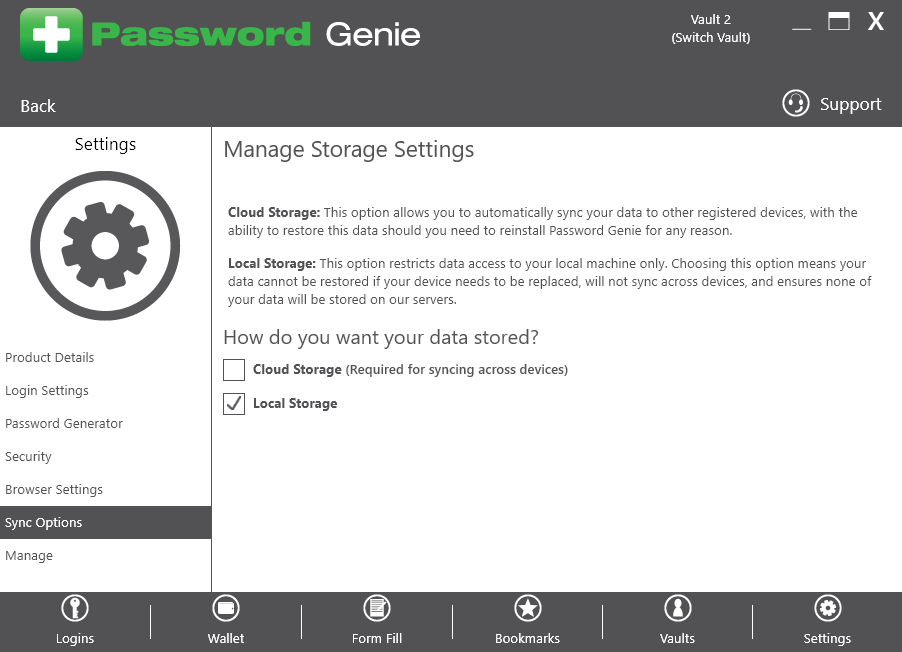
Login to the Vault that you wish to change the storage type and open the Password Genie console. Click on Settings, and then click Sync Options, then Manage Storage Settings. Here you can change which storage type your vault is set to by selecting either Cloud Storage or Local Storage. You will then be logged out of your vault and when you log back in the storage type switch will be finalized.