

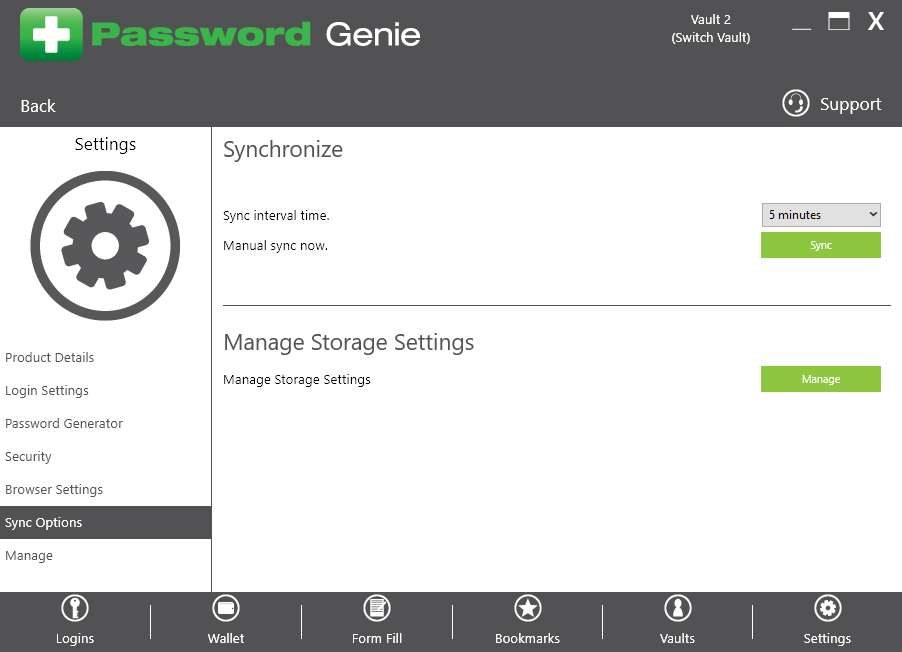
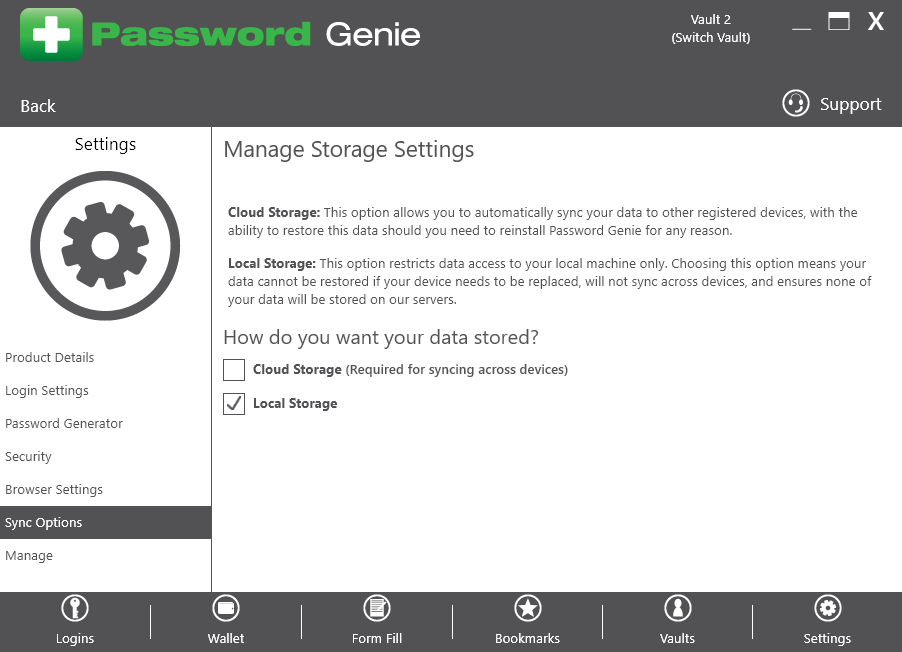
Login to the Vault that you wish to change the storage type and open the Password Genie console. Click on Settings, and then click Sync Options, then Manage Storage Settings. Here you can change which storage type your vault is set to by selecting either Cloud Storage or Local Storage. You will then be logged out of your vault and when you log back in the storage type switch will be finalized.
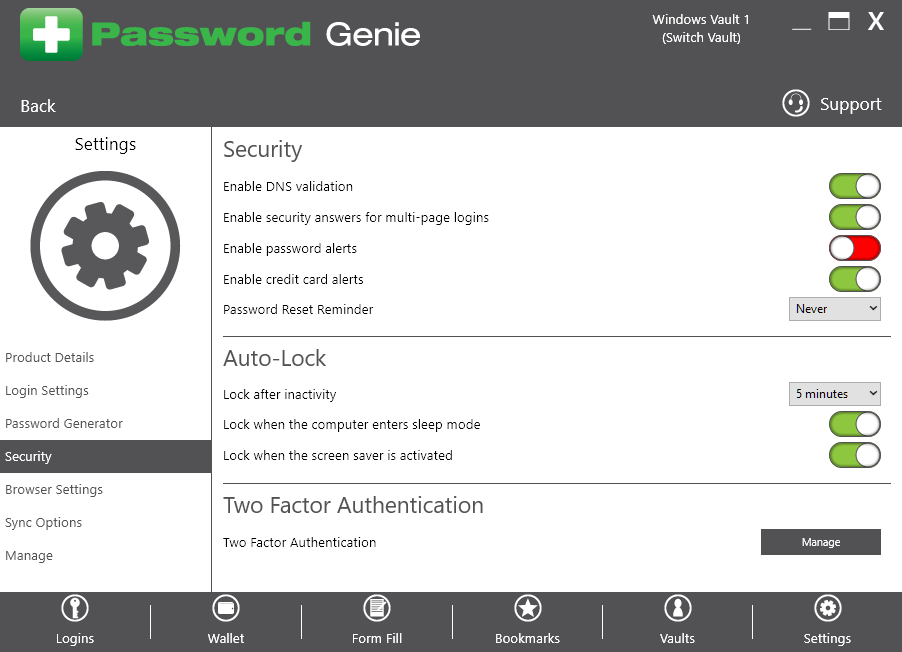
Open the PG Console and login to the Vault that you wish to enable 2FA on. Click on Settings then Security. Once there click ‘Manage’ under Two Factor Authentication.
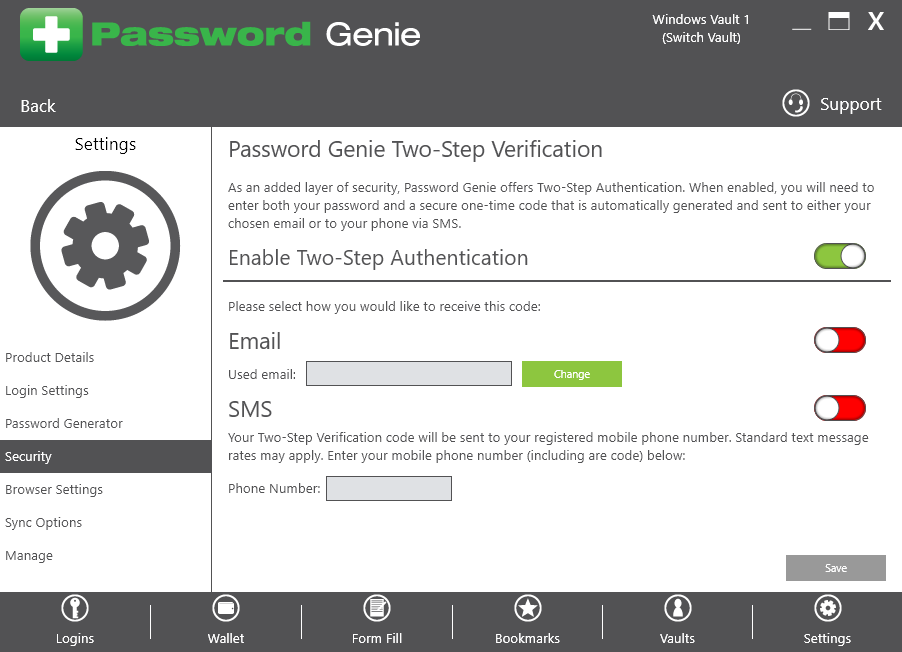
Under Two Factor Authentication, Click the toggle next to ‘Enable Two-Step Authentication to turn it on then choose either email of SMS by filling out the desired secondary authentication location then click Save.
Once the information is saved, you will receive a confirmation message at the specified address or phone number along with recovery code that can be used to disable 2FA if you ever lose access to the email or phone number.
Two Factor is now enabled and a verification code will be sent to the preferred lo email or phone whenever a login is performed on this Vault.
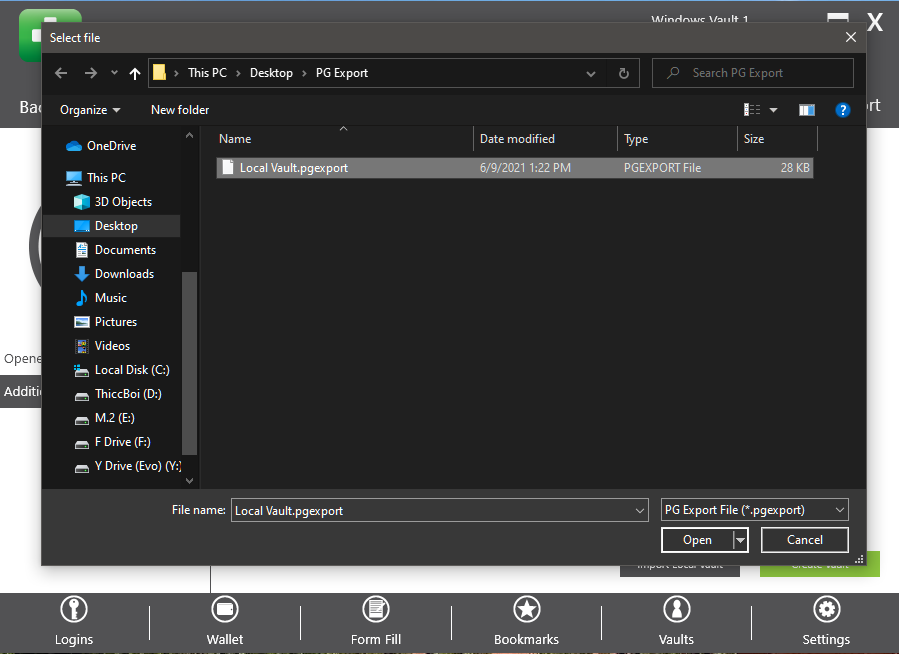
Open the Password Genie Console and Click Vaults, then ‘Import Local Vault’. Navigate to where you saved your previously exported Local Vault and select it.
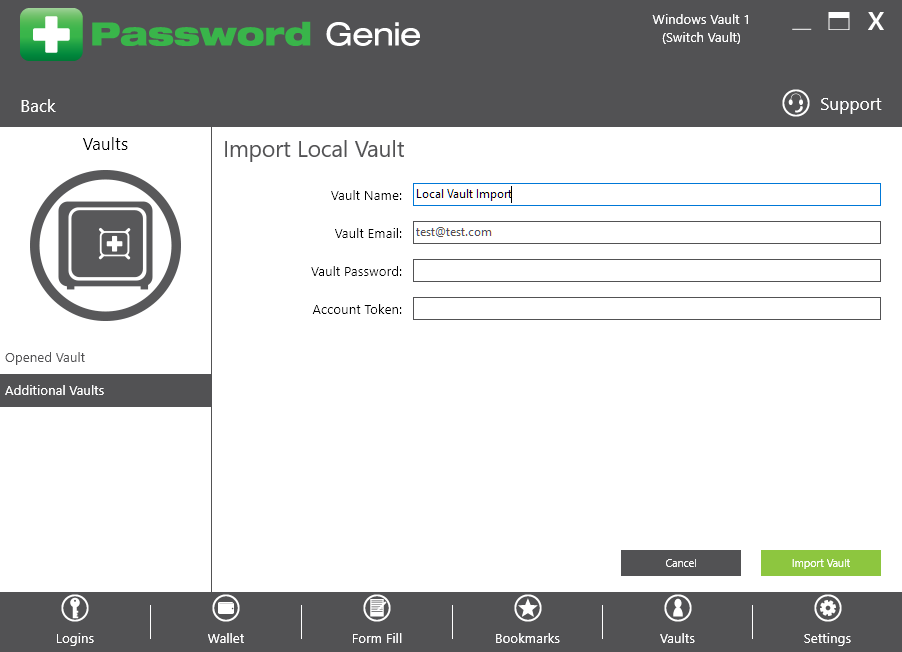
The Vault Name and email will be pre-filled, and you will need to enter the correct Vault Password and Account Token. Once this has been filled out, click Import Vault.
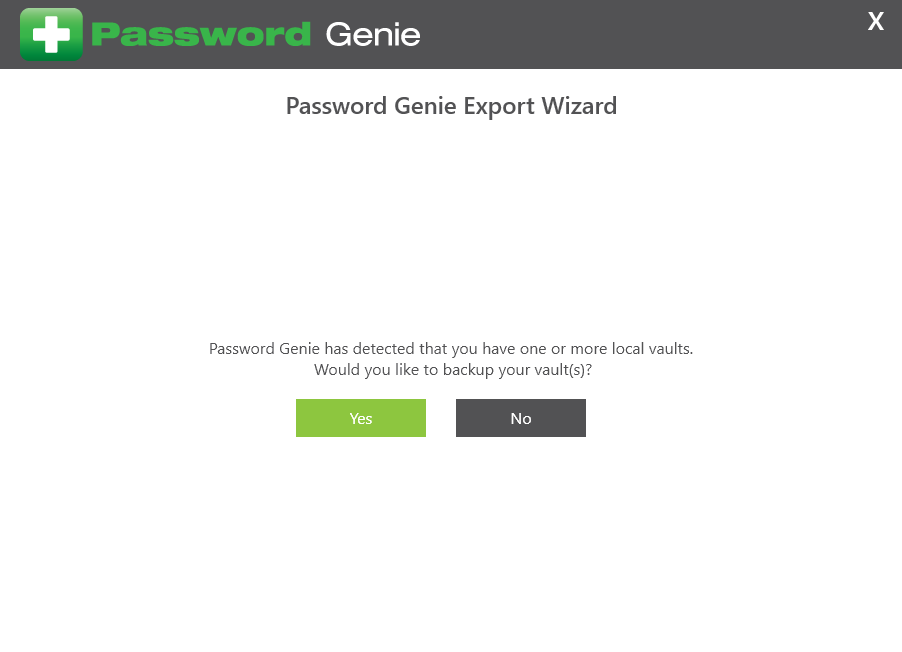
A Local Storage Password Genie Vault can be exported when you uninstall Password Genie. When the uninstall is initiated Password Genie will scan the existing Vaults to determine if any Vaults are stored locally. If they are, Password Genie will offer you the chance to export them if you plan on reinstalling Password Genie in the future.
Step 1. Uninstall Password Genie
Step 2. Click Yes when Password Genie asks if you would like to backup local vaults.
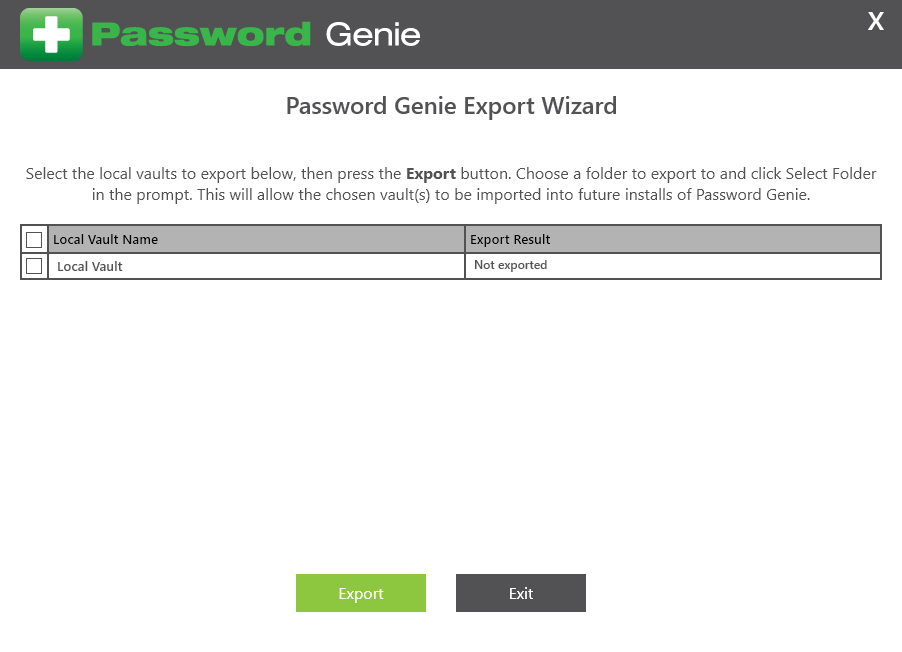
Step 3. Select the Local Vaults that you wish to export., then click Export.
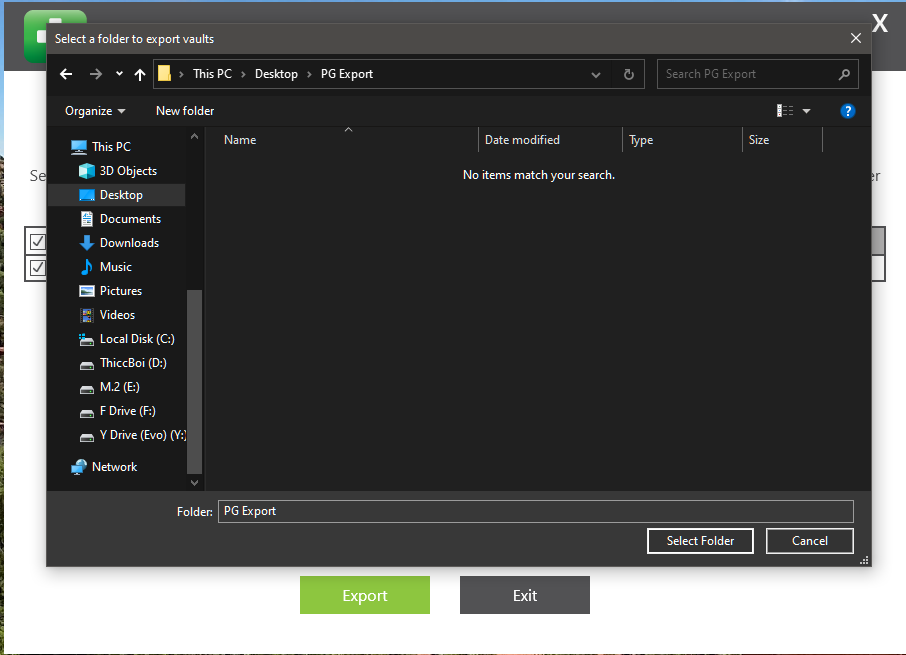
Step 4. Choose the location on your computer where you wish to export the Vaults to.
Step 5. When the ‘Export Result’ field changes to ‘Exported.’ It means that the Vaults have successfully been backed up and you can click Exit.
Step 6. The uninstallation will continue.

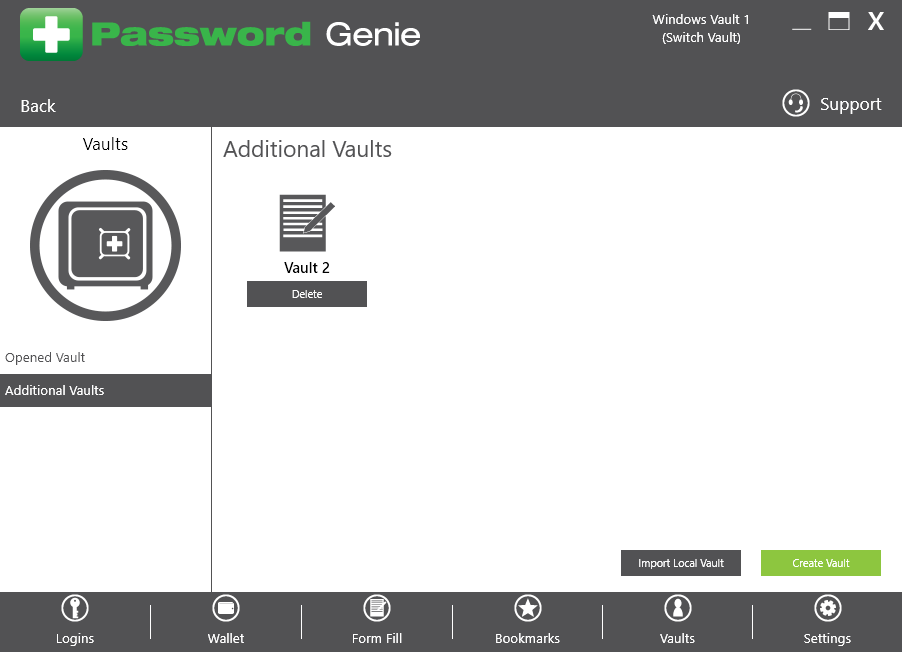
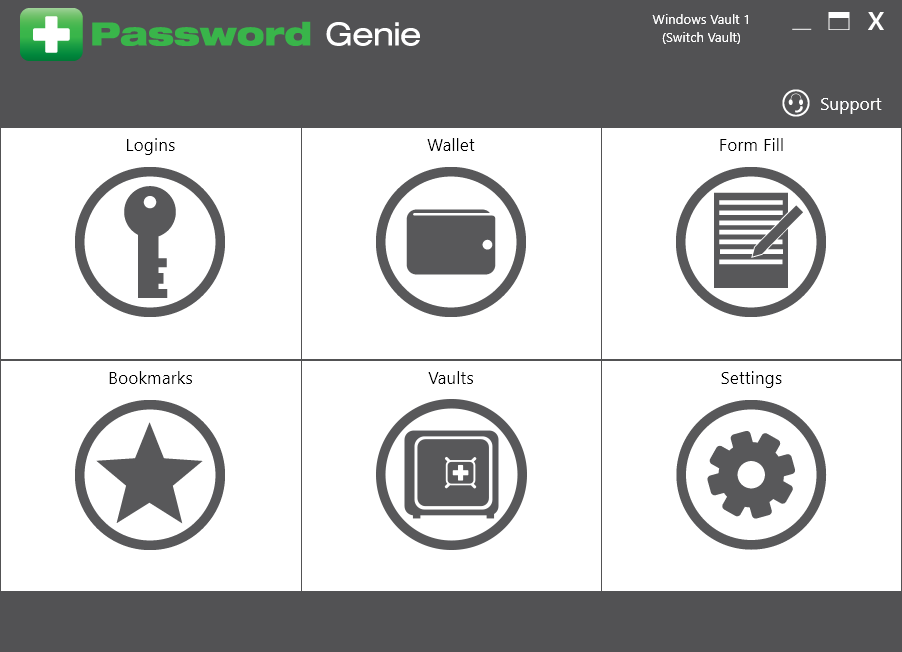
Open the Password Genie console and click Vaults, then Additional Vaults and finally ‘Create Vault’.
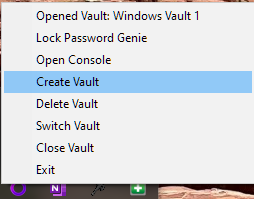
Alternatively, Right-Click the tray icon on the taskbar and select ‘Create Vault’.
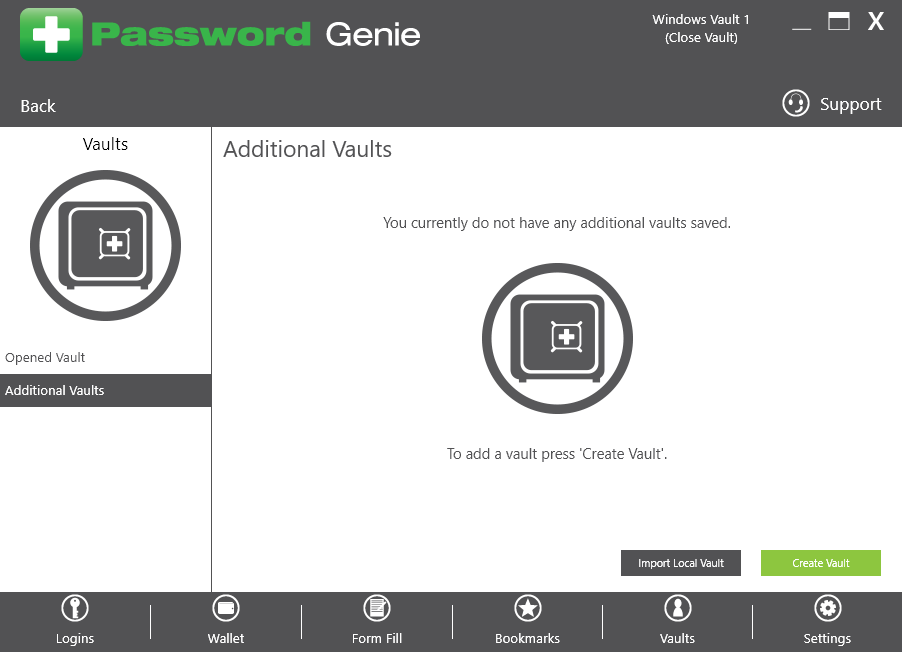
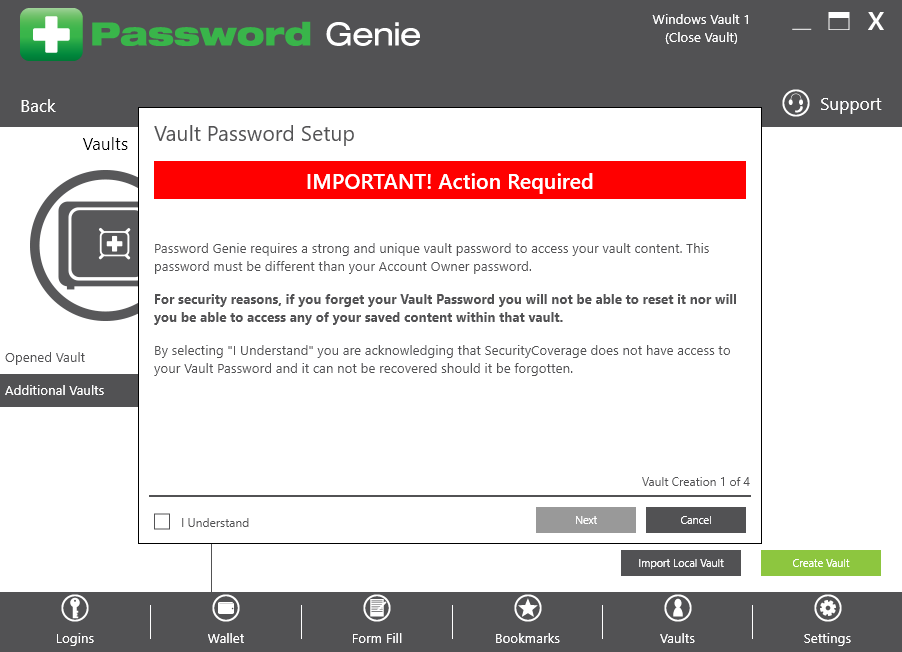
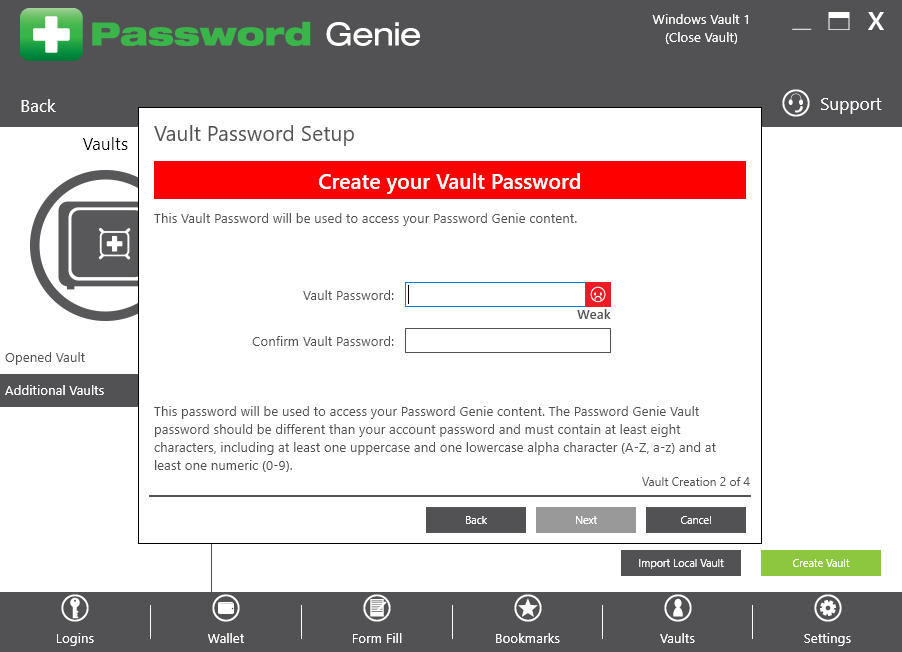
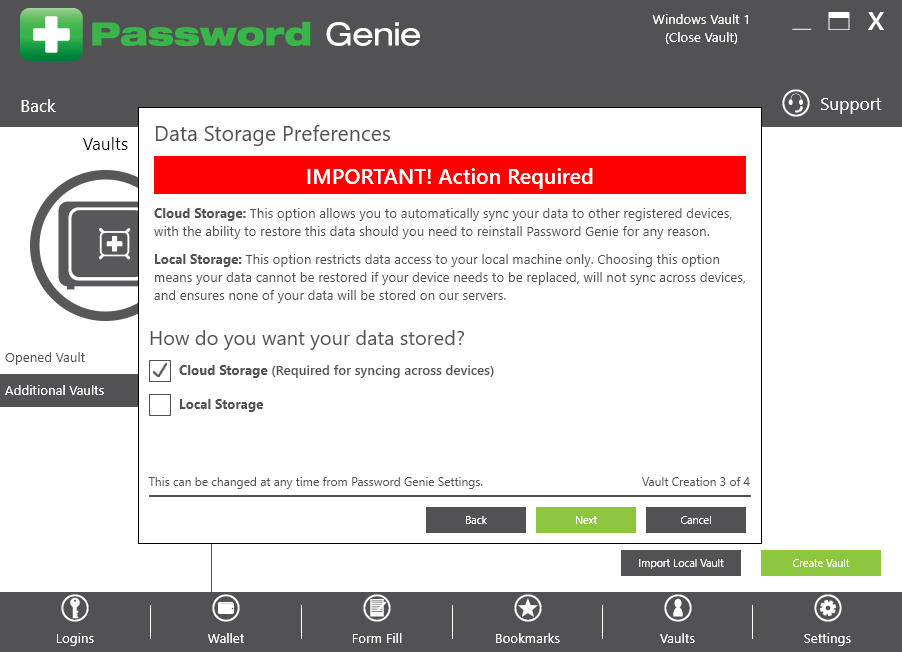
This will open the ‘Vault Creation Wizard’. Here you will need to follow the on-screen directions in completing the Vault creation process. Read each screen carefully, and ensure you remember any passwords you set as you will be unable to recover them at a later time.
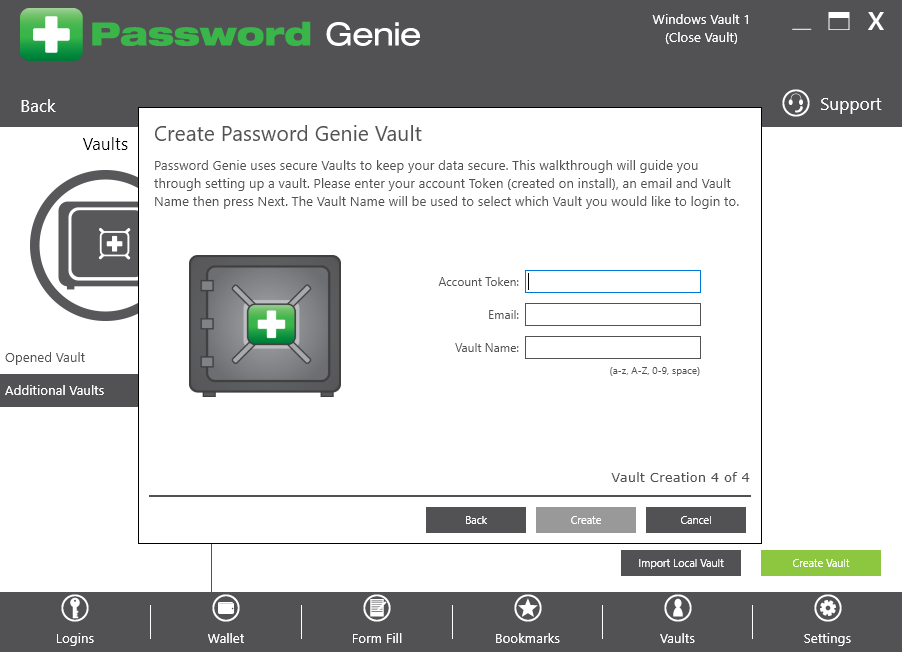
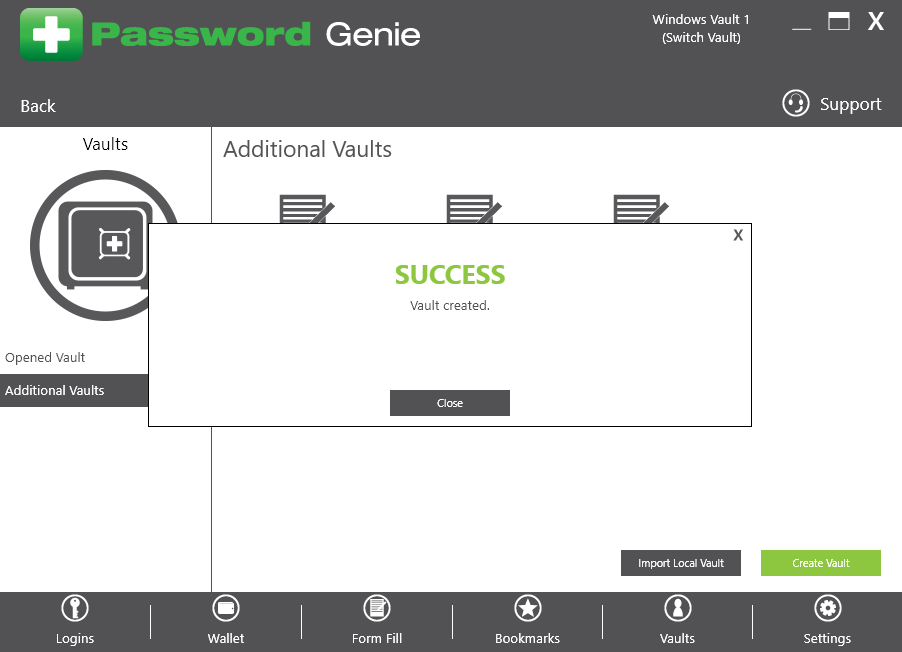
Once you have clicked Create, you will receive a confirmation that your Vault is created and you will now be able to login and begin using it!
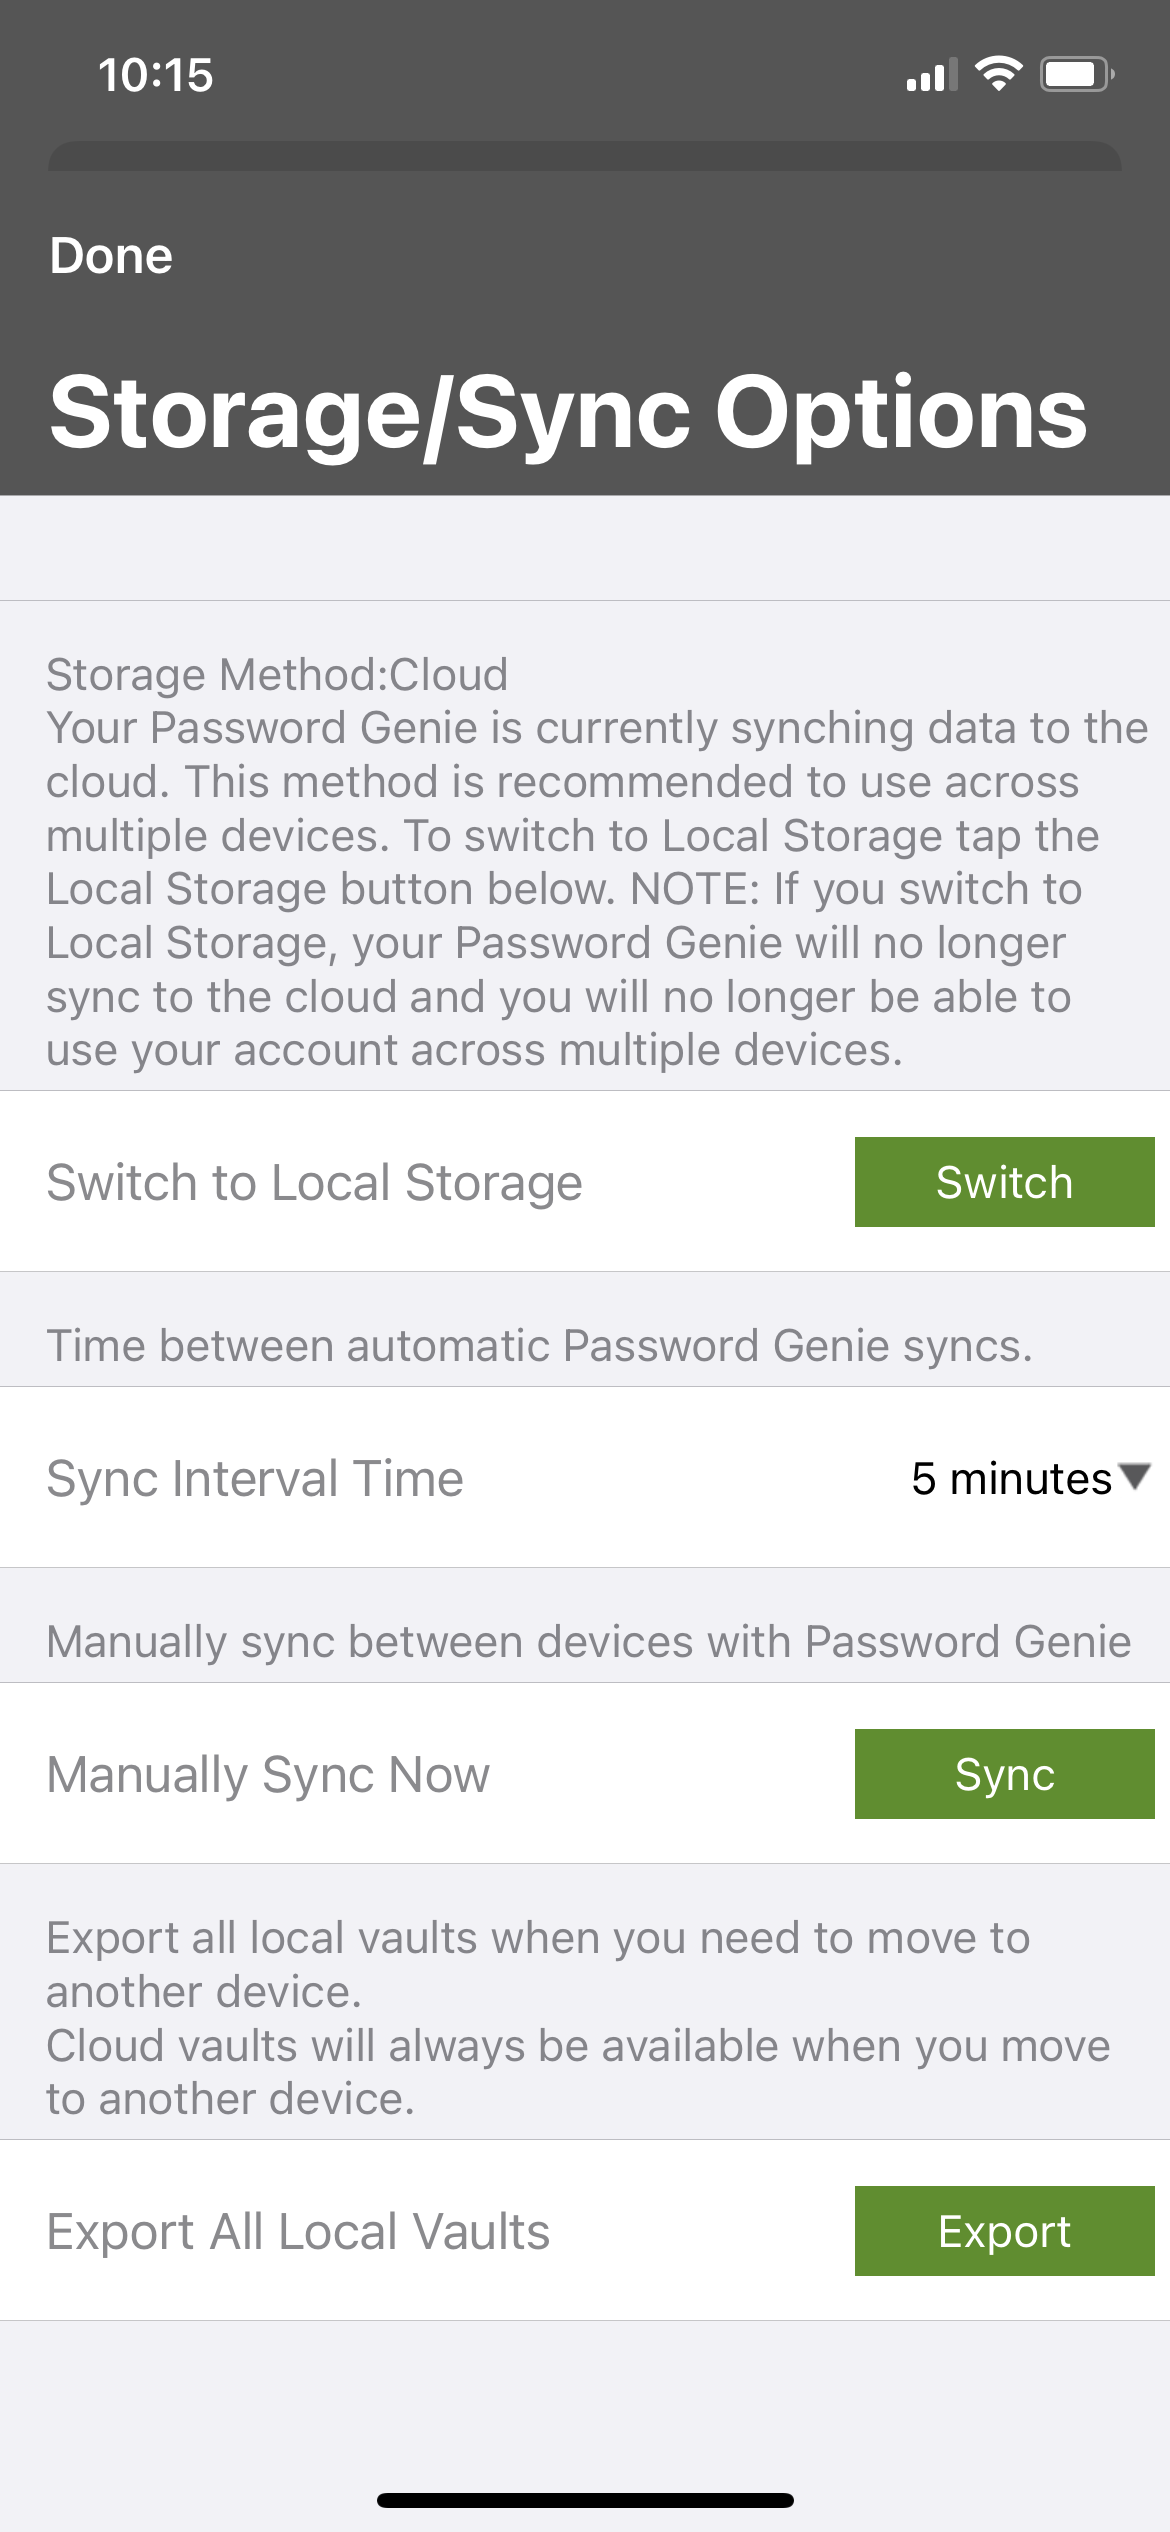
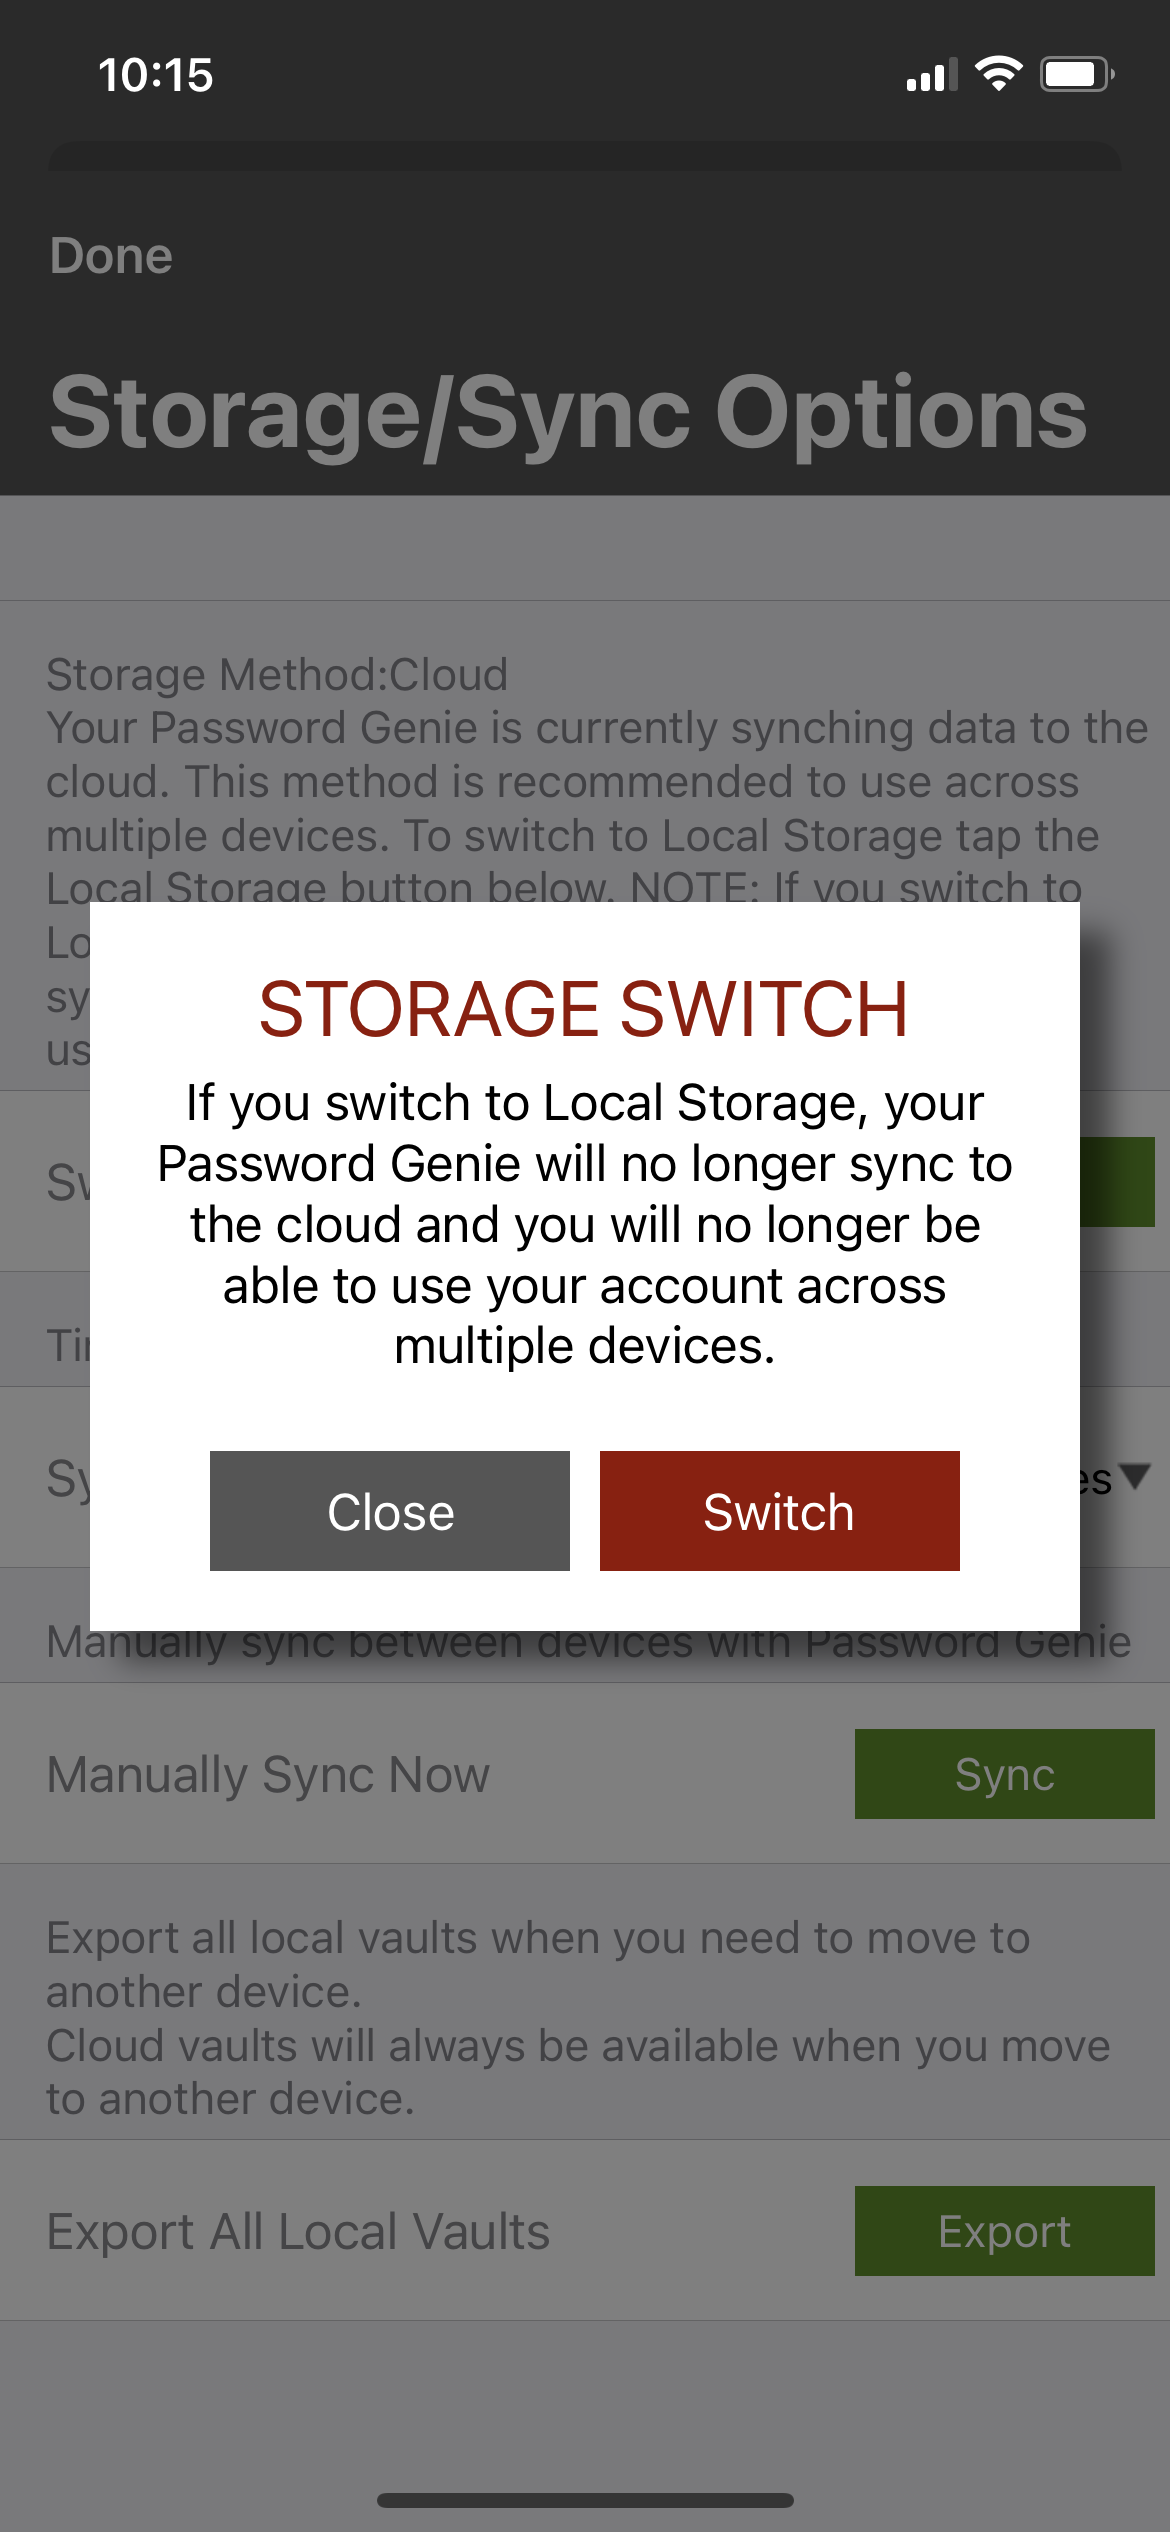
Login to the Vault that you wish to change the storage type and open the Password Genie app. Press on Settings, and then press Storage/Sync Options, then either ‘Switch to Local Storage’ or ‘Switch to Cloud Storage’ based on the type of Vault you are currently logged into. Once you press the ‘Switch Type’ button you will be given a confirmation message and then will then be logged out of your vault and when you log back in the storage type switch will be finalized.
If you are in need of uninstalling your Password Genie Firefox Extension the first thing you need to know is that the extension itself needs to be removed from the browser itself. Please follow the steps out lined below.
Steps to Remove your Password Genie Firefox Extension:
1.) Open Mozilla Firefox
2.) Choose the Mozilla Firefox “Open Menu” at the top right hand corner
3.) Select Add-ons
4.) Click the Extensions Tab on the left hand corner
5.) Once under the Extensions tab you should see two Password Genie Extension. Press the three dot menu on the right and Select Remove.
6.) You will be prompted by the browser “Remove Password Genie (Web Extension) from Firefox” Once you press “Remove” the Password Genie Firefox Extension will be removed.
If you are in need of uninstalling your Password Genie Safari Extension the first thing you need to know is that the extension itself needs to be removed from the browser itself. Please follow the steps out lined below.
Steps to Uninstall your Password Genie Safari Extensions:
1.) Open Safari
2.) Choose the Safari Menu at the top
3.) Select Preferences
4.) Click the Extensions Tab at the top
5.) Once under the Extensions tab you should see two Password Genie Extensions. Both will have an uninstall button. Press this on both and you have uninstalled the Password Genie Safari Extensions.
Currently Password Genie Safari Extension can only be Installed and or Uninstalled using the Password Genie Setup. If for any reason you are in need of reinstalling the PG Safari Extension you will need to Uninstall Password Genie and then Reinstall.
This feature allows you to define a keystroke combination that will automatically fill and submit your username and password on Saved Login forms. The default keystroke combination is holding down the CTRL key and “/” key at the same time.
Use this feature when you don’t want your usernames and passwords to be automatically submitted or filled out on your favorite web sites and instead wish to be in full control of when Password Genie works.
To change the keystroke combination, simply place your cursor in the “Fill login keyboard shortcut” field and press the keys you’d like to change the combination to.
Important – When changing the keystroke combination, you need to ensure the combination doesn’t already represent another Windows or browser shortcut. For example using CTRL and X would not be a good choice as that represents the “Cut” command from Cut and Paste.
When the “Submit Saved Logins automatically” is checked, this option is disabled.
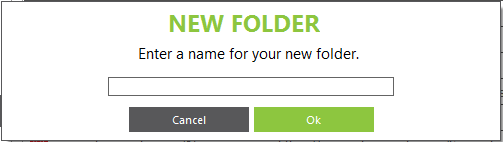
Each entry section (Logins, Bookmarks and Wallet) provides the ability to create New folders to add a folder choose “New Folder”.
Once choosen the following popup with appear. Name the folder and click “Save”.
Occasionally Password Genie will have an update to improve functionality or add new features. This setting controls how Password Genie checks for updates. By default, Password Genie will check to see if a new update is available each time the console is opened and will in certain situations silently download and install updates.
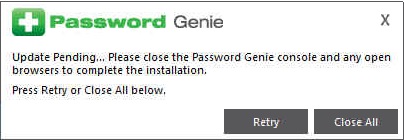
If an update is available, you’ll see a window similar to the one shown below.

In some situations you may be asked to close the console or any open browsers, you’ll see a window similar to the one shown below. You can close the console or any open browsers at you leisure, once everything is closed press “Retry” and Password Genie will do the rest.
If you would like Password Genie to close everything for you then you can choose “Close All”. (Please remember that any unsaved data will be lost so be sure to save before choosing this option.) Once everything is closed Password Genie will do the rest.
To manually check for updates, open the Settings tab and choose the green “Check” button for “Check for Update”.
Password Genie allows you to have an unlimited number of users. Each user can safely save their own set of usernames and passwords. Saved Information is unique per user and cannot be viewed or accessed by other additional users of the computer.
The Additional Users screen can only be viewed by the Password Genie Master Account that was created during the initial installation.
To create an additional Password Genie user, click on on the “Users” tab on the Main Menu and choose Additional Users and then Create Account.
Fill out the information on the Password Genie User Account screen.

Important – The password must be at least six characters and contain at least one alpha character (A-Z) and at least one number (0-9). If your password meets these criteria, the password box will turn green as shown above. After all the information has been correctly entered, click Change Password.
Tip – Make sure to enter a valid e-mail address when creating additional users. This e-mail will be used for the “Forgot Password” function.
Once an additional user has been created you’ll see a screen similar to the following:
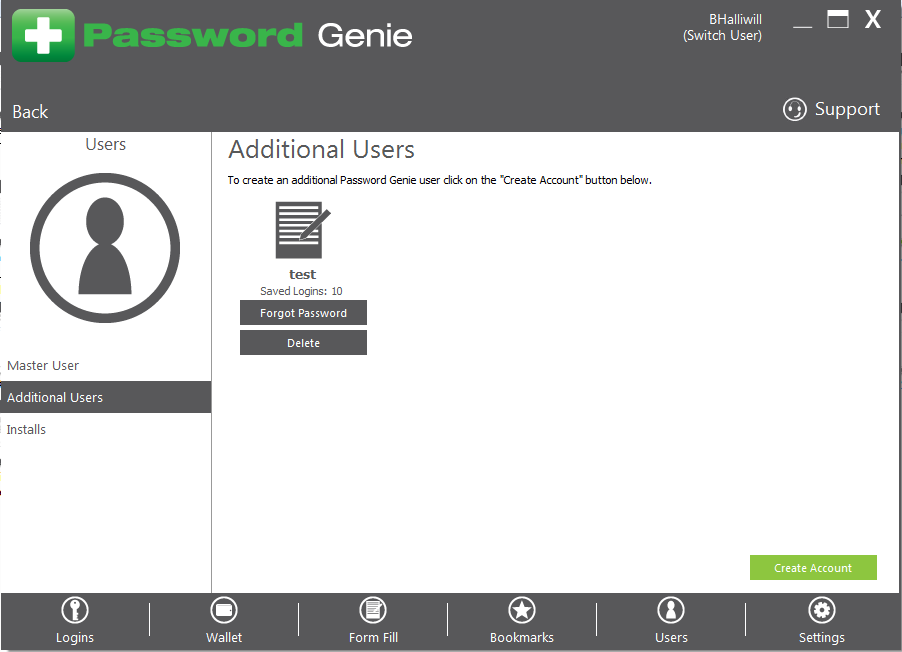
From here you can view the number of saved logins for each user. You can also resend a forgotten password for a user by clicking on the Forgot Password button. This will generate an e-mail to the address used when creating that user account.
From the Console
If you know of a site you do not want Password Genie to remember, you can manually add it and ensure that Password Genie won’t save a username and password.
For example: You never want Password Genie to save a username and password for your Yahoo e-mail account. In order to do this, enter www.yahoo.com and click on the ![]() button. The site will be automatically added to the list and Password Genie will not save the web site as a Saved Login.
button. The site will be automatically added to the list and Password Genie will not save the web site as a Saved Login.
If at any time you’d like to remove a domain that has been excluded, simply highlight the web site in the console and click on the ![]() button.
button.
From the “Save Login” Prompt
If you are browsing the Internet and Password Genie prompts you to save a login you do not want to save, you can press the “Never For This Website” button that appears on the Password Genie Save Login prompt.
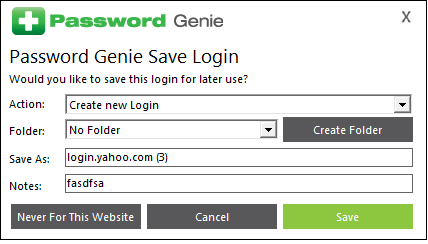
A domain will also be placed here if you choose “Never for this Website” on the save login prompt.
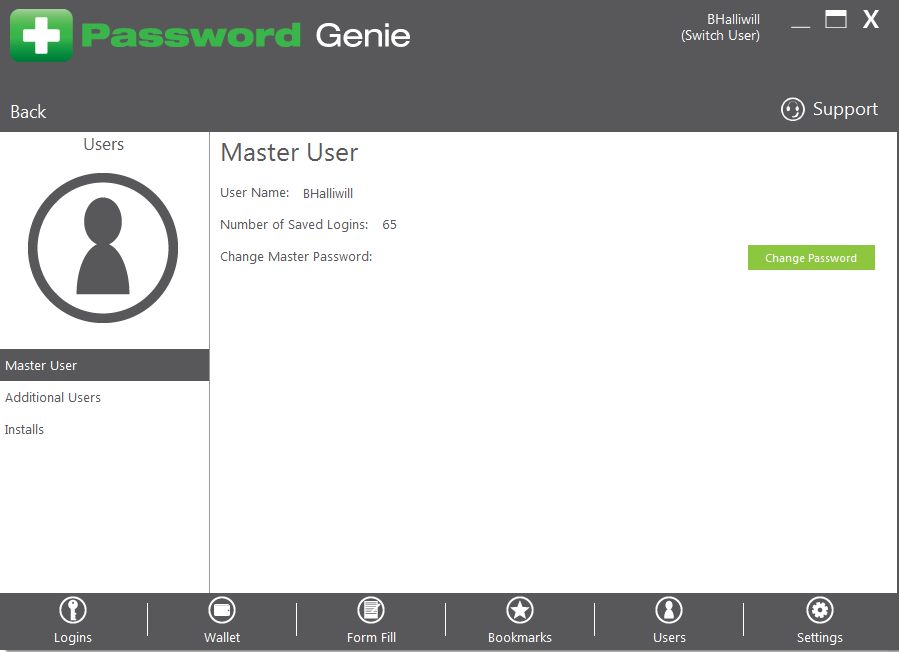
Users
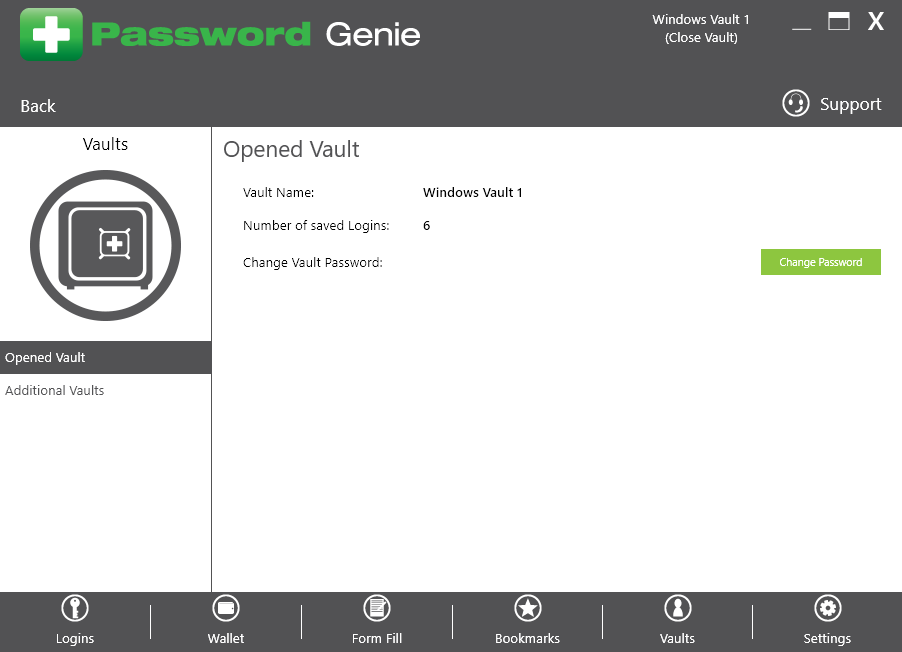
The “Users” tab shows the number of entries that Password Genie is currently remembering for you as well as your current User Name.
Change Master Password
To change the password choose “Change Password” and follow the prompts to change the Master Password.
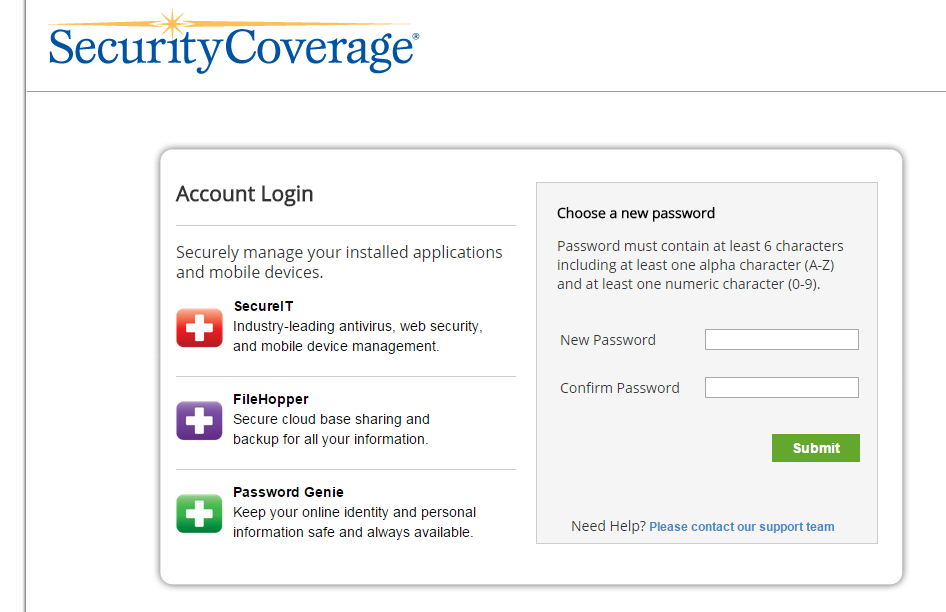
Important – The password must be at least six characters and contain at least one alpha character (A-Z) and at least one number (0-9). If your password meets these criteria, the password box will turn green as shown above. After all the information has been correctly entered, click Change Password.
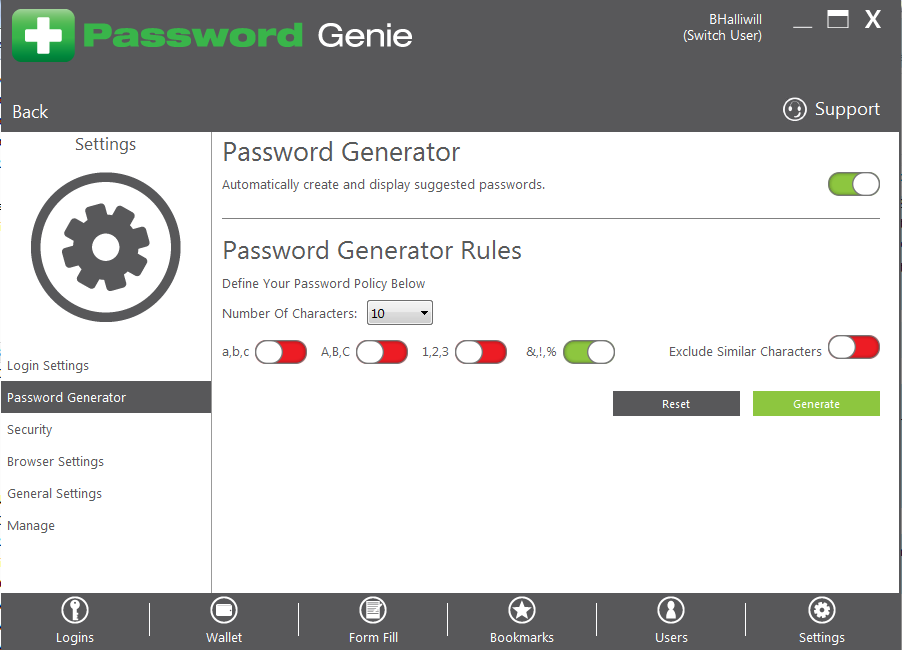
Generate a password for each new login created – Checked by default, this box allows Password Genie to automatically suggest a password when creating a new login.
Password Generator Rules
Rules: Rules that are set by default:
a. Number of characters: 10 by default
b. a,b,c: Includes all the letters of the alphabet in lowercase form
c. A,B,C: Includes all the letters of the alphabet in uppercase form
d. 1,2,3: Includes all single digit numbers 0-9
e. Special characters that include: !, #, $, %, ^, *, :, ;, ., “, ?, (include comma as a special character)
f. Exclude similar characters: il1, 0oO, 5S
Reset default rules: This button will reset any changes you’ve made back to the original default settings.
Any changes made will automatically be saved immediately and will appear in the Password Generator screen the next time it appears. – See more at: https://www.securitycoverage.com/support/passwordgenie/howto.php?id=35#sthash.EIXc0F4G.dpuf
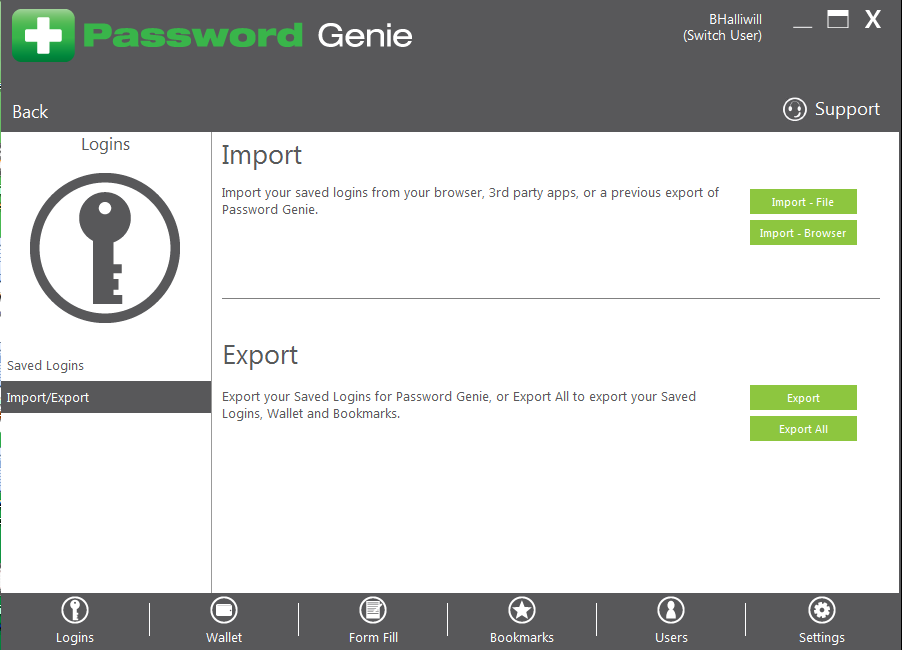
You can export all of your entries or individual categories with entries through Password Genie’s export feature. Each category will be exported into individual CSV files with all information from each entry.

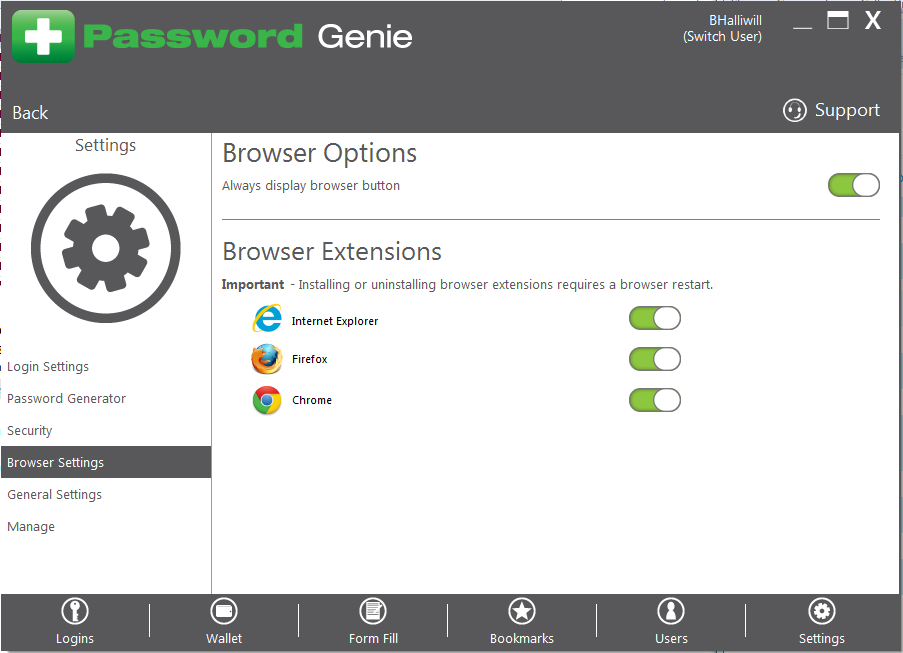
The Browser Settings page allows you to decide which browser extensions are installed on your computer.
Definition – A browser extension is a computer program that extends the functionality of a web browser in some way. Depending on the browser, the term may be distinct from similar terms such as plug-in or add-on.
During the initial installation, Password Genie will automatically enable all supported browser extensions.
Tip – Only supported browsers will appear in the Browser Extensions tab. If you install a supported browser after your Password Genie installation, you’ll need to visit this page and click to install the extension.
To remove a previously installed extension simply move the toggle switch from green to red next to the appropriate web browser.
Important – Removing all browser extensions will disable Password Genie from saving or submitting saved logins.
To install an extension, move the toggle switch back to green next to the appropriate web browser.
On Windows Vista and Windows 7, you may see a prompt similar to the following when adding or removing browser extensions.

Click “Yes” to continue and allow Password Genie to complete the browser extension request.
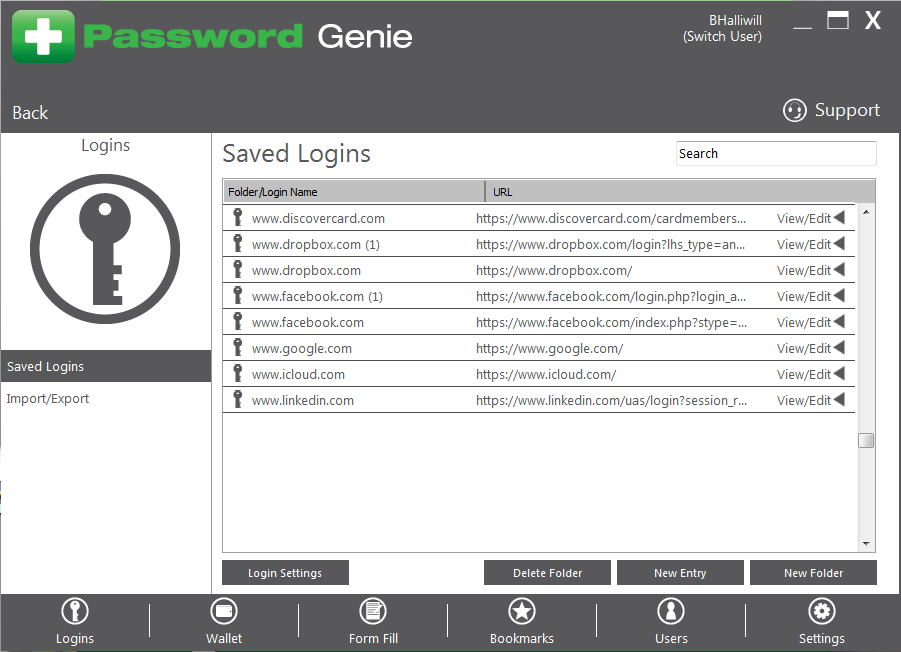
As soon as you save a login, it will appear in your Logins tab.

Once Password Genie is installed, simply use your browser and the Internet as normal. When you first visit a web site that requires a username and password, enter it directly in the form provided by the web site. Below is an example when visiting Google Gmail for the first time.
Browse directly to http://www.google.com/gmail. The following login form will appear on the page. Enter your Username and Password as normal.

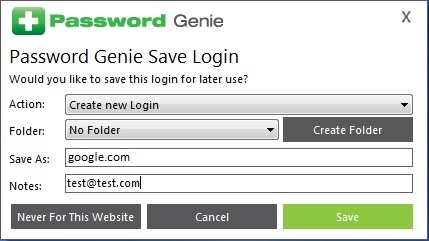
Once you click to sign-in to the page, Password Genie will automatically recognize this site and prompt you to create a new Saved Login as shown below.

Action:
Create new Login – When the Action is set to “Create new Login,” a new web site entry will be saved in your Information section of the console.
Replace existing Login – If you are updating an existing login with a new username or password you can choose to replace that previously saved login by clicking on the arrow button and choosing the appropriate Saved Login to replace.
Folder:
Folder – You can save your saved logins in no folder (default), into an existing folder by clicking on the drop-down menu, or you can create a new folder.
Create Folder – If you want to create a brand new folder and save your new login to it, you can click the “Create Folder” button and create a brand new folder.
Save As:
The “Save As” field allows you to enter a custom name for this login that will be shown in the Information section of the console. Password Genie will default to the root domain name of the web site.
Notes:
The “Notes” field allows you to enter description information for this login that will be shown in the Information section of the console. Password Genie will default to the username used when signing into the web site.
That’s all there is to it… Now the next time you visit a Password Genie saved web site requiring a username and password, Password Genie will automatically fill in the web site username and password according to your settings in the Information section of the console.
As you save birthdays in Password Genie you can create birthday reminders:

Display Reminder – Checked by default, ![]() allows a reminder to pop up for each birthday entry you have saved, whenever you log in to Password Genie on that day.
allows a reminder to pop up for each birthday entry you have saved, whenever you log in to Password Genie on that day.
Email Reminder – When checked, the ![]() option will send an email to you for that particular person’s birthday.
option will send an email to you for that particular person’s birthday.
Display age in reminder – When checked, the ![]() will display the person’s age when the birthday reminder pop’s up.
will display the person’s age when the birthday reminder pop’s up.
Set Reminder – The ![]() option allows you to set the number of days before a birthday that a reminder appears. This means that you can set a reminder for up to five (5) days before the actual birthday.
option allows you to set the number of days before a birthday that a reminder appears. This means that you can set a reminder for up to five (5) days before the actual birthday.
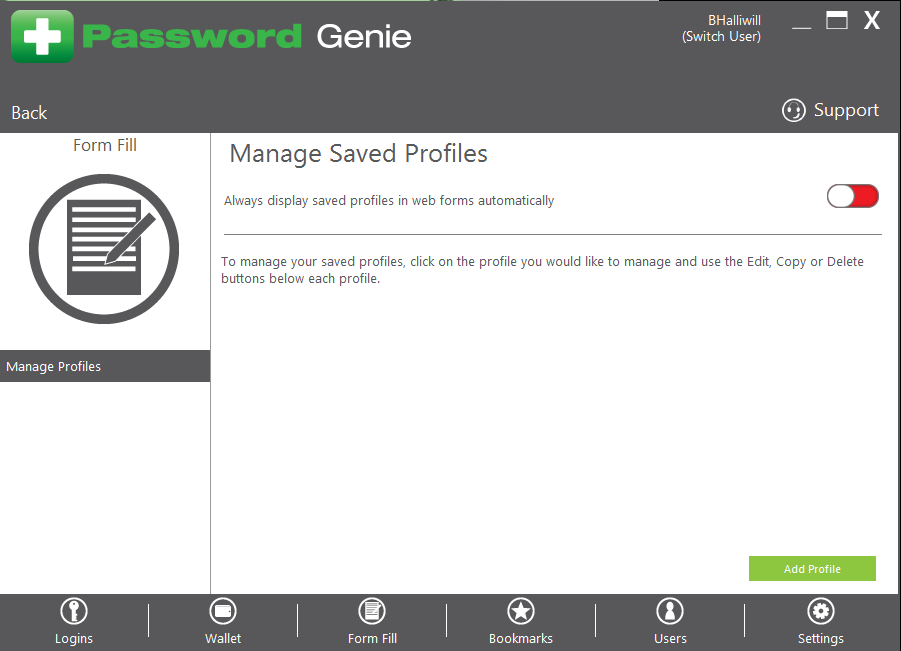
After you’ve created a new profile you can easily manage the profile. Each profile can be edited, copied and deleted:
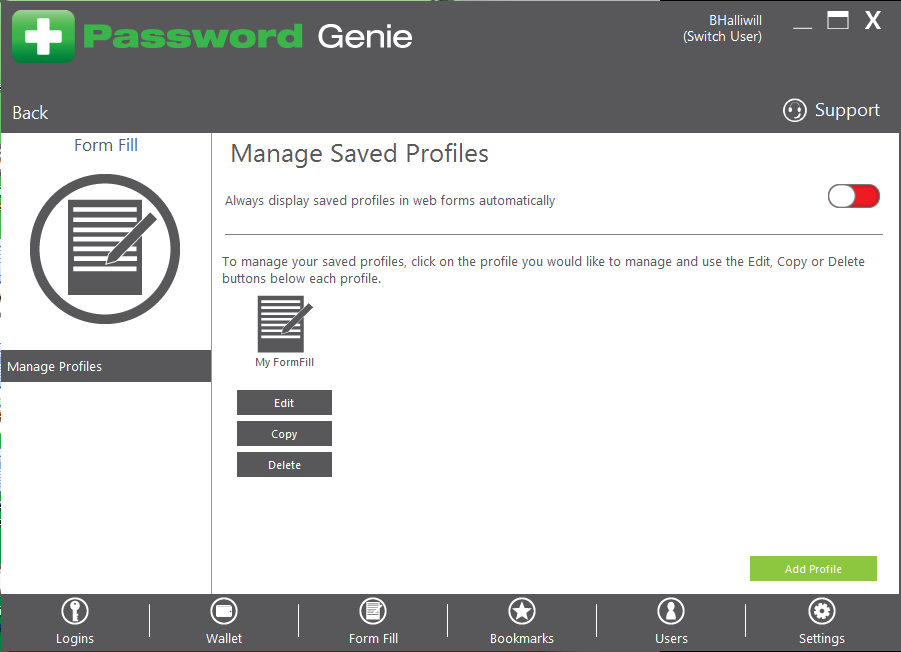
Edit – Allows you to edit your saved profile.
Copy – Allows you copy a profile.
Delete – The Allows you to delete a profile.
Creating a profile for form-fill is easy!
1) Navigate to the Form-Fill tab in your Password Genie console and press the “Add Profile” button.
2) First, enter a name for your profile (required) and a description.
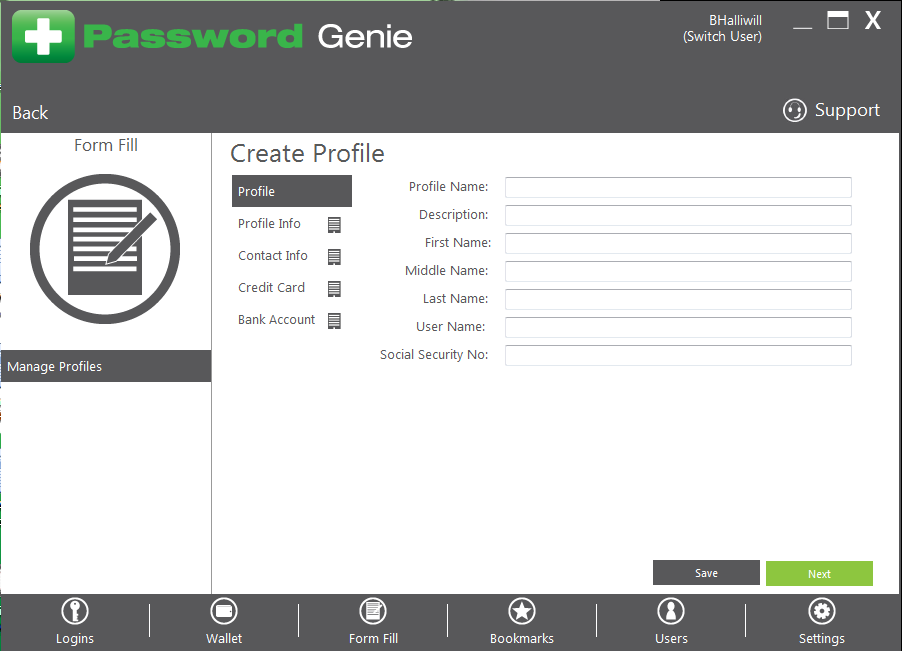
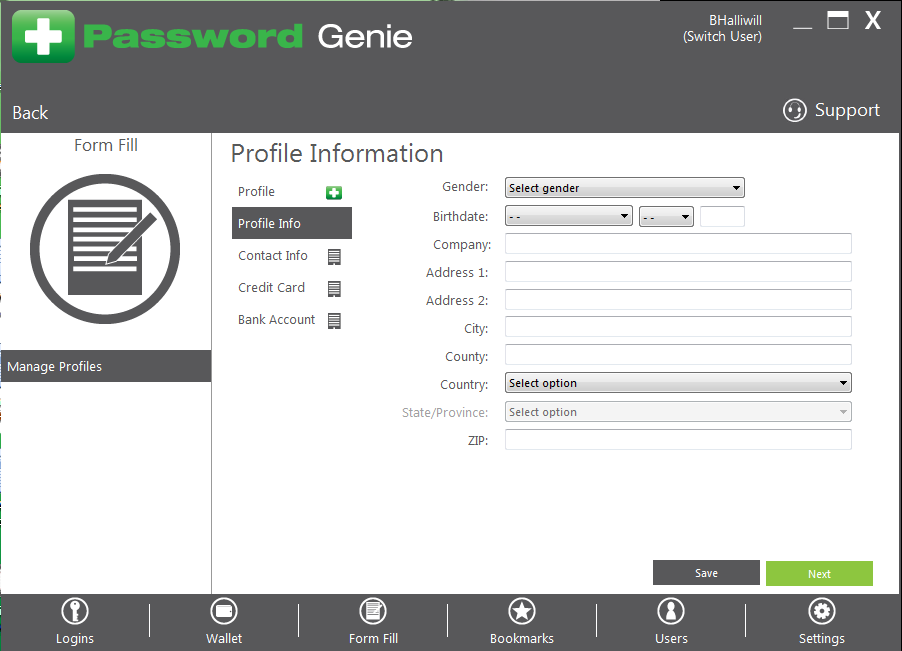
3) The next screen you will see is to enter Profile Information.
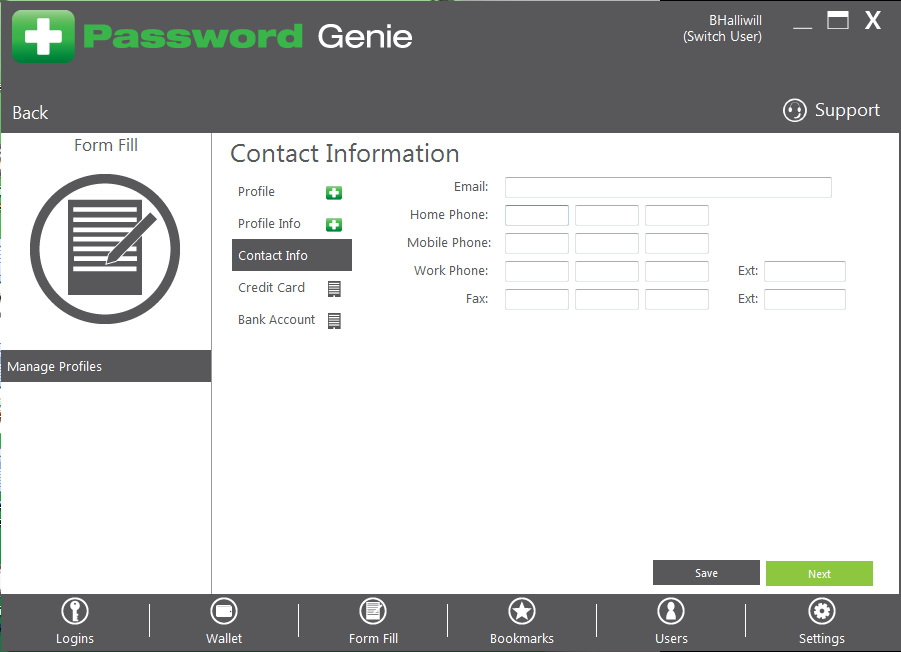
4) Next, enter any Contact Information you would like the profile to contain.
5) Enter a Credit Card for your profile or choose an existing credit card already stored as an entry in Password Genie.
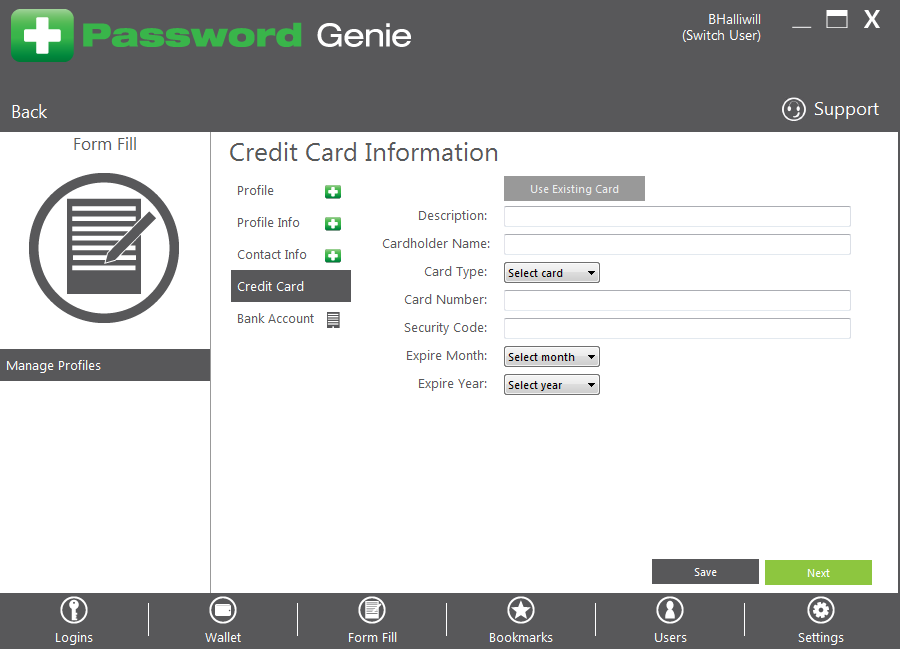
6) Finally, enter a bank account for your profile or choose an existing bank account already stored as an entry in Password Genie.

7) Press the “Save” button to save your new profile!
Password Genie gives users the ability to export their saved entries to a CSV file and now the ability to import those entries back into the console! Simply choose the desired Password Genie Tab (Logins, Wallet, or Bookmarks) from the Main Menu and choose the Import/Export button on the right.

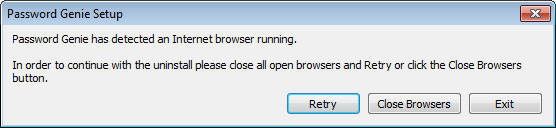
Uninstalling Password Genie is a fast and easy process. Simply go to your Password Genie folder and you’ll find the Uninstaller. If you have browsers open, you’ll be prompted to close them:
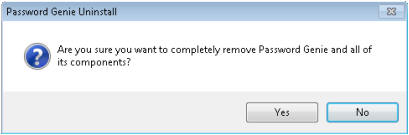
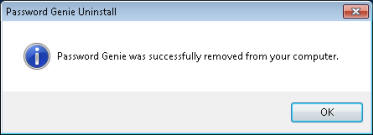
Once all your browsers are closed, Password Genie will have you confirm that you want to uninstall Password Genie.
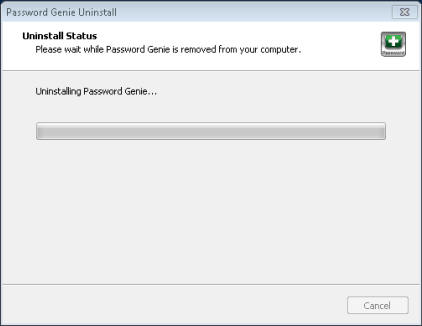
Once you say “Yes” that you want to confirm your uninstall, Password Genie will be begin the uninstalling process.
Syncing to a desktop account is simple. Once you’ve decided to use Password Genie desktop all you have to do is enter the same email address and password that you used to register your existing Password Genie account. Password Genie will recognize your email and password and sync your accounts together!
Don’t want to open all your logins and bookmarks individually? No problem! We now give you the ability to open every login and bookmark in folder. Simply navigate to your browser button and choose the folder you’d like to open. Password Genie will automatically open all the stored sites in that folder:
Password Genie allows you to have an unlimited number of users. Each user can safely save their own set of usernames and passwords. Saved Logins are unique per user and cannot be viewed or accessed by other users of the computer.
To switch Password Genie users, right-click the Password Genie system tray icon found in the lower right corner of your computer on Windows and the upper right hand corner of your computer on Mac.
Tip – On Windows you may need to click the up arrow  to view the system tray icons.
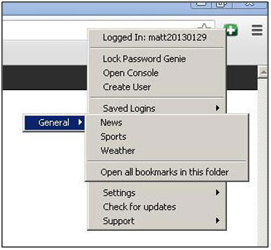
From the right-click menu you can:
Lock Password Genie – Selecting this option will lock Password Genie and not save or display any Saved Logins while browsing the Internet. Use this option when you are going to step away from your computer and want to ensure your saved information cannot be accessed.
Open Console – The Open Console option will open the Password Genie console.
Create User – Create User allows you to create a new Password Genie user account. When selecting this option, you’ll be presented with the following window:
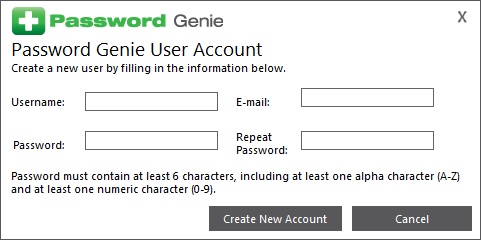
Enter the details of the user account you’d like to create and click “Create New Account” to continue. This option only shows when logged in with the Master Account.
Switch User – When you have multiple users created within Password Genie, you’ll see a Switch User option appear on the menu. Switch User allows you to change the current logged-in Password Genie user. When selecting this option, you’ll be presented with a window similar to the following:
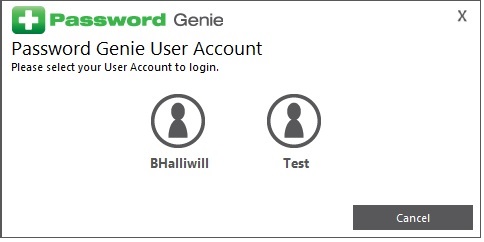
Click on the user that you would like to switch to, enter the password, and click Login to continue. This option only shows when there is at least one other user created.
Logout – The Logout option allows you to completely log out of Password Genie.
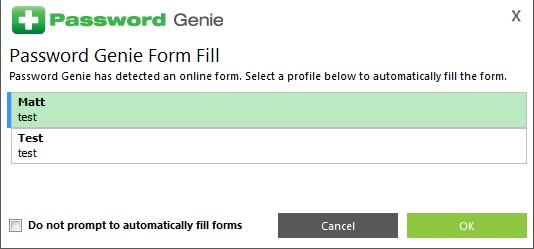
After you’ve saved a profile to form-fill, all you have to do is simply navigate to a site and your profile automatically fills in the form. If you have more than one profile saved, Password Genie will prompt you to choose a profile:
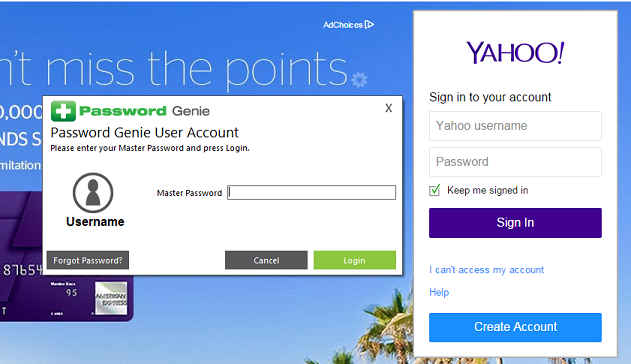
Logging into Password Genie is easy! Start browsing the Internet as you normally would and when you get to a page with a login, Password Genie will detect that you’re at a login and ask you to sign in.
We now give the Master Account holder the ability to import passwords from any Password Genie compatible/supported browser – Internet Explorer, Firefox, Google Chrome or Safari for Mac. Simply navigate to the Main Menu and choose the Logins tab. Under the Import Section choose Import – Browser.

You will be guided through the steps in each browser to import any saved passwords into your Password Genie console.
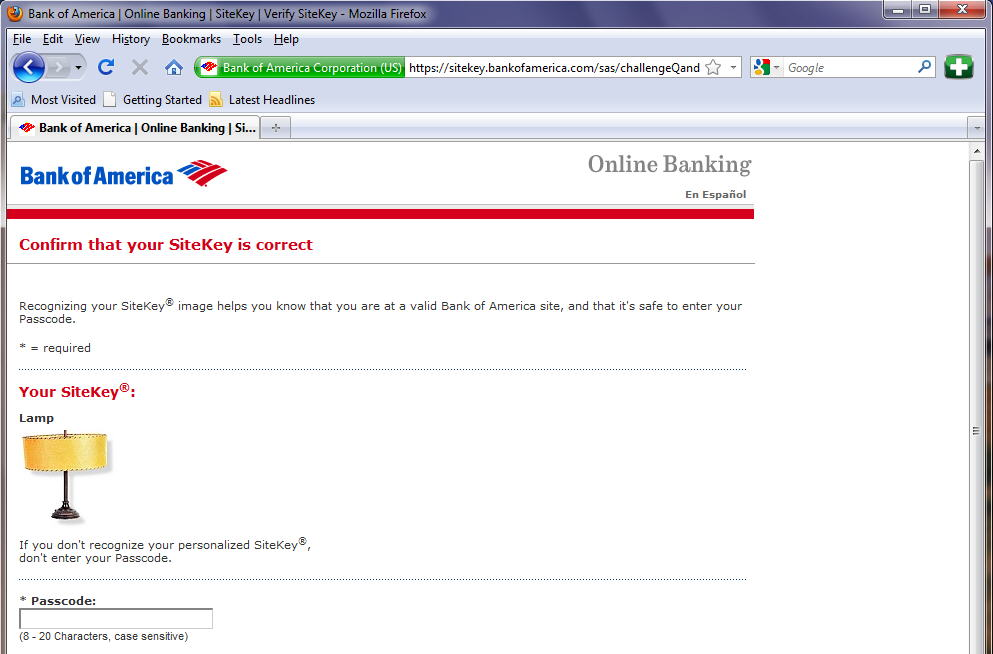
Password Genie gives you the option to capture your security answers for multi-page logins and fill them in automatically.
To disable Password Genie from saving your security answers, you must go into the Settings > Security section of the console and uncheck the “Enable security answers for multi-page logins”.
Note: This option is enabled by default.

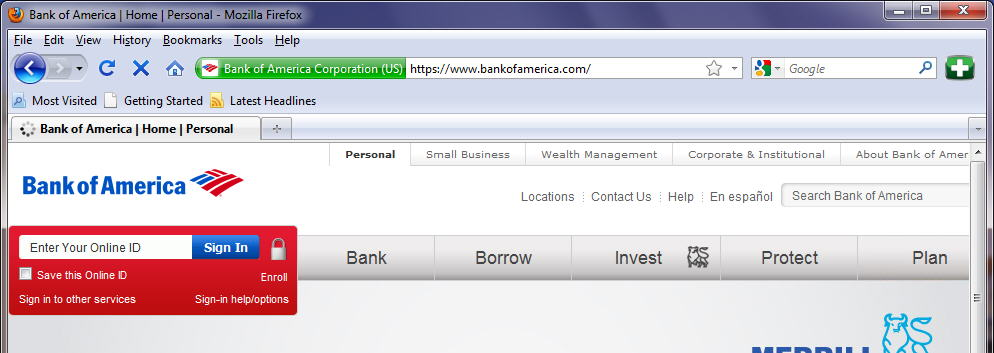
After this box is checked, simply proceed to your Internet browser and log-in to your multi-page log-in site.
Enter your username or ID:
After this box is checked, simply proceed to your Internet browser and log-in to your multi-page log-in site.
Enter your security answer:
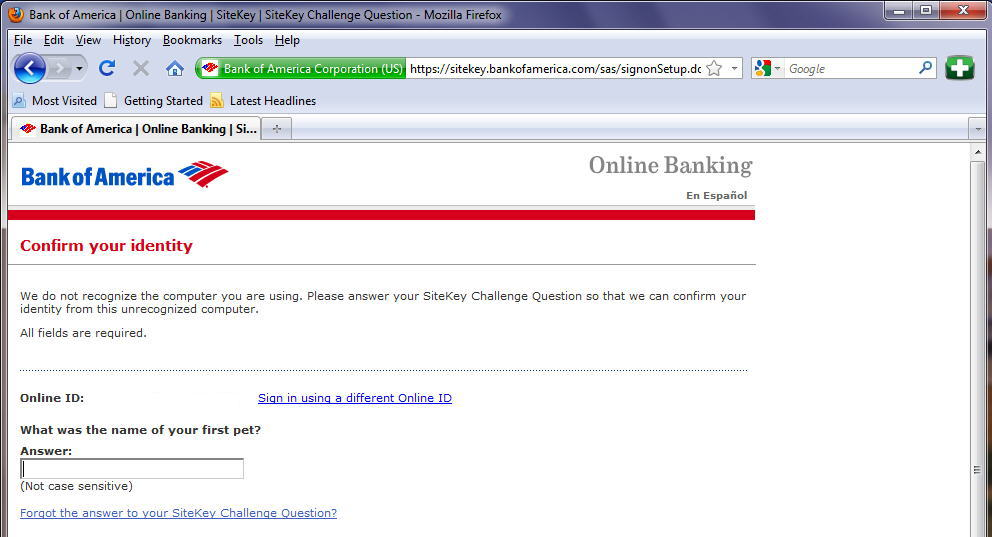
Enter your password:
The second time you log in, your username will auto-fill and the first security answer you chose will auto-fill. Simply highlight and erase this answer and put in the correct answer, and your password will auto-fill. Now your first two security answers are stored in the Password Genie console.
When you log in for a third time, your username will auto-fill. When you get to your security answer, you will be given a prompt to pick which answer you’d like Password Genie to pre-fill.
Choose the security answer you’d like to use and press “OK” or choose “Return to page” to enter a new security answer. Your password will automatically pre-fill.
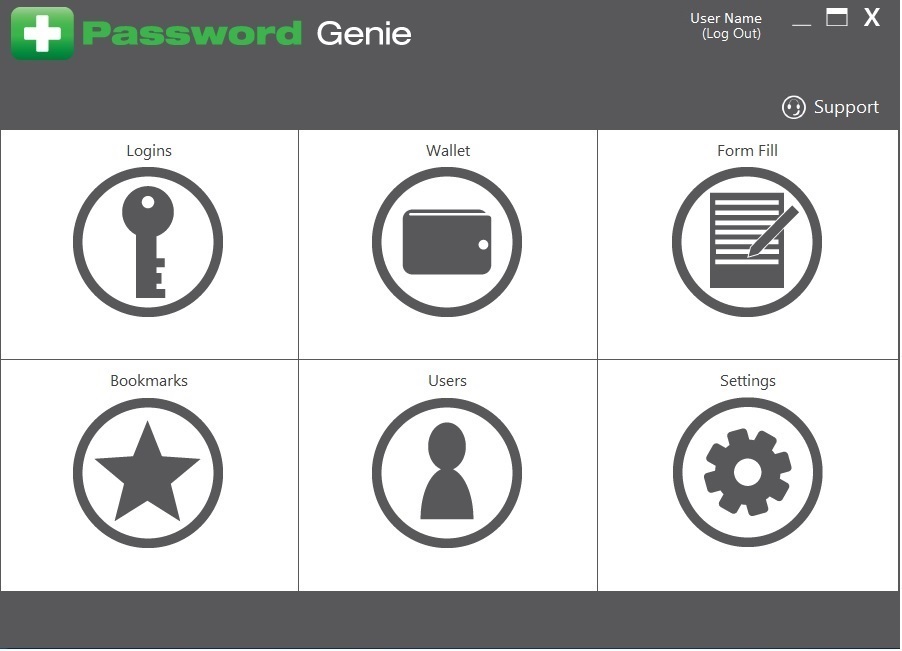
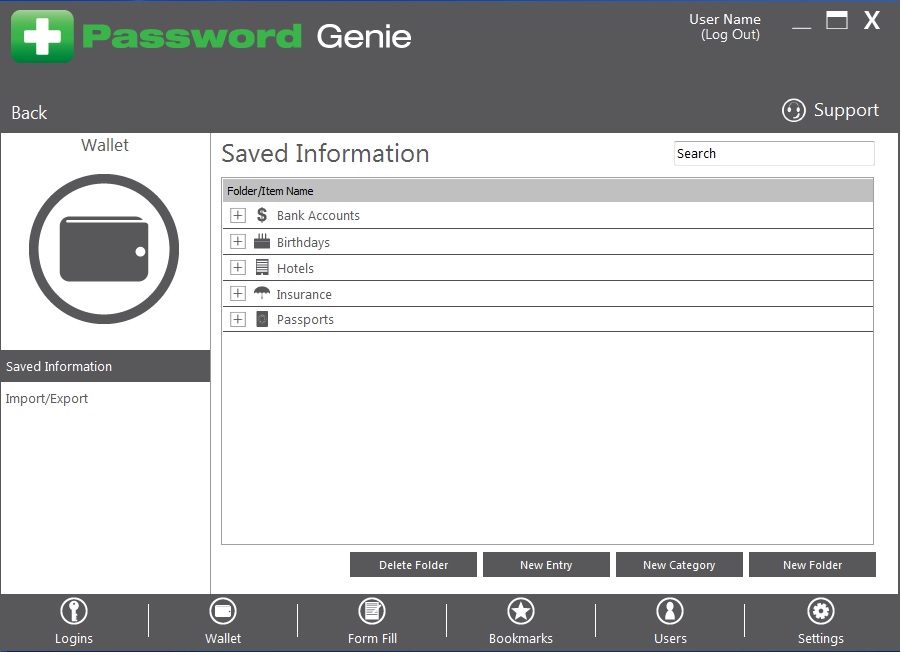
To create a new entry, press the “Category” you’d like to create your entry in. Then press the “New Entry” button at the bottom of the screen. For Logins and Bookmarks you will be presented with the field options for the respective category. For “Wallet” you will need to select the wallet category from the drop down to begin filling in the respective fields.
All the fields for the category you have chosen for your new entry will appear in your console for you to enter the information.
When you are finished entering the information, press the “Save” button.
After the changes are saved, the new entry will be placed automatically in the list.
Once Password Genie is installed, simply use your browser and the Internet as normal. When you first visit a web site that requires a username and password, enter it directly in the form provided by the web site. Below is an example when visiting Google Gmail for the first time.
Browse directly to http://www.google.com/gmail. The following login form will appear on the page. Enter your Username and Password as normal.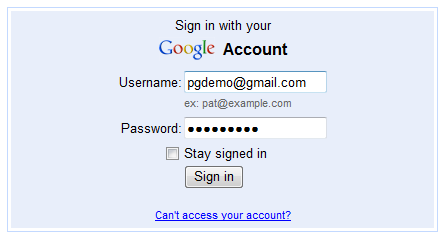
Once you click to sign-in to the page, Password Genie will automatically recognize this site and prompt you to create a new Saved Login as shown below.
Action:
Create new Login – When the Action is set to “Create new Login,” a new web site entry will be saved in your Information section of the console.
Replace existing Login – If you are updating an existing login with a new username or password you can choose to replace that previously saved login by clicking on the arrow button and choosing the appropriate Saved Login to replace.
Group:
Folder – You can save your saved logins in no folder (default), into an existing folder by clicking on the drop-down menu, or you can create a new folder.
Create Folder – If you want to create a brand new folder and save your new login to it, you can click the “Create Folder” button and create a brand new folder.
Save As:
The “Save As” field allows you to enter a custom name for this login that will be shown in the Information section of the console. Password Genie will default to the root domain name of the web site.
Notes:
The “Notes” field allows you to enter description information for this login that will be shown in the Information section of the console. Password Genie will default to the username used when signing into the web site.
That’s all there is to it… Now the next time you visit a Password Genie-saved web site requiring a username and password, Password Genie will automatically fill in the web site username and password according to your settings in the Information section of the console.
Once two-step verification is enabled, Password Genie requires you to enter the master account e-mail, as well as your master password. Once this information has been verified as correct, we will send your PIN code to that email, which will then need to be entered before you can access your saved information.
Please be aware that a working internet connection is required for Password Genie to send you your UNLOCK code.
Password Genie lets you manage your two-step verification settings through the console. These settings can be found at Settings–>Security–> Manage Two-Step Verification.
Syncing your Password Genie mobile and desktop accounts is simple! Use your same master account e-mail and password across all your installations and watch as all of your devices seamlessly sync together!
For Internet Explorer: Tools >Internet Options >Content >Autocomplete Settings button >Prompt me to save passwords – should be checked, then click Apply and restart the browser.
For Firefox: Tools->Security >Remember Passwords for Sites – should be checked, then click OK and restart the browser.
For Google Chrome: Wrench > Options > Personal Stuff > Offer to save passwords – should be checked, then click close and restart the browser
For Apple Safari: Sprocket icon > Preferences > Auto-Fill > Usernames and passwords – check the box and the change will be saved.